


If you’re a fan of crispy, delicious chicken skin, then you’re in for a treat! With the help of an air fryer, you can achieve that perfect golden crunch without the need for a deep fryer. Whether you’re looking to make a tasty appetizer or a mouth-watering snack, frying chicken skin in an air fryer is easy and convenient. Let’s dive into the step-by-step process of how to achieve that irresistible texture and flavor!
Step 1: Start by preheating your air fryer to the desired temperature. Most recipes suggest setting it to around 400°F (200°C), but it may vary depending on the model of your air fryer. Preheating will ensure that the chicken skin is cooked evenly and becomes crispy.
Step 2: While the air fryer is preheating, prepare the chicken skin. If you’re using a whole chicken, gently remove the skin and separate it from the meat. For quicker cooking, you can also purchase pre-cut chicken skin from your local grocery store or butcher.
Step 3: Place the chicken skin in a bowl and season it with salt, pepper, and any other desired spices or herbs. Some popular choices include paprika, garlic powder, onion powder, or cayenne pepper. Toss the chicken skin gently to ensure that the seasoning is evenly distributed.

Step 4: Once the air fryer has preheated, arrange the chicken skin in a single layer in the fryer basket. Be careful not to overcrowd the basket, as this can prevent proper air circulation and result in uneven cooking. If necessary, fry the chicken skin in batches.
Step 5: Set the timer for about 10-15 minutes and start frying the chicken skin. During the cooking process, you may want to shake the basket or flip the chicken skin halfway through to ensure that it cooks evenly on all sides. Keep an eye on the skin to avoid burning.
Step 6: Once the chicken skin is golden brown and crispy, remove it from the air fryer and place it on a paper towel-lined plate to absorb any excess oil. Let it cool for a few minutes before serving to allow it to become even crispier.
Enjoy the deliciousness of perfectly fried chicken skin in just a few simple steps! Whether you’re serving it as an appetizer, adding it to your favorite recipes, or enjoying it on its own, you’ll love the crispy texture and flavorful taste. So, fire up your air fryer and get ready to indulge in this irresistible treat!
Preparing the Chicken Skin
Before you start frying the chicken skin in the air fryer, it’s important to prepare it properly. Follow these steps to ensure crispy and delicious chicken skin:
1. Start by sourcing high-quality chicken skin. You can either buy it separately or remove it from chicken thighs or breasts yourself.
2. Rinse the chicken skin under cold water to remove any excess blood or impurities. Pat it dry with paper towels.
3. Season the chicken skin with your preferred spices and seasonings. Common options include salt, pepper, garlic powder, and paprika. You can get creative and experiment with different flavors.
4. Place the seasoned chicken skin in a single layer on a clean plate or cutting board. Make sure there is enough space between the pieces to allow for even cooking.
5. If you prefer extra crispy chicken skin, you can let it air dry in the refrigerator for a couple of hours or overnight. This step helps to remove moisture from the skin and guarantees a crunchier texture.
6. Once the chicken skin is ready, preheat your air fryer to the desired temperature. Most recipes recommend setting it to 400°F (200°C).
Now that you’ve prepared the chicken skin, it’s time to start frying it in the air fryer. Follow the recipe instructions or continue reading for further guidance on how to achieve the perfect crispy texture using an air fryer.
Remove the Skin from the Chicken
Before you can start frying chicken skin in an air fryer, you’ll need to remove the skin from the chicken. Here’s a step-by-step guide:
1. Prepare the chicken
Take the chicken and place it on a cutting board. Make sure the chicken is clean and pat it dry with paper towels.
2. Locate the skin
Identify the chicken skin. It covers most parts of the chicken, including the breast, drumsticks, and wings.
3. Loosen the skin
Using a sharp knife or your fingers, gently loosen the skin from the chicken. Be careful not to tear the skin or remove too much meat.
4. Remove the skin
Once the skin is loosened, carefully peel it off the chicken. Start from one end and work your way across the chicken.
Now that you have successfully removed the skin from the chicken, you are ready to proceed with frying it in the air fryer.
Seasoning the Chicken Skin
Prepare the chicken skin: Start by removing the chicken skin from the chicken pieces. You can use a small knife or your fingers to gently separate the skin from the meat. Be careful not to tear the skin.
Season the chicken skin: In a small bowl, mix together your favorite seasonings. You can use a combination of salt, pepper, garlic powder, paprika, and any other spices that you enjoy. Make sure to season both sides of the chicken skin evenly.
Let the seasoning sit: After seasoning the chicken skin, let it sit for about 10-15 minutes. This will allow the flavors to penetrate the skin and enhance the taste.
Preheat the air fryer: Meanwhile, preheat your air fryer to the desired temperature (usually around 400°F or 200°C) for about 5 minutes.
Place the chicken skin in the air fryer: Once the air fryer is preheated, carefully place the seasoned chicken skin in a single layer in the air fryer basket. Make sure not to overcrowd the basket, as this can prevent the skin from becoming crispy.
Cook the chicken skin: Set the air fryer to cook at 400°F (200°C) for 10-12 minutes. Flip the skin halfway through cooking to ensure it cooks evenly on both sides.
Check for crispiness: After the cooking time is up, check the chicken skin for crispiness. If it’s not as crispy as desired, you can continue cooking for another 1-2 minutes until it reaches your preferred level of crispness.
Remove and serve: Once the chicken skin is crispy and golden brown, carefully remove it from the air fryer using tongs or a spatula. Place it on a paper towel-lined plate to absorb any excess oil. Serve immediately as a delicious, crispy snack or as a topping for salads or other dishes. Enjoy!
Apply Salt and Pepper
Before air frying the chicken skin, it is essential to season it properly. Start by applying a generous amount of salt and pepper to both sides of the chicken skin. The salt will help to enhance the flavor of the skin, while the pepper will add a subtle spiciness.
Preheating the Air Fryer
Before you begin frying chicken skin in your air fryer, it’s important to preheat it. Preheating the air fryer ensures that it reaches the optimal cooking temperature and helps to achieve crispy, golden chicken skin.
To preheat your air fryer, follow these steps:
- Plug in your air fryer and place it on a heat-resistant surface.
- Set the temperature control to the desired cooking temperature, usually around 400 degrees Fahrenheit (200 degrees Celsius).
- Set the timer to preheat the air fryer for about 3-5 minutes.
- During this time, the air fryer will heat up and reach the desired temperature.
- Once the preheating is complete, you will be ready to start frying the chicken skin.
Preheating the air fryer is an essential step to ensure that your chicken skin is evenly cooked and crispy. Skipping this step may result in undercooked or unevenly cooked chicken skin, so make sure to preheat your air fryer before frying.
Set the Temperature and Time
Once you have preheated your air fryer, it’s time to set the temperature and time for frying the chicken skin.
For crispy and golden chicken skin, the ideal temperature for air frying is around 400°F (200°C). This high temperature will help to render the fat and crisp up the skin.
As for the cooking time, it may vary depending on the thickness of the chicken skin and your personal preference for crispiness. However, a general guideline is to cook the chicken skin for about 8-10 minutes in the air fryer.
If you prefer a softer texture, you can reduce the cooking time to around 6-7 minutes. On the other hand, if you like your chicken skin extra crispy, you can increase the cooking time to around 12-15 minutes. Just keep an eye on it as it cooks to avoid burning.
It’s important to note that air fryers can vary in their cooking times and temperature settings, so it’s always a good idea to refer to your specific air fryer’s manual for recommended cooking times and temperatures.
FAQ
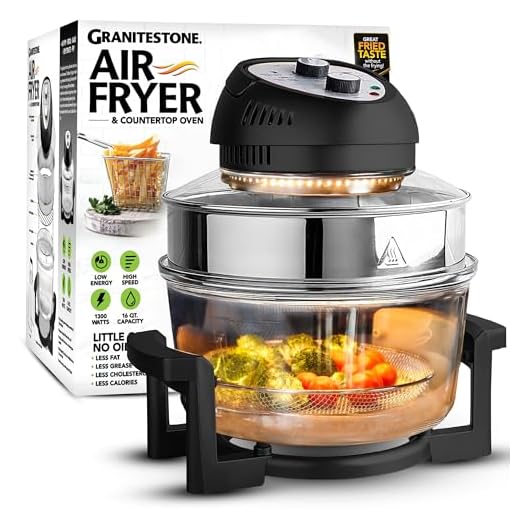
What is an air fryer?
An air fryer is a kitchen appliance that cooks food by circulating hot air around it, creating a crispy outer texture similar to deep frying but with less oil.
Is it possible to fry chicken skin in an air fryer?
Yes, you can definitely fry chicken skin in an air fryer. It will result in a crispy and delicious snack or addition to your meal.
How do you fry chicken skin in an air fryer?
To fry chicken skin in an air fryer, start by patting the skin dry and seasoning it with salt and any desired spices. Preheat the air fryer to 400°F (200°C) and place the chicken skin in a single layer. Cook for about 10-15 minutes, flipping halfway through, until it becomes crispy and golden brown.
Can you use frozen chicken skin in an air fryer?
Yes, you can use frozen chicken skin in an air fryer. Just make sure to thaw it before frying for more even cooking.
What are some seasoning options for fried chicken skin?
Some seasoning options for fried chicken skin include salt, black pepper, paprika, garlic powder, onion powder, cayenne pepper, and any other herbs or spices you enjoy.