

If you’ve noticed that your freezer is developing a layer of frost, it’s important to address the issue as soon as possible. A freezer that is frosting up can lead to decreased efficiency, increased energy consumption, and potentially spoiled food. Thankfully, there are several steps you can take to fix this problem and ensure that your freezer stays frost-free.
1. Check the door seal: Start by inspecting the door seal for any signs of damage or wear. A faulty door seal can allow warm air to enter the freezer, causing excess condensation and frost. If you notice any gaps or tears in the seal, it will need to be replaced.
2. Clean the vents: Over time, the vents in your freezer can become clogged with ice or debris, preventing proper airflow and leading to frosting. Use a soft brush or cloth to gently clean the vents and remove any obstructions.
3. Defrost the freezer: If the layer of frost has already built up, it’s important to defrost the freezer. Unplug the appliance and remove all items from the freezer. Leave the freezer door open and allow the frost to melt naturally. You can also place towels on the floor to absorb any excess water.
4. Check the thermostat: A malfunctioning thermostat can cause temperature fluctuations and excessive frost formation. Use a thermometer to check the accuracy of the thermostat. If it’s not functioning properly, you may need to replace it.
5. Arrange the food properly: Improperly arranged food can obstruct the airflow and lead to excess condensation and frost. Make sure that there is enough space between items for the cold air to circulate freely. Additionally, avoid leaving the freezer door open for an extended period as this can increase humidity levels inside the freezer.
By following these steps and maintaining regular freezer maintenance, you can fix a freezer that is frosting up and prevent future issues. However, if the problem persists, it may be necessary to contact a professional appliance repair technician for further assistance.
Common Causes of Freezer Frosting
Experiencing frost buildup in your freezer can be frustrating and may indicate an underlying issue. Here are several common causes of freezer frosting that you should be aware of:
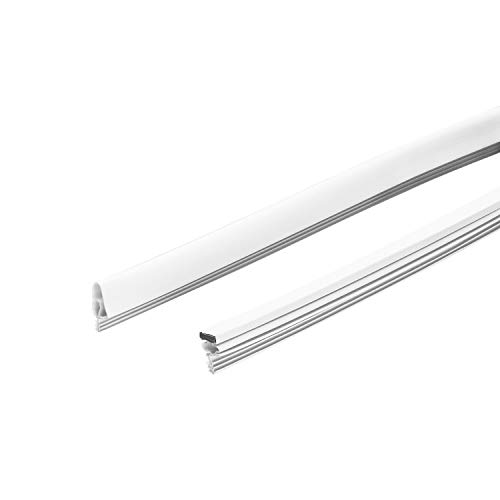
- Poor door seal: A faulty or worn-out door seal can allow warm air from outside to enter the freezer, resulting in frost buildup. Inspect the rubber gasket around the door and replace it if necessary.
- Incorrect temperature settings: If the freezer temperature is set too low, it can cause frost to accumulate. Make sure the temperature is set according to the manufacturer’s recommendations.
- Overloading the freezer: Overloading the freezer with too much food can restrict the airflow, leading to frost buildup. Organize the items inside the freezer, ensuring proper air circulation.
- Defective defrost timer: A malfunctioning defrost timer can prevent the automatic defrost system from activating, resulting in excessive frost. Test the timer and replace it if needed.
- Blocked vents or air circulation: Blocked vents or air circulation can disrupt the flow of cold air, causing frost to accumulate. Check for any obstructions and clear them to restore proper airflow.
By understanding these common causes of freezer frosting, you can troubleshoot the issue and potentially avoid more significant problems in the future. Remember to consult the manufacturer’s manual or seek professional assistance if needed.

Improper Door Seal
One common reason why a freezer may be frosting up is due to an improper door seal. If the door seal is not tight or has gaps, warm air from outside can enter the freezer, causing frost to accumulate.
To fix this issue, you can start by inspecting the door seal for any visible damage or gaps. If you notice any issues, you may need to replace the door seal. You can find a replacement door seal specific to your freezer’s make and model by contacting the manufacturer or checking online retailers that specialize in appliance parts.
Before installing the new door seal, make sure to clean the area where it will be attached. Remove any debris or residue that may interfere with the seal’s adhesion.
To install the new door seal, carefully remove the old seal by peeling it off or unscrewing any screws that hold it in place. Follow the instructions provided with the new door seal to attach it properly. Make sure it is aligned and evenly attached around the perimeter of the freezer door.
Once the new door seal is installed, check it to ensure that it creates a tight seal when the door is closed. You can do this by placing a dollar bill between the door and the seal and closing the door. If you can easily pull the bill out without any resistance, then the seal may not be tight enough, and you may need to adjust it or seek professional help.
By fixing the improper door seal, you can prevent warm air from entering the freezer and reduce the amount of frost buildup, ensuring that your freezer operates efficiently and keeps your food properly frozen.
Defective Door Gasket
If your freezer is frosting up, one possible cause could be a defective door gasket. The door gasket is the rubber seal that goes around the edge of the freezer door, creating an airtight seal when the door is closed. If there are any tears, cracks, or gaps in the door gasket, it can allow warm air to enter the freezer, causing frost to build up.
To check if the door gasket is defective, start by inspecting it for any visible damage. Look for tears or cracks in the rubber seal, as well as any areas where the gasket may be loose or not properly attached to the door. If you notice any problems, it’s likely that the door gasket needs to be replaced.
Replacing the Door Gasket
To replace the door gasket, you will first need to purchase a new gasket that is compatible with your freezer make and model. You can usually find the correct gasket at an appliance parts store or online.
Once you have the new gasket, follow these steps to replace it:
- Unplug the freezer from the electrical outlet.
- Remove any items that may be stored on the freezer door.
- Starting at one corner, carefully peel back the old gasket from the freezer door. Be gentle to avoid damaging the door or gasket.
- Clean the area where the old gasket was attached, using warm soapy water and a sponge or cloth.
- Take the new gasket and position it around the edge of the freezer door, making sure it is properly aligned.
- Press the gasket firmly against the door, starting at one corner and working your way around the door.
- Once the gasket is in place, use a hairdryer on a low heat setting to warm the gasket. This will help it conform to the shape of the door and create a tight seal.
- Plug the freezer back into the electrical outlet and close the door.
After replacing the door gasket, allow the freezer to run for a few hours to see if the frosting issue has been resolved. If the problem persists, there may be another underlying issue that requires further troubleshooting or professional repair.
| Cause | Possible Solution |
|---|---|
| Defective Door Gasket | Replace the door gasket with a new one that is compatible with your freezer make and model. |
| Temperature Setting Too Low | Adjust the temperature setting to the recommended level for your freezer. |
| Frequent Door Opening | Minimize the number of times the freezer door is opened and limit the duration of each opening. |
| Faulty Defrost Heater | Contact a professional technician to diagnose and repair the defrost heater, if necessary. |
Faulty Temperature Control
If your freezer is frosting up, one possible cause could be a faulty temperature control. The temperature control is responsible for regulating the temperature inside the freezer by turning the compressor on and off. If it is not functioning properly, the freezer may not be maintaining the correct temperature, resulting in excessive frost build-up.
To determine if the temperature control is the problem, you can try adjusting it to a colder setting and see if that helps reduce the frost. If not, you may need to replace the temperature control.
Here are the steps to replace a faulty temperature control:
- Unplug the freezer from the power source.
- Locate the temperature control, which is usually located on the front or inside of the freezer door.
- Remove any screws or clips holding the temperature control in place.
- Disconnect the wires connected to the temperature control.
- Take note of the wire connections so you can reconnect them correctly later.
- Remove the faulty temperature control from the freezer.
- Install the new temperature control by reconnecting the wires in the same positions as before.
- Secure the temperature control in place with screws or clips.
- Plug the freezer back into the power source and test the temperature control by adjusting it to the desired setting.
If replacing the temperature control does not solve the issue, there may be another underlying problem causing the excessive frost. In such cases, it is best to consult a professional technician or contact the manufacturer for further assistance.
| Possible Causes | Solutions | |
|---|---|---|
| 1. | Faulty temperature control | Replace the temperature control |
| 2. | Defective defrost timer | Replace the defrost timer |
| 3. | Worn out door gasket | Replace the door gasket |
| 4. | Blocked air vents | Clean or clear any obstructions from the air vents |
| 5. | Malfunctioning defrost heater | Replace the defrost heater |
Troubleshooting Steps
If you have noticed that your freezer is frosting up, here are a few troubleshooting steps you can take to try and fix the issue:
1. Check the door seal: A faulty door seal can allow warm air to enter the freezer, causing frost build-up. Inspect the seal and ensure that it is properly aligned and free from any cracks or damage.
2. Adjust the temperature: If the temperature is set too low, it can lead to excessive frost formation. Make sure the freezer is set at the correct temperature according to the manufacturer’s instructions.
3. Clean the coils: Dust and debris can accumulate on the coils at the back of the freezer, hindering proper airflow and causing frost to form. Use a vacuum cleaner or a soft brush to gently clean the coils.
4. Do not overload the freezer: Overloading the freezer with too many items can restrict airflow and lead to frost build-up. Make sure there is enough space for air to circulate inside the freezer.
5. Allow warm food to cool: Placing warm or hot food directly into the freezer can cause excess condensation and frost. Allow the food to cool down to room temperature before placing it in the freezer.
6. Regularly defrost the freezer: If your freezer does not have an automatic defrost feature, it is important to manually defrost it regularly to remove any accumulated frost. Follow the manufacturer’s instructions on how to defrost your specific freezer model.
If these troubleshooting steps do not resolve the frost build-up issue, it may be a sign of a more serious problem. In that case, it is recommended to contact a professional appliance technician for further assistance.
Check and Clean Door Seal
The door seal, also known as a gasket, plays a crucial role in maintaining the cold temperature inside the freezer. Over time, the door seal can become dirty or damaged, causing air leaks and frost build-up. To fix this issue, follow these steps to check and clean the door seal:
1. Inspect the Door Seal
Start by visually inspecting the door seal for any signs of wear and tear, such as cracks, tears, or deformation. Gently run your fingers along the seal to feel for any air leaks or gaps. If you notice any damage or gaps, it may be necessary to replace the door seal.
2. Clean the Door Seal
To clean the door seal, mix a solution of mild soap and warm water. Dampen a clean cloth or sponge in the solution and gently wipe down the entire surface of the seal, including the inner and outer edges. Be sure to remove any dirt, grime, or food particles that may be stuck to the seal.
After cleaning, rinse the seal with a damp cloth to remove any soap residue. Then, dry the seal thoroughly with a clean towel.
3. Test the Door Seal
Once the seal is clean and dry, close the freezer door and perform a simple test to check its effectiveness. Place a dollar bill or a piece of paper between the door and the seal, and then close the door tightly. Try to pull out the paper or bill with a gentle tug. If it comes out easily, there may still be gaps or air leaks in the seal.
If the seal fails the test, you may need to adjust the alignment of the door or consider replacing the seal altogether. Consult the freezer’s manual or contact a professional for further assistance.
Remember: A properly functioning door seal is essential for the freezer to maintain its cold temperature and prevent frost build-up. Regularly inspecting and cleaning the door seal can help prolong its lifespan and ensure the freezer’s efficiency.
Replace Defective Door Gasket
If your freezer is constantly frosting up, the door gasket may be defective and allowing warm air to enter the freezer. The door gasket is the rubber seal that runs around the perimeter of the freezer door and creates a tight seal when the door is closed. Over time, the gasket can become worn, torn, or damaged, preventing it from effectively sealing the door.
To replace the defective door gasket, you will need the following tools:
| – Screwdriver |
| – Replacement door gasket |
Follow these steps to replace the defective door gasket:
- Begin by unplugging the freezer from the power source to ensure safety.
- Open the freezer door and carefully examine the current door gasket for any tears, cracks, or other signs of damage.
- Using a screwdriver, carefully remove the screws securing the old gasket in place. Make sure to keep track of the screws to use later.
- Once the screws are removed, gently pull the old gasket away from the door.
- Take the new replacement door gasket and align it with the door, making sure it matches the shape and size of the old gasket.
- Carefully press the new gasket onto the door, starting from one corner and working your way around the entire perimeter.
- Secure the new gasket in place by screwing the screws back into their original positions.
- Plug the freezer back into the power source and close the door. Check for any gaps or leaks and ensure the door seals tightly.
Replacing a defective door gasket can greatly improve the performance of your freezer and prevent it from constantly frosting up. By creating a proper seal, the new gasket will help maintain the desired temperature inside the freezer and reduce energy consumption.
Calibrate and Replace Temperature Control
If your freezer is consistently frosting up, it may be due to an issue with the temperature control. The temperature control regulates the temperature inside the freezer and can sometimes become inaccurate over time.
To calibrate the temperature control, you will need an accurate thermometer. Place the thermometer inside the freezer and wait for it to stabilize. Check the temperature reading on the thermometer and compare it to the temperature setting on the temperature control. If there is a significant difference, you may need to adjust the temperature control to align with the actual temperature inside the freezer. Consult your freezer’s manual or manufacturer’s website for specific instructions on how to calibrate the temperature control for your model.
If calibrating the temperature control does not solve the issue, it may be necessary to replace the temperature control altogether. Before replacing the temperature control, make sure to unplug the freezer from the power source. Remove the old temperature control by disconnecting the wiring harness and any mounting screws. Take note of the wiring connections for proper installation of the new temperature control.
Replacing Temperature Control
When replacing the temperature control, it is important to purchase the correct replacement part for your freezer model. You can find the model number of your freezer either on the front panel or on a sticker located inside the freezer. Use this model number to search for the appropriate replacement temperature control.
Once you have the replacement part, start by connecting the wiring harness to the new temperature control. Ensure that each wire is securely connected to the correct terminal. Then, attach the new temperature control to the freezer using the mounting screws.
After replacing the temperature control, plug the freezer back into the power source and wait for it to start up. Monitor the freezer for any signs of frosting up. If the freezer continues to frost up, it may be necessary to consult a professional technician for further diagnosis and repair.
Summary
Frosting up in the freezer can be a frustrating issue, but calibrating or replacing the temperature control can often resolve the problem. Start by calibrating the temperature control using an accurate thermometer, and if that doesn’t work, proceed to replace the temperature control. Ensure that you purchase the correct replacement part and follow the manufacturer’s instructions for installation. If the issue persists, seek professional assistance to diagnose and repair the freezer.
| Steps to Calibrate and Replace Temperature Control: |
|---|
| 1. Obtain an accurate thermometer. |
| 2. Place the thermometer inside the freezer and wait for it to stabilize. |
| 3. Compare the temperature reading on the thermometer to the temperature setting on the temperature control. |
| 4. Adjust the temperature control if there is a significant difference. |
| 5. Consult the freezer’s manual or manufacturer’s website for specific instructions on calibrating the temperature control. |
| 6. If calibrating doesn’t solve the issue, unplug the freezer and replace the temperature control. |
| 7. Purchase the correct replacement part for your freezer model using the model number. |
| 8. Connect the wiring harness to the new temperature control. |
| 9. Securely attach the new temperature control to the freezer using mounting screws. |
| 10. Plug the freezer back into the power source and monitor for any signs of frosting up. |
Preventive Measures
To prevent your freezer from frosting up and potentially causing damage, implementing a few preventive measures can go a long way. Follow these tips to keep your freezer frost-free:
Regularly Defrost the Freezer
One of the most important preventive measures is to regularly defrost your freezer. Manual defrost freezers should be defrosted when the frost buildup reaches a thickness of around 0.25 inches (6 mm). This may vary depending on the model, so consult your freezer’s manual for specific instructions.
To defrost your freezer, remove all the food and unplug the appliance. Leave the freezer door open to allow the ice to melt. You can expedite the process by placing a bowl of hot water inside the freezer. Once the ice has melted, wipe down the interior with a clean cloth or sponge.
Avoid Overloading the Freezer
Overloading the freezer can obstruct proper airflow and contribute to frost buildup. Make sure not to cram too much food into your freezer, as this can also interfere with the freezer’s ability to maintain a consistent temperature.
Additionally, arranging items in a way that allows for proper airflow can prevent frost formation. Leave enough space between food containers to allow air to circulate freely.
Check the Door Seal
A faulty door seal can allow warm air from outside to enter the freezer, causing excess frost. Regularly check the door seal for any signs of wear or damage and replace it if necessary. You can test the seal by closing the door on a piece of paper. If the paper slides out easily, the seal may need to be replaced.
| Preventive Measures: | Tips: |
|---|---|
| Regularly defrost the freezer | Follow the manufacturer’s recommendations for defrosting frequency |
| Avoid overloading the freezer | Leave enough space for proper airflow |
| Check the door seal | Replace if damaged or worn out |
FAQ
Why is my freezer frosting up?
There can be several reasons why a freezer is frosting up. One common reason is a faulty door seal that allows warm air to enter the freezer, causing the moisture to freeze. Another possible cause is a malfunctioning defrost system that fails to remove the frost build-up. It could also be due to a blocked air vent or a problem with the temperature control.
How can I check if the door seal is faulty?
To check if the door seal is faulty, close the freezer door on a piece of paper, then try to pull out the paper. If the paper comes out easily, it means that the door seal is not creating a proper seal and needs to be replaced. You can also visually inspect the seal for any signs of wear or damage.
What should I do if the defrost system is malfunctioning?
If the defrost system is malfunctioning, you can try manually defrosting the freezer by unplugging it and letting the ice melt. Once the ice has melted, plug it back in and see if the freezer starts cooling properly. If the problem persists, it is advisable to call a professional technician to diagnose and fix the issue.
How do I unblock the air vent?
To unblock the air vent, you can use a hairdryer on a low heat setting to gently melt the ice obstructing the vent. Be careful not to use high heat, as it can damage the plastic parts. Once the ice has melted, remove any remaining debris and ensure that the vent is clear for proper airflow.
Can the temperature control be the cause of frosting up?
Yes, a faulty temperature control can cause a freezer to frost up. If the temperature control is not functioning correctly, it may not be able to maintain the desired temperature, leading to excessive frost build-up. If you suspect that the temperature control is the issue, it is recommended to call a professional technician to inspect and replace it if necessary.


