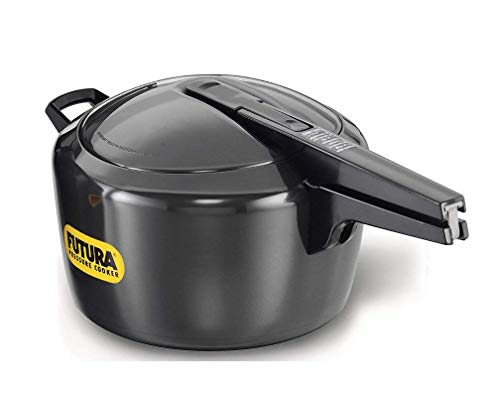


If you’re a fan of homemade jams and preserves, you’ll love making pear jam in a pressure cooker. This efficient method allows you to create delicious, fruity spreads in a fraction of the time it takes using traditional stovetop methods. Plus, the pressure cooker helps to intensify the flavors of the pears, resulting in a jam that is bursting with natural sweetness.
Using a pressure cooker for making jam may seem a bit unconventional, but it’s actually a fantastic way to save time and achieve incredible results. The high pressure and heat in the cooker help to break down the pears quickly and evenly, resulting in a smooth and flavorful jam. This method also helps to preserve the vibrant color of the fruit, making for an appealing jar of jam that you’ll be proud to share with friends and family.
To make pear jam in a pressure cooker, you’ll need ripe pears, sugar, lemon juice, and a few optional flavorings such as cinnamon or vanilla extract. It’s important to choose pears that are ripe but still firm, as overly ripe pears can make the jam too mushy. The sugar helps to balance the natural tartness of the fruit, while lemon juice adds a bright citrus note. Feel free to experiment with different flavor combinations to create your own unique jam.
Ready to embark on your pear jam adventure? In the following steps, we’ll guide you through the process of making pear jam in a pressure cooker. Get your jars ready, and let’s start preserving those juicy pears!
Preparing the Ingredients
Before you start making pear jam in a pressure cooker, you need to gather and prepare all the necessary ingredients. Here’s what you’ll need:
Pears: Select ripe, firm pears that are sweet and juicy. You can use any variety of pears, such as Bartlett or Anjou.
Lemon juice: Squeeze fresh lemon juice to prevent the pears from browning and add a tangy flavor to the jam.
Sugar: Use granulated sugar to sweeten the jam. The amount of sugar needed depends on the sweetness of the pears and your personal preference.
Pectin: Adding pectin helps the jam to set properly. You can use either liquid or powdered pectin according to the instructions on the package.
Vanilla extract: This optional ingredient adds a hint of warmth and enhances the flavor of the pear jam.
Cinnamon: Another optional ingredient, cinnamon adds a subtle spiciness that complements the sweetness of the pears.
Note: Make sure you have a clean working surface, a sharp knife, and a cutting board ready for peeling, coring, and slicing the pears.
Once you have all the ingredients prepared and your pressure cooker cleaned and ready, you’re all set to start making delicious pear jam!
Gather Fresh Ripe Pears
Before starting the process of making pear jam in a pressure cooker, it is important to gather fresh and ripe pears. Ripe pears are essential for achieving the best flavor and texture in the jam. Look for pears that are firm, but not too hard, with a slight give when gently squeezed. They should have a good aroma and be free from any bruises or blemishes.
You can either pick fresh pears from your own pear tree if you have one, or you can purchase them from a local farmer’s market or grocery store. It’s always a good idea to buy pears that are in season, as they will be at their peak ripeness.
When gathering the pears, it’s important to handle them carefully to avoid bruising or damaging the fruit. Place them gently in a basket or a box, making sure not to pile them on top of each other.
If you have a large quantity of pears, you may need to sort them by ripeness. Separate the ripest pears from those that are slightly underripe, as this will help ensure that the jam is consistent in flavor and texture.
Gathering fresh ripe pears is an essential first step in preparing delicious homemade pear jam in a pressure cooker. By using high-quality fruit, you can guarantee a jam that is bursting with flavor and provides a delightful accompaniment to your breakfast or afternoon tea.
Wash and Peel the Pears
Before starting the process of making pear jam in a pressure cooker, it is essential to properly wash and peel the pears. This step ensures that the fruit will be clean and free from any dirt or contaminants.
To wash the pears, first, rinse them under cold water to remove any dirt or debris from the surface. Gently rub the skin with your fingers to ensure a thorough clean. Alternatively, you can use a produce wash or vinegar solution to remove any waxy residue or pesticides.
Once the pears are clean, it’s time to peel them. Using a sharp knife or a peeler, carefully remove the outer skin, making sure not to remove too much flesh. Peeling the pears will help to ensure a smoother texture in the final jam.
Tips for Peeling Pears
- Choose ripe pears for easier peeling. The skin should be slightly firm but not overly hard.
- If the pears are difficult to peel, try blanching them in boiling water for a few seconds. This will help loosen the skin and make it easier to remove.
- Work slowly and carefully to avoid bruising or damaging the fruit.
Once the pears are washed and peeled, they are ready to be used in the pear jam recipe. Following these steps ensures that you start with clean and prepared fruit, resulting in a delicious and high-quality jam.
Remove the Cores and Seeds
Before you begin making pear jam in a pressure cooker, it’s important to remove the cores and seeds from the pears. This will prevent any bitterness from seeping into your jam.
Start by peeling the pears using a vegetable peeler. Once peeled, cut the pears in half and use a small spoon or melon baller to remove the cores and seeds.
Place the cored and seeded pears into a large bowl as you work. Make sure to discard the cores and seeds as you go.
Once you have finished removing the cores and seeds from all of the pears, you are ready to continue with the pear jam recipe.
Cooking the Jam
Once the pears have been mashed and the sugar has been added, it’s time to start cooking the jam in the pressure cooker. The pressure cooker will help to speed up the cooking process, allowing you to enjoy your homemade pear jam faster!
Step 1: Prep the Pressure Cooker
Before you start cooking the jam, make sure to prep your pressure cooker. Add the trivet to the bottom of the pressure cooker and pour in the appropriate amount of water. The water level should be about 1-2 inches below the trivet.
Step 2: Cook the Jam
Place the pot with the mashed pears and sugar on top of the trivet in the pressure cooker. Close the pressure cooker tightly according to the manufacturer’s instructions.
Set the pressure cooker to high pressure and cook the jam for 10 minutes. Make sure the pressure release valve is in the sealed position.
Once the cooking time is up, carefully release the pressure according to the manufacturer’s instructions. Once the pressure has been fully released, carefully open the pressure cooker.
Step 3: Test the Jam’s Consistency
To test the jam’s consistency, take a spoonful of the jam and place it on a chilled plate. Allow it to cool for a few seconds, and then run your finger through the jam. If it wrinkles and holds its shape, it’s ready. If not, continue cooking for a few more minutes.
Keep in mind that the jam will thicken further as it cools, so don’t overcook it in the pressure cooker.
Once the jam has reached the desired consistency, remove it from the heat and let it cool for a few minutes before transferring it to clean, sterilized jars.
Enjoy your homemade pear jam on toast, scones, or as a delicious topping for yogurt or ice cream!
Chop the Pears into Small Pieces
Before making pear jam in a pressure cooker, it is essential to chop the pears into small pieces. This will ensure that they cook evenly and release their natural sweetness.
To start, gather ripe but firm pears and wash them thoroughly under running water. Then, using a sharp knife and a cutting board, carefully remove the stems and seeds from the pears.
Step 1: Cutting the Pears
- Place the washed pear on the cutting board.
- Hold the pear firmly with one hand and cut it vertically in half.
- Using a spoon or a small knife, remove the core and seeds from each half.
- Repeat this process for all the pears.
Step 2: Dicing the Pears
- Take one pear half and place it on the cutting board, flat side down.
- Hold the pear firmly and make vertical cuts, about ¼ inch apart, across the width of the pear.
- Rotate the pear half and make horizontal cuts, also ¼ inch apart, across the length of the pear.
- Continue dicing all the pear halves in this manner until they are all chopped into small pieces.
Once all the pears are chopped into small pieces, you can proceed with making pear jam in a pressure cooker. This step ensures that the pears will cook evenly, allowing their flavors to meld together and create a delicious jam.
FAQ
What ingredients do I need to make pear jam in a pressure cooker?
To make pear jam in a pressure cooker, you will need the following ingredients: 4 pounds of ripe pears, 4 cups of granulated sugar, 1 lemon (juiced and zested), and 1 tablespoon of butter.
Can I use any type of pear to make jam in a pressure cooker?
Yes, you can use any type of pear to make jam in a pressure cooker. However, it is recommended to use ripe and sweet pears for the best flavor.
How long does it take to make pear jam in a pressure cooker?
The total cooking time for making pear jam in a pressure cooker is approximately 30 minutes. This includes the time it takes for the pressure cooker to come to pressure and release the pressure naturally.
Can I store the pear jam made in a pressure cooker?
Yes, you can store the pear jam made in a pressure cooker. Once the jam is cooked and cooled, transfer it to sterilized jars and seal them tightly. The jam can be stored in a cool and dark place for up to a year.


