Rotisserie chicken is a delicious and flavorful dish that is often cooked on a spinning spit over a fire. However, not everyone has access to a rotisserie grill, but don’t worry – you can still enjoy the same succulent flavors right in your own oven! Making rotisserie chicken in the oven is a simple process that can be done by anyone, even if you’re not a seasoned cook.
To make rotisserie chicken in the oven, you’ll need a whole chicken, some seasoning, and a roasting pan or baking dish. Start by preheating your oven to the appropriate temperature. While the oven is heating up, season your chicken with a blend of herbs, spices, and salt to create that classic rotisserie flavor. You can use a pre-made spice rub or create your own with ingredients like paprika, garlic powder, onion powder, thyme, and rosemary.
Next, place the chicken onto a roasting rack or directly into the pan, breast-side up. This allows the chicken to cook evenly and ensures that the skin gets nice and crispy. If you prefer a moist and juicy chicken, you can also place a small rack of vegetables, such as carrots and onions, underneath the chicken to catch the drippings and infuse the meat with extra flavor.

Once your oven has reached the desired temperature, place the chicken in the center rack and cook for about 1.5 to 2 hours, or until the internal temperature reaches 165°F (74°C). To get that golden-brown skin, you can brush the chicken with melted butter or olive oil halfway through the cooking process. Remember to baste the chicken every 30 minutes to keep it moist and flavorful.
When the chicken is done, let it rest for a few minutes before carving to allow the juices to distribute evenly. Serve your oven-baked rotisserie chicken with your favorite side dishes, such as roasted potatoes, steamed vegetables, or a fresh salad. Enjoy the tender and juicy meat with the crispy, flavorful skin for a satisfying and delicious meal right at home!
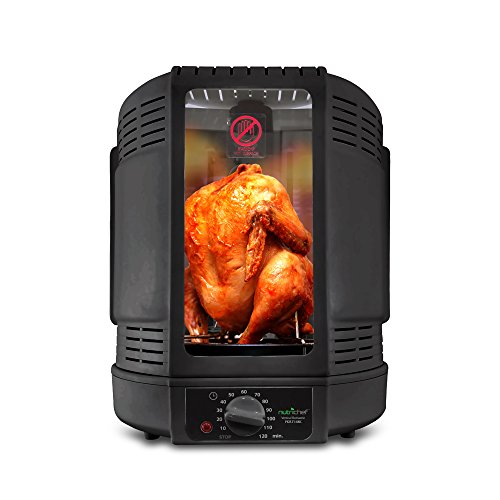
How to Cook Rotisserie Chicken in the Oven
If you don’t own a rotisserie grill but still want to enjoy delicious rotisserie chicken at home, you can easily make it in the oven. Follow these simple steps to cook a perfectly tender and flavorful rotisserie-style chicken.
Ingredients:
- 1 whole chicken
- 2 tablespoons olive oil
- 2 tablespoons paprika
- 1 tablespoon garlic powder
- 1 tablespoon onion powder
- 1 tablespoon dried thyme
- 1 tablespoon dried oregano
- 1 tablespoon salt
- 1 teaspoon black pepper
Instructions:
- Preheat your oven to 400°F (200°C).
- Rinse the whole chicken under cold water and pat it dry with paper towels.
- In a small bowl, mix together the olive oil, paprika, garlic powder, onion powder, dried thyme, dried oregano, salt, and black pepper to create a flavorful rub.
- Brush the chicken with the prepared rub, making sure to coat all sides evenly.
- Place the chicken on a roasting rack or a baking sheet lined with aluminum foil.
- Insert a meat thermometer into the thickest part of the chicken without touching the bone.
- Roast the chicken in the preheated oven for about 1 to 1 ½ hours, or until the internal temperature reaches 165°F (75°C).
- Once cooked, remove the chicken from the oven and let it rest for about 10 minutes before carving.
Enjoy your homemade rotisserie-style chicken hot and fresh from the oven. Serve it with your favorite side dishes and sauces for a complete and delicious meal.
Note: You can add more spices or herbs to the rub according to your taste preferences. Additionally, you can stuff the chicken cavity with lemon wedges or garlic cloves for extra flavor.
Preparing the Chicken
To make rotisserie chicken in the oven, you’ll need to start by preparing the chicken itself. Here are the steps to follow:
1. Choose the Right Chicken
Select a whole chicken that weighs between 3 and 4 pounds. Look for a chicken that has a plump and moist appearance with no signs of bruising or discoloration.
2. Remove the Giblets
Check the cavity of the chicken to see if it contains any giblets, such as the neck, heart, liver, or gizzard. If they are present, remove them and set them aside for future use or discard them if desired.
3. Rinse and Pat Dry
Thoroughly rinse the chicken, both inside and out, under cold running water. Once rinsed, carefully pat the chicken dry with paper towels. This step helps to remove any excess moisture, which will promote better browning during the cooking process.
4. Season the Chicken
Season the chicken generously with your choice of herbs and spices. Common options include garlic powder, onion powder, paprika, thyme, rosemary, salt, and black pepper. Rub the seasoning mixture all over the chicken, making sure to coat it evenly.
5. Let the Chicken Rest
Allow the chicken to rest at room temperature for about 30 minutes. This resting time allows the flavors to meld together and helps the chicken cook more evenly.
6. Truss the Chicken (Optional)
Trussing the chicken involves tying the legs and wings close to the body using kitchen twine. This step can help the chicken cook more evenly and maintain its shape, but it is optional. If you choose to truss the chicken, make sure to remove the twine before serving.
By following these steps, you’ll have a properly prepared chicken ready to be cooked in the oven and transformed into delicious rotisserie-style chicken.
Marinating the Chicken
To make delicious rotisserie chicken in the oven, marinating the chicken is an essential step. Marinating not only enhances the flavor of the chicken but also helps to tenderize it. Here is how you can marinate your chicken:
1. Choose your marinade: There are many marinade options to choose from, such as lemon herb, garlic and herb, or even a spicy marinade. Pick a marinade that suits your taste preferences.
2. Prepare the marinade: In a bowl, combine the ingredients for the marinade. This can include herbs, spices, oil, vinegar, soy sauce, and any other flavorings you desire. Mix them well to ensure all the flavors are distributed evenly.
3. Coat the chicken: Place the chicken in a resealable plastic bag or a shallow container. Pour the marinade over the chicken, making sure it is fully coated. If using a bag, seal it, then gently massage the marinade into the chicken to ensure it is evenly distributed.
4. Marinate the chicken: Place the marinated chicken in the refrigerator and let it marinate for at least 2 hours, preferably overnight. The longer you marinate the chicken, the more flavorful it will be.
5. Flip the chicken: If you marinated the chicken in a bag, flip it over every few hours to ensure the marinade reaches all parts of the chicken evenly.
6. Remove excess marinade: Before cooking the chicken, remove any excess marinade from the surface of the chicken. This will prevent the marinade from burning during the cooking process.
Marinating the chicken is an important step in making rotisserie chicken in the oven. It adds flavor and helps to enhance the juiciness of the chicken. Don’t rush this step and give the chicken enough time to absorb all the delicious flavors!
Preheating the Oven
Before you start preparing your rotisserie chicken, it’s essential to preheat your oven. Preheating ensures that the oven reaches the desired temperature and allows for even cooking throughout the chicken.
Here’s how you can preheat your oven for making rotisserie chicken:
- First, remove any racks or trays from the oven.
- Next, set the temperature on your oven to 350°F (175°C) and wait for it to heat up.
- It’s important to note that different ovens may take varying amounts of time to preheat, so be patient while it reaches the desired temperature.
- While the oven is preheating, you can start preparing your rotisserie chicken by seasoning it with your choice of herbs, spices, and marinades.
Once the oven is preheated, you can move on to the next steps in the process of making delicious rotisserie chicken in the oven.
Roasting the Chicken
Once your oven is preheated and your chicken is seasoned, it’s time to roast the chicken in the oven. Here is how you can do it:

Step 1: Place the chicken on a roasting rack or a baking dish. This will help elevate the chicken and allow the heat to circulate evenly around it.
Step 2: Insert a meat thermometer into the thickest part of the chicken, making sure not to touch the bone. This will help you to determine when the chicken is fully cooked.
Step 3: Place the chicken in the preheated oven and roast it at 350°F (175°C) for about 20 minutes per pound. This means if you have a 4-pound chicken, you will need to cook it for approximately 1 hour and 20 minutes.
Step 4: Baste the chicken with its own drippings or with melted butter every 30 minutes. This will help to keep the chicken moist and flavorful.
Step 5: About 10 minutes before the chicken is done, increase the oven temperature to 400°F (200°C). This will help to crisp up the skin and give it a golden brown color.
Step 6: Remove the chicken from the oven when the meat thermometer reads an internal temperature of 165°F (74°C). Let the chicken rest for at least 10 minutes before carving.
Roasting the chicken in the oven will result in a juicy and flavorful bird with a crispy skin. Follow these steps, and you’ll be able to enjoy a delicious rotisserie-style chicken made right in your own kitchen!
Checking the Chicken’s Doneness
Properly cooked rotisserie chicken should have an internal temperature of 165°F (74°C) to ensure it is safe to eat. Use a meat thermometer to check the temperature by inserting it into the thickest part of the chicken, away from the bone. If the temperature reads lower than 165°F (74°C), return the chicken to the oven and continue cooking until it reaches the appropriate temperature.
Additionally, the chicken’s skin should be golden brown and crispy. If the skin appears pale or rubbery, you can increase the temperature of the oven or broil the chicken for a few minutes to achieve that desired crispy texture.
Resting the Chicken
After you remove the chicken from the oven, let it rest for about 10 minutes before carving. This allows the juices to redistribute throughout the meat, resulting in a more flavorful and tender chicken.
Cover the chicken loosely with aluminum foil to help retain its warmth during the resting period. Use this time to prepare any side dishes or sauces to accompany the rotisserie chicken.
Carving and Serving
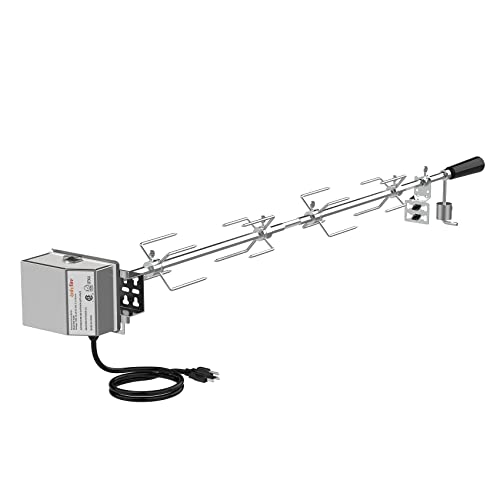
Once the chicken has rested, it’s time to carve and serve. Carefully remove the chicken from the rotisserie spit, being mindful of any hot parts. Use a sharp carving knife to slice the chicken into desired portions, such as breast, thigh, and drumstick.

Arrange the sliced chicken on a platter or individual plates and serve with your favorite sides. Rotisserie chicken pairs well with roasted vegetables, mashed potatoes, or a fresh salad. Enjoy!
Serving and Enjoying
Once your rotisserie chicken is cooked to perfection, it’s time to serve and enjoy the delicious flavors. Follow these steps to make the most of your oven-roasted chicken:
1. Carve the Chicken
Start by carving the rotisserie chicken into serving portions. Use a sharp knife to cut through the crispy skin and tender meat. Begin by removing the legs and wings, followed by slicing the breast meat. Make sure to slice against the grain for maximum tenderness.
2. Pair with Sides
Rotisserie chicken pairs well with a variety of side dishes. Consider serving it with traditional sides like mashed potatoes, steamed vegetables, or a garden salad. You can also get creative and try it with couscous, roasted sweet potatoes, or a refreshing coleslaw.
3. Make a Sauce
A delicious sauce can elevate the flavors of your rotisserie chicken even further. Consider making a homemade barbecue sauce, garlic aioli, or tangy lemon herb sauce. Drizzle it over the carved chicken or serve it on the side for dipping.
4. Create Leftovers
If you have leftovers, don’t worry! Rotisserie chicken can be used in a variety of dishes. Shred the meat and use it in sandwiches, wraps, or salads. You can also add it to soups, casseroles, or stir-fries for a quick and easy meal.
With these serving and enjoying tips, you can savor every bite of your homemade rotisserie chicken. Enjoy the delicious flavors and get creative with your leftovers. Bon appétit!
FAQ
What is rotisserie chicken and how is it made in the oven?
Rotisserie chicken is a flavorful and juicy chicken that is cooked on a rotating spit. To make it in the oven, you will need to marinate the chicken with your choice of seasonings, then roast it on a spit or a roasting rack in the oven. The rotating motion helps to evenly cook the chicken and gives it a crispy skin.
What are some good seasonings to use for rotisserie chicken?
There are many great seasonings you can use for rotisserie chicken. Some popular options include a mix of salt, pepper, garlic powder, paprika, and dried herbs like thyme or rosemary. You can also experiment with different spice blends or marinades to add more flavour.