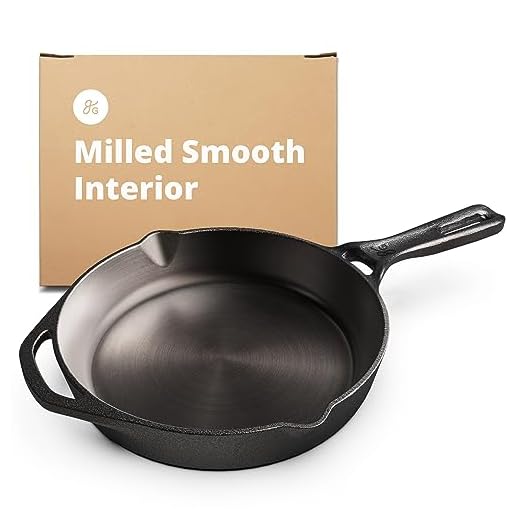
Seasoning a cast iron skillet is an important step to ensure that it lasts for generations to come. Cast iron skillets are known for their durability, versatility, and excellent heat retention, but they require proper maintenance to keep them in their best condition. The seasoning process involves coating the skillet with a layer of oil or fat and heating it to create a natural non-stick surface that also protects the iron from rust.
But how long does it take to cure a cast iron skillet? Well, the answer can vary depending on several factors such as the skillet’s size, the type of oil used, and the method of seasoning. Generally, it is recommended to repeat the seasoning process multiple times to achieve a well-seasoned skillet. Each round of seasoning typically takes about an hour, including the time for preheating and cooling.
When curing a cast iron skillet, patience is key. It may take several rounds of seasoning, consisting of applying a thin layer of oil, heating the skillet until it begins to smoke, and then allowing it to cool, before the desired seasoning is achieved. This can be a time-consuming process, but it is well worth the effort. Once properly seasoned, the cast iron skillet will develop a beautiful, slick patina that improves with each use and adds rich flavor to your meals.
The Importance Of Curing
Curing a cast iron skillet is an essential step in properly maintaining and using it. Cast iron skillets are known for their exceptional heat retention and even heat distribution, making them a favorite among professional chefs and home cooks alike. However, they can be prone to rust and food sticking if not properly cared for.
When you cure a cast iron skillet, you are essentially creating a natural non-stick surface and preventing rust from forming. The process involves applying a layer of oil or fat to the skillet and then heating it to a high temperature. This allows the oil to polymerize, creating a durable and non-stick coating.
Curing not only enhances the cooking performance of the skillet but also helps to prevent food from sticking and improves the flavor of your dishes. The seasoning process creates a smooth surface that reduces friction and allows for easy release of food. Additionally, the oil used in the curing process adds a subtle depth of flavor to your cooking.
Regularly curing your cast iron skillet is essential for maintaining its longevity. The seasoning layer protects the skillet from moisture and oxygen, preventing it from rusting. It also helps to prevent food from sticking, making it easier to clean and maintain. By properly curing your skillet, you can ensure that it will last for generations.
In conclusion, curing your cast iron skillet is not only important for its longevity but also for the quality of your cooking. By creating a non-stick surface and preventing rust, you can enjoy the many benefits of using a cast iron skillet for years to come.
Choosing The Right Oil
When it comes to curing a cast iron skillet, choosing the right oil is essential. The oil you choose will not only affect the curing process but also the overall performance and durability of your skillet.
There are several options available for oiling your cast iron skillet, but not all oils are created equal. Here are some factors to consider when choosing the right oil:
Smoke Point
The smoke point of an oil is the temperature at which it starts to smoke. It is important to choose an oil with a high smoke point for cast iron seasoning because the skillet needs to be heated to a high temperature to create the polymerized coating.
Oils with high smoke points include:
| Canola oil | 450°F (232°C) |
| Grapeseed oil | 420°F (216°C) |
| Sunflower oil | 440°F (227°C) |
Saturation
The saturation of an oil refers to the chemical structure of the fatty acids it contains. Saturated fats are more stable and less likely to go rancid compared to unsaturated fats. Therefore, oils with higher saturation levels are generally better for cast iron seasoning.
Some oils with high saturation levels include:
| Lard | 40% |
| Tallow | 50% |
| Duck fat | 35% |
Flavor
While the flavor of the oil may not affect the performance of the seasoning, it can still impact the taste of your food. Some oils, like olive oil, have distinct flavors that can be transferred to the food you cook in your cast iron skillet. If you prefer a neutral flavor, oils with mild tastes, such as canola oil or grapeseed oil, may be a better choice.
Ultimately, the choice of oil for seasoning your cast iron skillet depends on your personal preferences. It’s important to experiment with different oils and find the one that works best for you. Remember to follow the proper curing process to ensure a properly seasoned cast iron skillet that will last for years to come.
Applying The Oil
Before you can start using your new cast iron skillet, you need to season it properly. This process will create a protective coating that prevents rust and makes the skillet nonstick.
What You’ll Need
Here’s what you’ll need:
- A clean, dry cast iron skillet
- Neutral cooking oil (such as vegetable oil or canola oil)
- A paper towel or cloth
Steps to Seasoning
Follow these steps to season your cast iron skillet:
- Preheat your oven to 350°F (175°C).
- Start by cleaning your skillet thoroughly with hot water and a stiff brush. Make sure to remove any dirt or residue.
- Dry the skillet completely with a towel or by placing it on the stove over low heat for a few minutes.
- Apply a thin layer of oil to the entire surface of the skillet, including the handle and the outer walls.
- Use a paper towel or cloth to remove any excess oil. The skillet should have a thin and even coat of oil.
- Place the skillet upside down on the middle rack of the preheated oven. This allows any excess oil to drip off.
- Bake the skillet in the oven for about one hour.
- After one hour, turn off the oven and let the skillet cool down inside the oven. This gradual cooling helps the seasoning bond to the skillet.
- Once the skillet is completely cool, it is ready to use!
Note: It is important to re-season your cast iron skillet periodically to maintain its nonstick properties. Simply repeat the steps above whenever you notice the seasoning wearing off or the skillet becoming sticky.
By properly applying the oil and seasoning your cast iron skillet, you can enjoy its benefits for years to come. Happy cooking!
Letting It Bake
Once your cast iron skillet is coated with oil, it’s time to let it bake. This process allows the oil to polymerize and form a protective layer on the surface of the skillet.
Preheat your oven to a high temperature, around 450-500 degrees Fahrenheit (230-260 degrees Celsius). Place your cast iron skillet upside down on the oven rack, with a baking sheet or aluminum foil beneath to catch any drips.

Let the skillet bake for about one hour. During this time, the oil will heat up and bond with the skillet, creating a smooth and seasoned surface.
After an hour, turn off the oven and allow the skillet to cool completely inside. Avoid removing the skillet from the oven while it’s still hot, as this can lead to warping or cracking.
Once the skillet has cooled, it’s ready to be used! You may notice that the surface is now darker and has a slight shine to it. This is a good sign that the seasoning process was successful.
Remember, it’s important to continue seasoning your cast iron skillet regularly to maintain its non-stick surface. With proper care, your skillet will become even better with time and use.
Cooling And Repeating
After the initial seasoning process, it is important to let the cast iron skillet cool completely before using it or applying another layer of seasoning. This allows the oils to penetrate and bond with the iron, creating a strong, non-stick surface.
Once the skillet has cooled, it is recommended to repeat the seasoning process several times. This helps to build up the layers of seasoning, making the skillet even more durable and non-stick.
To repeat the seasoning, simply apply a thin layer of oil to the entire surface of the skillet, including the handle and exterior. Place the skillet upside down on the middle rack of a preheated oven at 375°F (190°C) for one hour.
After the hour is up, turn off the oven and let the skillet cool inside with the oven door closed. This slow cooling process helps to further bond the oil to the iron.
Repeat this process two to three times, allowing the skillet to cool completely between each seasoning. This will help to build up a strong and durable seasoning layer, ensuring the best cooking performance.
Tips And Tricks
When it comes to curing a cast iron skillet, there are some tips and tricks that can help you achieve the best results. Here are a few things to keep in mind:
1. Clean the skillet thoroughly
Before you begin the curing process, make sure to clean the skillet thoroughly. Remove any rust or food particles by scrubbing the surface with a stiff brush and hot soapy water. Rinse it thoroughly and dry it completely.
2. Use a high smoke point oil
When choosing an oil for curing, it’s important to select one with a high smoke point. This will prevent the oil from burning and leaving a sticky residue on the skillet. Good options include vegetable oil, canola oil, and flaxseed oil.
3. Apply a thin layer of oil
When applying the oil, it’s important to use a thin and even layer. Too much oil can result in a sticky and uneven coating. Use a paper towel or a clean cloth to apply the oil, making sure to cover the entire surface of the skillet, including the handle and sides.

4. Heat the skillet gradually
To cure the skillet, it’s important to heat it gradually. Start by placing it in a cold oven, then set the temperature to around 300-350°F (150-175°C). Allow the skillet to heat up slowly for about 2 hours, then turn off the oven and let it cool down completely inside.
5. Repeat the process
Curing a cast iron skillet is not a one-time process. To develop a durable and non-stick seasoning, it’s recommended to repeat the curing process several times. This will help to build up layers of seasoning that will enhance the skillet’s performance over time.
By following these tips and tricks, you can ensure that your cast iron skillet is properly cured and ready for use. Remember to always care for your skillet by avoiding harsh soaps, using gentle cleaning methods, and regularly re-seasoning it to maintain its quality.
FAQ
How long does it take to cure a cast iron skillet?
A cast iron skillet can take anywhere from 1-2 hours to cure properly.
What is the process for curing a cast iron skillet?
The process for curing a cast iron skillet involves applying a thin layer of oil to the surface and heating it at a high temperature for about an hour.
Can I use my cast iron skillet without curing it?
Yes, you can use a cast iron skillet without curing it, but it may not have the same non-stick properties and could be prone to rusting.
What type of oil should I use to cure my cast iron skillet?
You can use a variety of oils to cure a cast iron skillet, such as vegetable oil, flaxseed oil, or lard.