


If you are a fan of chocolate, then you are probably familiar with the mesmerizing sight of a chocolate fountain. This delightful invention is not only a feast for the taste buds but also a feast for the eyes. Have you ever wondered how to use a chocolate fountain to create your own chocolatey masterpieces at home? Well, you’re in luck! In this video, we will show you step-by-step instructions on how to use a chocolate fountain.
First things first, you need to make sure your chocolate fountain is clean and ready for action. We recommend using high-quality chocolate that is specifically formulated for fountains. Chop the chocolate into small pieces and place them in the microwave-safe bowl. Microwave the chocolate in 30-second intervals, stirring in between, until it is fully melted and smooth.
Next, assemble the chocolate fountain by attaching the tiers. Make sure the motor is working properly and place the bowl at the base to catch the cascading chocolate. Slowly pour the melted chocolate into the basin of the fountain. Be careful not to overfill it, as this can cause a messy overflow. Once the chocolate starts flowing, adjust the temperature to maintain a smooth consistency.

Now comes the fun part! Dip a variety of delicious treats into the flowing chocolate. You can use fresh fruits like strawberries, bananas, or pineapple chunks. Marshmallows, pretzels, and cookies also make for fantastic dippers. Don’t forget to encourage your guests to get creative and personalize their own chocolate creations!
In conclusion, using a chocolate fountain is a simple and enjoyable way to wow your friends and family with a delectable treat. By following the instructions in this video, you will soon become a chocolate fountain expert and be able to create stunning chocolate displays that will be the highlight of any event. So go ahead, indulge in the chocolatey goodness and let the sweet memories flow!
What is a Chocolate Fountain
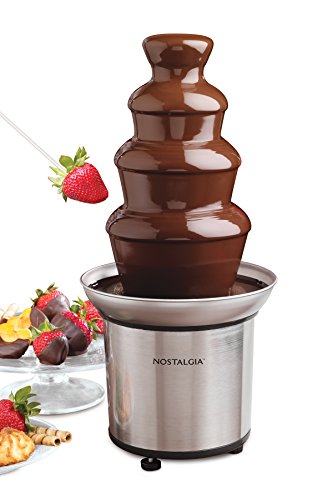
A chocolate fountain is a popular dessert attraction at parties, events, and weddings. It is a device that holds melted chocolate and allows it to flow smoothly and continuously over multiple tiers, resembling a cascading waterfall of chocolate.
Chocolate fountains are typically made up of a base, a tower with multiple tiers, and a heating element. The base contains a motor and a heating element that keeps the chocolate melted and at a consistent temperature. The tower is where the chocolate flows from the top tier to the bottom tier, creating the cascading effect.
Using a chocolate fountain is a fun and interactive way to enjoy chocolate. Guests can dip various foods, such as fruits, marshmallows, pretzels, or pastries, into the flowing chocolate. The continuous flow of the chocolate keeps it in a smooth and liquid state, making it easy to coat the dipping items.
Chocolate fountains come in different sizes, ranging from small tabletop models for home use to large commercial models for large-scale events. They can be rented or purchased, depending on the needs of the occasion.
Benefits of Using a Chocolate Fountain
A Chocolate fountain can be a fun and exciting addition to any event or gathering. Not only does it provide a delicious and visually appealing treat, but it also offers several other benefits.
1. Interactive Experience: A chocolate fountain allows guests to interact with their food in a unique and enjoyable way. They can dip a variety of fruits, marshmallows, or other treats into a flowing stream of melted chocolate, creating a personalized dessert experience.
2. Versatility: Chocolate fountains are versatile and can be used with different types of chocolate, including milk, dark, and white. This gives you the option to cater to various taste preferences and dietary restrictions of your guests.
3. Eye-catching Display: The flowing chocolate in a fountain creates a captivating visual display that is sure to attract attention and serve as a centerpiece for your event. It adds an elegant and luxurious touch to any dessert table.
4. Easy to Use and Clean: Chocolate fountains are designed to be user-friendly, making them easy to set up and operate. They often come with a removable basin and dishwasher-safe parts, making the cleaning process hassle-free.
5. Fun for All Ages: Whether you’re hosting a children’s birthday party or an elegant wedding reception, a chocolate fountain appeals to people of all ages. It brings out the inner child in everyone and adds an element of fun and excitement to any celebration.
6. Conversation Starter: A chocolate fountain naturally becomes a conversation starter among guests. It encourages social interaction and creates a relaxed and friendly atmosphere, making it a perfect addition to cocktail parties or networking events.
7. No Need for a Pastry Chef: With a chocolate fountain, you don’t need a professional pastry chef to create a stunning dessert display. It enables you to offer a gourmet dessert option without the need for complex preparation or baking skills.
In conclusion, a chocolate fountain offers numerous benefits, from providing an interactive and versatile dessert option to creating an eye-catching display. It is a simple, yet elegant addition to any event that is sure to impress your guests and leave a lasting impression.
How To Use a Chocolate Fountain Video
Using a chocolate fountain can be a fun and delicious way to add a touch of luxury to any event. Whether you’re hosting a wedding, a birthday party, or just a casual gathering with friends, a chocolate fountain can create a stunning centerpiece and provide a delightful treat for your guests. In this video, we will guide you through the steps to properly set up and use a chocolate fountain.
Gather Your Supplies
Before you begin, make sure you have all the necessary supplies. You will need a chocolate fountain, skewers or dipping tools, various foods for dipping (such as fruit, marshmallows, or pretzels), and of course, some delicious melted chocolate. Ensure that the chocolate is of high quality and specifically formulated for use in a chocolate fountain.
Set Up the Chocolate Fountain
Start by assembling the chocolate fountain according to the manufacturer’s instructions. Place it on a stable surface, as it can get quite heavy when filled with chocolate. Make sure the fountain is on a level surface to prevent any leaning or tipping during operation.
Next, fill the base of the fountain with the recommended amount of melted chocolate. Be careful not to overfill it, as this can cause spills and messes. Turn on the fountain and let the chocolate flow for a few minutes to ensure it is properly heated and flowing smoothly.
Prepare Your Dipping Foods
While the chocolate fountain is warming up, prepare your dipping foods. Wash and cut the fruits into bite-sized pieces, and set them aside. You can also lay out other dipping options, such as marshmallows or pretzels, on serving trays or platters.
Dip and Enjoy
Once the chocolate is flowing smoothly, it’s time to start dipping! Grab a skewer or dipping tool and carefully dip your chosen food item into the cascading chocolate. Rotate it to ensure all sides are coated, and let any excess chocolate drip back into the fountain.
Place the dipped food on a separate plate or tray to allow it to cool and harden. Repeat this process with other foods or variations of the same food item.
Remember to be mindful of hygiene and avoid double-dipping. Replace the skewers or dipping tools regularly to maintain cleanliness and prevent cross-contamination.
As the evening progresses, keep an eye on the chocolate level in the fountain. Add more melted chocolate as needed to ensure a continuous flow. Make sure to periodically stir the chocolate to prevent it from hardening or forming a skin.
In conclusion, using a chocolate fountain can be a delightful and interactive experience for all your guests. With these simple steps, you’ll be able to set up and use a chocolate fountain like a pro. So go ahead and indulge in the sweetness!
Step 1: Setting Up the Chocolate Fountain
Setting up the chocolate fountain is the first step to creating a delicious and visually appealing dessert display. Follow these steps to ensure a successful set up:
Gather the necessary supplies
Before setting up the chocolate fountain, make sure you have all the necessary supplies. This includes the chocolate fountain itself, a flat and stable surface to place it on, an electrical outlet nearby, and enough chocolate and skewers for dipping.
Assemble the fountain
Start by assembling the chocolate fountain according to the manufacturer’s instructions. This typically involves stacking the tiers of the fountain on top of each other, making sure they are securely attached. Make sure the auger is properly installed and centered in the base.
Note: It’s important to assemble the fountain on the surface where you plan to set it up, as it can be heavy and difficult to move once fully assembled.
Preheat the chocolate
Before pouring the chocolate into the fountain, preheat it by melting it in a microwave or a double boiler. Stir the chocolate occasionally to ensure smooth and even melting. Make sure to use high-quality chocolate that is specifically formulated for use in a chocolate fountain.

Tip: To add extra flavor to your chocolate, you can incorporate flavored extracts, such as vanilla or almond, during the melting process.
Once the chocolate is fully melted, pour it into the fountain base, making sure not to overfill it. Leave a small gap at the top to prevent any overflow or splattering during operation.
Remember: It’s always a good idea to have extra melted chocolate on hand in case you need to add more to the fountain during the event.
Step 2: Preparing the Chocolate
Before you can start using your chocolate fountain, you need to prepare the chocolate. Here is how you can do it:
1. Choose the Right Chocolate
When it comes to choosing the chocolate for your chocolate fountain, it is important to use a high-quality chocolate that is specifically designed for melting and flowing smoothly. You can use either dark, milk, or white chocolate based on your preference.
Pro tip: Make sure to use chocolate that is labeled as “couverture” or “fountain chocolate” as they are formulated to have a higher cocoa butter content, which helps in achieving a smooth flowing consistency.
2. Chop the Chocolate into small pieces
To ensure even melting, chop the chocolate into small, uniform pieces. This will help the chocolate to melt more quickly and evenly when it is melted in the microwave or over a double boiler.
Pro tip: It is recommended to use a serrated knife to chop the chocolate as it will help to prevent the chocolate from splintering.
3. Melt the Chocolate
You can melt the chocolate either in the microwave or over a double boiler. If you are using a microwave, place the chopped chocolate in a microwave-safe bowl and melt it in short bursts, stirring after each interval. If you are using a double boiler, place the chopped chocolate in the top bowl and heat it over simmering water, stirring constantly until melted.
Pro tip: Be careful not to overheat the chocolate as it can become grainy and lose its smooth texture. Stop heating as soon as the chocolate is fully melted.

4. Thin the Chocolate
After melting the chocolate, it may be too thick for the chocolate fountain. To thin it out, you can add a small amount of vegetable oil or cocoa butter and stir until well combined.
Pro tip: Add the oil or butter gradually, stirring well after each addition, until you achieve the desired consistency. Be careful not to add too much as it can cause the chocolate to become too thin.
Once you have prepared the chocolate, you are ready to move on to the next step of setting up and operating the chocolate fountain. Stay tuned for step 3!
Step 3: Melting the Chocolate
Before you can start using your chocolate fountain, you need to melt the chocolate. Here’s how:
1. Gather Your Ingredients
For melting the chocolate, you will need:
- Good quality chocolate
- Chopping board and knife
- Microwave-safe bowl or double boiler
2. Prepare the Chocolate
Start by chopping the chocolate into small, uniform pieces. This will help it melt evenly and prevent lumps.
3. Melt the Chocolate
You have two options for melting the chocolate:
- Microwave method: Place the chopped chocolate in a microwave-safe bowl. Heat it in the microwave in 30-second intervals, stirring well after each interval, until the chocolate is fully melted and smooth.
- Double boiler method: Fill a saucepan with an inch of water and place it over low heat. Place the chocolate in a heatproof bowl and set it on top of the saucepan, making sure the bottom of the bowl doesn’t touch the water. Stir the chocolate occasionally until it melts completely.
Remember to be patient and gentle when melting the chocolate, as overheating can cause it to seize and become lumpy.
Once the chocolate is melted, it’s ready to be poured into the fountain. Proceed to the next step to learn how to set up and use your chocolate fountain.
Q&A
What is a chocolate fountain?
A chocolate fountain is a device that is used to melt chocolate and keep it in a liquid state to be used as a dipping sauce. It consists of a basin at the base where the chocolate is melted and a tower in the middle with multiple tiers or layers through which the melted chocolate is circulated and flows down in a cascading manner.
How does a chocolate fountain work?
A chocolate fountain works by heating the chocolate in the basin at the base of the device until it reaches a liquid state. The melted chocolate is then pumped up through the tower and flows over the tiers, creating a cascading effect. The chocolate is continuously circulated and reused in this process, providing a constant flow of melted chocolate for dipping various food items.
What types of chocolate can be used in a chocolate fountain?
A chocolate fountain can be used with different types of chocolate, such as dark chocolate, milk chocolate, white chocolate, and even flavored chocolate. It is important to choose high-quality chocolate that has a high cocoa content, as this will ensure a smooth and delicious flowing consistency. The chocolate should also be tempered before being used in the fountain to achieve the best results.
What foods can be dipped in a chocolate fountain?
There is a wide range of foods that can be dipped in a chocolate fountain. Some popular options include fruits like strawberries, bananas, and pineapple chunks, marshmallows, pretzels, cookies, and even pieces of cake. The possibilities are endless, and you can get creative with your choices depending on your preferences and the occasion.


