Have you noticed that the seal on your freezer is not functioning properly? Is it letting in warm air and causing your freezer to not cool properly? If so, don’t panic! You may be able to fix the seal on your freezer on your own, without having to call a professional technician.
The seal, also known as a gasket, plays a crucial role in keeping your freezer airtight. It creates a seal between the door and the freezer, preventing warm air from entering and cold air from escaping. Over time, the seal can become worn out, torn, or even dirty, which can lead to inefficiency and increased energy consumption.
The first thing you should do is assess the condition of the seal. Inspect it carefully for any visible signs of damage, such as cracks, tears, or gaps. If you notice any of these issues, it’s a clear indication that the seal needs to be fixed or replaced. In some cases, the seal may just need a good cleaning, especially if it’s covered in dirt or grime. In this case, a warm, soapy water solution and a soft cloth can do wonders.
If the seal is damaged, you have a few options to fix it. One option is to purchase a replacement seal from the manufacturer or an appliance repair store. Make sure to have the make and model number of your freezer handy to ensure you get the correct seal. To replace the seal, remove the old one by carefully peeling it off and cleaning any residual adhesive from the door. Then, apply the new seal by pressing it firmly onto the door, making sure it is aligned properly.
Another option is to attempt to repair the seal using adhesive or sealant. This can be a more temporary solution, but it may work if the damage is minor. Clean the damaged area thoroughly, and then apply the adhesive or sealant according to the manufacturer’s instructions. Allow it to dry completely before closing the freezer door.
In conclusion, it is possible to fix the seal on a freezer yourself, depending on the extent of the damage. By assessing the condition of the seal and choosing the appropriate solution, you can ensure that your freezer functions efficiently once again, saving you time and money in the long run.
Common Issues with Freezer Seals
A properly functioning freezer seal is important for keeping the cold air inside and preventing warm air from entering. However, over time, freezer seals can develop various problems that can affect their performance. Some common issues with freezer seals include:
-
Worn or Damaged Seals
Freezer seals can become worn or damaged due to regular use, age, or accidents. Cracks, tears, or gaps in the seal can result in air leakage, reducing the efficiency of the freezer and leading to increased energy consumption. Inspect the seal regularly and replace it if any signs of wear or damage are present.
-
Dirt and Debris
Dust, food particles, and other debris can accumulate on the freezer seal over time. This build-up can prevent the seal from forming a tight bond with the freezer, allowing cold air to escape. Clean the seal regularly with mild soap and water to remove any dirt or debris.
-
Improper Installation
If the freezer seal is not installed correctly, it may not provide a proper seal. Make sure the seal is aligned properly and evenly covers the entire door. Check the installation instructions provided by the manufacturer and make any necessary adjustments.
-
Warped or Misaligned Seals
Freezer seals can become warped or misaligned over time, especially if exposed to extreme temperature changes or physical pressure. A warped or misaligned seal may not create a proper seal, leading to air leakage. If the seal appears distorted, try repositioning it or consider replacing it.
-
Depleted Magnetism
Some freezer seals use magnets or magnetic strips to provide added sealing strength. Over time, these magnets can lose their magnetism, resulting in a weaker seal. If you notice the seal doesn’t cling tightly to the freezer, it may be time to replace the magnets or the entire seal.
Regular maintenance and inspection of the freezer seal can help identify and resolve these common issues. Properly maintaining the seal will not only improve the efficiency of the freezer but also prolong its lifespan.
How to Recognize a Damaged Seal
When it comes to the seal on your freezer, it is important to recognize any signs of damage early on. A damaged seal can result in cold air leakage, leading to increased energy consumption and potentially spoilage of food. Here are some ways to recognize if your freezer seal is damaged:
1. Visual Inspection
Take a close look at the seal around your freezer door. Look for any visible cracks, tears, or gaps in the seal. These can be a sign of wear and tear or damage, which may need to be repaired or replaced.
2. Cold Air Leakage
If you notice a noticeable amount of cold air escaping from your freezer, it may be a sign of a damaged seal. Place your hand near the edge of the door while the freezer is running and feel for any drafts or cold air coming from the seal.
3. Difficulty in Closing the Door
If you find it increasingly difficult to close the door of your freezer, it could be due to a damaged seal. A damaged seal may cause the door to not align properly or create resistance when closing, indicating that it needs repair or replacement.
4. Ice Build-Up
If you notice excessive ice build-up around the seal or on the interior walls of the freezer, it may be a sign of a damaged seal. A damaged seal can result in moisture entering the freezer, causing frost and ice to accumulate.
Recognizing a damaged seal early on can help prevent further damage and ensure efficient operation of your freezer. If you notice any signs of a damaged seal, it is advisable to contact a professional technician or service provider to diagnose and repair the issue.
Steps to Fix a Leaking Seal
If your freezer’s seal is leaking, here are the steps you can follow to fix it:
|
Step 1: |
Inspect the seal for any visible damages such as cracks or holes. This could be causing the leak. |
|
Step 2: |
If you find any damages, use a damp cloth to clean the area around the seal. |
|
Step 3: |
Apply a silicone-based sealant to the damaged area. Make sure to spread it evenly and cover the entire damaged section. |
|
Step 4: |
Allow the sealant to dry completely, as per the manufacturer’s instructions. This may take a few hours. |
|
Step 5: |
Once the sealant is dry, check the seal for any remaining leaks. If there are still leaks, repeat steps 3 and 4 until the seal is fully repaired. |
|
Step 6: |
After the seal is completely dry and there are no more leaks, test the freezer to ensure it is working properly. |
Do-It-Yourself vs Professional Repair
When it comes to fixing the seal on a freezer, you have two options: do-it-yourself or hire a professional repair service. Both options have their advantages and disadvantages, so it’s important to consider your specific situation before making a decision.
If you have some basic handyman skills and access to the right tools, you may be able to fix the seal on your freezer yourself. There are many online tutorials and videos available that can guide you through the process step-by-step. DIY repairs can save you money, as you won’t have to pay for a professional’s services. However, it’s important to note that if you make a mistake during the repair process, it could lead to further damage and additional costs down the line.
On the other hand, hiring a professional repair service ensures that the job is done correctly and efficiently. Professionals have the necessary experience and expertise to assess the problem and provide a long-lasting solution. They also have access to specialized tools and equipment that may not be readily available to the average homeowner. Choosing professional repair may be more expensive upfront, but it can save you money in the long run by preventing further damage and extending the lifespan of your freezer.
Ultimately, the decision between do-it-yourself and professional repair depends on your comfort level with DIY projects, your budget, and the severity of the problem. If you’re confident in your ability to tackle the repair, and it’s a minor issue, DIY may be a suitable option. However, if you’re unsure or the problem is complex, it’s advisable to seek professional help to ensure a proper and lasting fix.
Preventing Seal Damage in the Future
Keeping the seal on your freezer intact is crucial for ensuring its proper functioning and energy efficiency. Here are some tips to help prevent seal damage and maintain the quality of your freezer:
1. Regular Cleaning
Regularly clean the seal of your freezer with a mild detergent and warm water. This will remove any dirt, grime, or residue that can cause the seal to deteriorate over time. Avoid using abrasive cleaners or solvents, as these can damage the seal.
2. Gentle Handling
Handle the freezer door with care to avoid unnecessary stress on the seal. Avoid slamming or forcefully closing the door, as this can cause the seal to weaken or tear. Teach other household members to handle the freezer door gently as well.
3. Proper Loading
When loading items into your freezer, avoid placing them in a way that puts excessive pressure on the seal. Distribute the weight evenly and avoid overloading the freezer, as this can put strain on the seal and lead to damage over time.
4. Regular Maintenance
Have your freezer inspected and maintained by a professional on a regular basis. They can check the condition of the seal and make any necessary repairs or replacements. Regular maintenance can help prevent seal damage and prolong the lifespan of your freezer.
| Do: | Don’t: |
|---|---|
| – Clean the seal regularly with mild detergent and warm water | – Use abrasive cleaners or solvents to clean the seal |
| – Handle the freezer door gently | – Slam or forcefully close the freezer door |
| – Load items evenly and avoid overloading the freezer | – Place items in a way that puts excessive pressure on the seal |
| – Have your freezer regularly inspected and maintained | – Neglect regular maintenance |
By following these tips, you can prevent seal damage and ensure the longevity and efficiency of your freezer.
FAQ
How do I know if the seal on my freezer needs fixing?
To determine if the seal on your freezer needs fixing, you can perform a simple test. Close the door of the freezer and place a dollar bill between the door and the seal. If you can easily pull the bill out without any resistance, it indicates that the seal is not properly sealing the door. This means that it may need to be fixed or replaced.
Can I fix the seal on my freezer myself?
Yes, you can fix the seal on your freezer yourself. The process typically involves removing the old seal, cleaning the area, and then installing the new seal. You can purchase replacement seals from a variety of sources, such as appliance stores or online retailers. Make sure to follow the instructions provided with the replacement seal and use the appropriate tools for the job.
What tools do I need to fix the seal on my freezer?
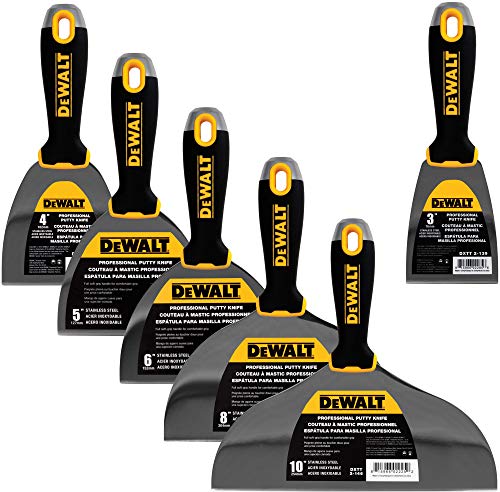
The tools required to fix the seal on your freezer may vary depending on the specific model and type of freezer. However, some common tools that may be necessary include a screwdriver, pliers, a putty knife or scraper for removing the old seal, and possibly a rubber mallet for installing the new seal securely. It is always a good idea to consult the user manual or manufacturer’s instructions for your specific freezer model to ensure you have the correct tools for the job.

How often should I check the seal on my freezer?
It is recommended to check the seal on your freezer at least once a year. Over time, the seal can wear out or become damaged, which can result in air leaks and reduced efficiency. By regularly inspecting the seal, you can identify any issues early and take prompt action to fix or replace it as necessary. Additionally, if you notice any signs of frost or condensation inside the freezer, it may indicate a problem with the seal and should be checked immediately.
What are the benefits of fixing the seal on my freezer?
Fixing the seal on your freezer offers several benefits. Firstly, it helps to maintain the temperature inside the freezer, ensuring that your food remains properly frozen and safe to consume. A sealed freezer also reduces energy waste and can lead to lower electricity bills. Additionally, a properly functioning seal prevents warm air from entering the freezer, which can cause excessive frost build-up and strain the compressor. By fixing the seal, you can prolong the lifespan of your freezer and prevent potential breakdowns or malfunctions.


