Pears are a delicious fruit that is often enjoyed fresh, but did you know that you can also store them in the freezer for future use? Freezing pears is a great way to preserve their flavor and texture, allowing you to enjoy them even when they’re out of season.
Before you start freezing pears, it’s important to note that not all varieties are suitable for freezing. Firm and crisp pears, such as Bosc and Anjou, are the best choices. Softer varieties, like Bartlett and Comice, may become mushy when thawed. Additionally, it’s important to choose ripe pears that are not overly soft or bruised.
To freeze pears, you’ll need to prepare them first. Start by washing the pears thoroughly and then peeling them. Once peeled, you can either leave the pears whole or slice them into quarters or eighths. If you prefer, you can also remove the cores and stems at this point.
After preparing the pears, it’s important to prevent them from oxidizing and turning brown. You can do this by treating the pears with a solution of water and lemon juice. For each quart of water, add two tablespoons of lemon juice. Soak the pears in this solution for a few minutes before draining them well.
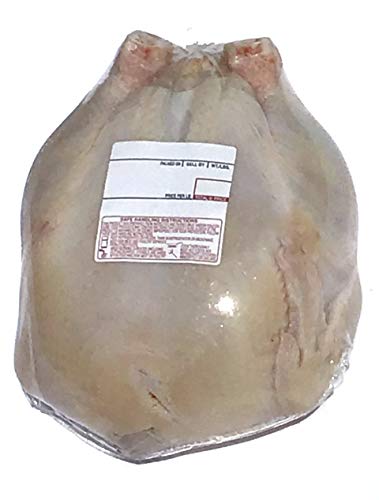
Finally, it’s time to pack the pears into airtight containers or freezer bags. Be sure to leave some room at the top of the container, as the pears will expand as they freeze. Seal the containers tightly and label them with the date. Frozen pears can be stored in the freezer for up to 10-12 months.
When you’re ready to use the frozen pears, simply remove them from the freezer and allow them to thaw in the refrigerator overnight. They can be used in a variety of recipes, such as pies, cakes, smoothies, and even as a topping for oatmeal or yogurt. Enjoy the fresh taste of pears all year round with this simple freezing method!
Why Store Pears in the Freezer?
Freezing pears is an excellent way to preserve their freshness and flavor for an extended period of time. Whether you have a surplus of pears from your garden or want to take advantage of a good sale, storing them in the freezer ensures that you can enjoy them at a later date.
Prolongs Shelf Life
By freezing pears, you can significantly extend their shelf life. Freshly picked pears have a relatively short lifespan, usually lasting only a few days to a couple of weeks at best. Freezing them allows you to keep them for several months, giving you more flexibility in using them in various recipes or enjoying them as a healthy snack.
Preserves Freshness and Flavor
When properly frozen, pears retain their fresh taste and texture. The low temperatures in the freezer help to slow down the enzymatic processes that cause fruits to ripen and eventually spoil. This means that when you thaw the frozen pears, they will still have their natural sweetness, juiciness, and appealing crunch.
Freezing the pears also locks in their nutritional value. Pears are a great source of dietary fiber, vitamins, and minerals. By freezing them at their peak ripeness, you can enjoy these nutrients even during the off-season when fresh pears may not be readily available.
Additionally, by freezing pears, you can save not only money but also reduce food waste. Instead of letting overripe or excess pears go to waste, you can freeze them for later use. This way, you can enjoy delicious pear-based dishes at any time, without worrying about them spoiling.
Overall, freezing pears is a convenient and effective method of preserving their freshness and flavor. By following proper freezing techniques, you can enjoy the taste of ripe pears all year round.
Selection and Preparation
In order to properly store pears in the freezer, it is important to start with high-quality fruit. Here are some tips for selecting and preparing pears for freezing:
Selecting Pears
Choose pears that are ripe but still firm. Look for pears that have a slight give when gently squeezed but are not overly soft or mushy. Avoid pears that have blemishes, bruises, or signs of decay.
Prepping Pears
Before freezing pears, it is important to properly prepare them. Follow these steps:
- Wash the pears thoroughly under cool running water to remove any dirt or debris.
- Peel the pears using a vegetable peeler or paring knife. Removing the skin will improve the texture of the frozen pears.
- Cut the pears in half and remove the core and seeds. You may also choose to slice or dice the pears into smaller pieces.
- Place the prepared pears into a bowl of acidulated water to prevent browning. To make the acidulated water, simply mix one tablespoon of lemon juice or vinegar with one quart of water.
Once the pears are prepared, they are ready to be frozen. Refer to the next section for instructions on how to properly store pears in the freezer.
Blanching Pears
Blanching pears before freezing them helps to preserve their quality and texture. It also helps to prevent browning and kill any bacteria or enzymes that may be present on the fruit.
To blanch pears, follow these steps:
1. Prepare the pears
Wash the pears thoroughly and remove any stems or leaves. Peel the skin off if desired.
2. Prepare a pot of boiling water
Fill a pot with enough water to cover the pears and bring it to a rolling boil.
3. Blanch the pears
Place the pears into the boiling water for about 1-2 minutes. This blanching process will help to kill bacteria and enzymes.
4. Cool the pears
Remove the pears from the boiling water and immediately transfer them to a bowl filled with ice water. Let them sit for about 2-3 minutes to cool and stop the cooking process.
5. Dry and freeze the pears
Drain the cooled pears and pat them dry with a clean kitchen towel or paper towels. Once dry, transfer the pears to a freezer-safe container or bag. Label the container with the date and store them in the freezer.
Note: Blanching pears is an optional step, but it can help to maintain the quality of the fruit during freezing. If you choose not to blanch them, the pears may turn brown and lose their texture over time in the freezer.
Packaging and Storing
Once you have prepared your pears for freezing, it is important to package them properly to keep them fresh and prevent freezer burn.
1. Freezer bags or containers
You can use either freezer bags or airtight containers to store your pears. Make sure they are specifically made for the freezer to prevent moisture loss and protect the fruit from freezer burn.
2. Preparing the bags or containers
If using freezer bags, squeeze out as much air as possible before sealing. This will help prevent the formation of ice crystals. If using containers, leave some space at the top to allow the pears to expand as they freeze.
3. Labeling
It’s important to label your packages with the date of freezing to keep track of their freshness. This will help you prioritize which pears to use first and avoid keeping them stored in the freezer for too long.
4. Storage in the freezer
Place your packaged pears in the coldest part of your freezer, ideally at a temperature of 0°F (-18°C) or below. This will help maintain their quality and freshness for a longer period of time.
| Method | Duration |
|---|---|
| Whole pears | 8 to 12 months |
| Sliced pears | 10 to 12 months |
| Peeled and cored pears | 10 to 12 months |
Remember that the quality of the pears may deteriorate slightly after being frozen for an extended period of time, so it is best to consume them within the recommended duration.
Using Frozen Pears
Frozen pears can be a versatile ingredient to have on hand in your freezer. They can be used in a variety of recipes and provide a convenient way to enjoy the taste of fresh pears throughout the year.
1. Thawing Frozen Pears:
To thaw frozen pears, simply transfer them from the freezer to the refrigerator and allow them to thaw overnight. This slow thawing process will help the pears retain their texture and flavor.
2. Using Frozen Pears in Recipes:
Frozen pears can be used in both cooked and uncooked recipes. They can add sweetness and a refreshing taste to smoothies, fruit salads, and yogurt parfaits. When using frozen pears in baked goods like pies or tarts, be sure to adjust the cooking time accordingly, as the additional moisture from the frozen pears may require a longer baking time.
3. Tips for Freezing Pears:
When freezing pears, it is important to choose ripe, but firm pears. Wash and peel the pears, removing any bruised or damaged areas. Slice or dice the pears as desired, and then place them in airtight containers or freezer bags. Be sure to label the containers with the date to help keep track of their freshness.
Remember that frozen pears may have a slightly different texture compared to fresh ones, but they can still be delicious and convenient to use in a variety of recipes. Experiment with different ways to enjoy your frozen pears, and enjoy the taste of summer all year long!
Tips and Tricks
When it comes to storing pears in the freezer, there are a few tips and tricks that can help you get the best results:
Choose the right pears: Select ripe and firm pears for freezing. Avoid using overly ripe or mushy pears, as they may not freeze well.
Wash and peel: Before freezing, wash the pears thoroughly to remove any dirt or residue. If desired, you can also peel the pears before freezing them.
Remove cores and seeds: Cut the pears in half and use a spoon to remove the cores and seeds. This will help prevent any bitterness or toughness in the frozen pears.
Slice or dice: Depending on your preference, you can slice or dice the pears before freezing. This will make them easier to use later on in recipes or smoothies.
Treat with lemon juice: To prevent browning, treat the sliced or diced pears with lemon juice before freezing. This will help maintain their natural color and flavor.
Use freezer-safe containers: Transfer the prepared pears to freezer-safe containers or bags. Make sure to leave some headspace to allow for expansion during freezing.
| Tips and Tricks |
|---|
| Choose ripe and firm pears |
| Wash and peel |
| Remove cores and seeds |
| Slice or dice |
| Treat with lemon juice |
| Use freezer-safe containers |
Label and date: Don’t forget to label the containers with the date of freezing. This will help you keep track of their storage time and ensure that you use them in a timely manner.
Store properly: Place the containers in the freezer and make sure they are stored in a way that prevents them from getting crushed or damaged. Try to keep them in a single layer, if possible.
Use within recommended time: While frozen pears can last for several months, it is best to use them within 8 to 12 months for optimal flavor and quality.
By following these tips and tricks, you can enjoy the taste of fresh pears all year round!
FAQ
What is the best way to store pears in the freezer?
The best way to store pears in the freezer is by first peeling and coring them, then slicing them into desired sizes. Next, you should blanch the slices in boiling water for about 2 minutes, then transfer them to an ice bath to halt the cooking process. After they have cooled, drain them and pat them dry. Place the sliced pears in airtight freezer bags or containers, removing as much air as possible before sealing. Label the bags or containers with the date and store them in the freezer. Frozen pears can last up to 10-12 months.
Can I store whole pears in the freezer?
Yes, you can store whole pears in the freezer, but it’s recommended to peel, core, and slice them before freezing for better long-term storage. Whole pears may develop a mushy texture when thawed, so slicing them allows for more flexibility in how you can use them later. If you prefer to store whole pears, make sure they are ripe but still firm. Place them in airtight freezer bags or containers, removing as much air as possible before sealing. Label the bags or containers with the date and store them in the freezer. Frozen whole pears can last up to 6-8 months.