


Are you a beer lover who wishes to have a convenient way to store and dispense your favorite brew? Converting a chest freezer into a kegerator might be the perfect solution for you! A kegerator is a modified refrigerator that is specifically designed to store and dispense kegs of beer. By converting a chest freezer, you can create your own custom kegerator at a fraction of the cost of buying a new one.
Converting a chest freezer into a kegerator is a relatively simple process that requires a few basic tools and some patience. First, you will need to gather the necessary materials, such as a chest freezer, a temperature controller, a CO2 tank and regulator, beer lines, and faucets. These items can be easily purchased online or at your local homebrewing store.
Once you have all the materials, you can then begin the conversion process. Start by cleaning out the chest freezer and removing any shelves or drawers. Next, install the temperature controller, which will allow you to regulate the internal temperature of the kegerator. Attach the CO2 tank and regulator to the freezer, ensuring a secure connection. Connect the beer lines to the faucets and feed them through the collar of the freezer. Finally, test the system and make any necessary adjustments to ensure everything is working properly.
Converting a chest freezer to a kegerator offers several advantages. First, it provides a dedicated space for storing and dispensing kegs of beer, allowing you to have a continuous supply on hand. Second, it allows you to control the temperature of your beer, ensuring it is always served at the perfect temperature. Finally, it is a cost-effective option, as converting a chest freezer is typically much cheaper than purchasing a pre-built kegerator.
If you are a beer enthusiast looking for a fun and practical project, converting a chest freezer into a kegerator is the way to go. With a little time and effort, you can create your own customized kegerator that will impress your friends and enhance your beer-drinking experience.
Overview of Converting Chest Freezer to Kegerator
Converting a chest freezer into a kegerator is a popular DIY project among beer enthusiasts. It allows you to have a cold and convenient tap in your home to enjoy a fresh pour of your favorite beer anytime you want.
Why Convert a Chest Freezer?
Chest freezers are an ideal choice for converting into kegerators due to their spaciousness and efficient cooling capabilities. The insulated design of chest freezers helps to maintain consistent temperatures, ensuring that your beer stays cold and refreshing.
In addition, chest freezers provide ample space to accommodate multiple kegs, allowing you to have a variety of beers on tap. This is especially beneficial if you enjoy experimenting with different types of brews or hosting parties.
The Conversion Process
The process of converting a chest freezer into a kegerator involves a few essential steps.
- Cleaning: Start by thoroughly cleaning the chest freezer to remove any dirt or debris. This will ensure that your kegerator is sanitary and ready for use.
- Temperature Control: Install a temperature controller to regulate the cooling of the freezer. This will allow you to maintain the desired temperature for storing and serving your beer.
- Drilling Holes: Drill holes in the lid or side of the freezer for the beer lines and CO2 lines. Be careful to choose the right size and location for optimal functionality.
- Line Installation: Connect the beer and CO2 lines to the appropriate taps and regulators. Ensure they are securely fastened to prevent leaks.
- Accessories: Install additional accessories like a drip tray, pressure gauge, and tap handles to enhance the functionality and aesthetics of your kegerator.
It is important to note that converting a chest freezer into a kegerator requires some basic knowledge of DIY skills and electrical wiring. If you are unsure, it is advisable to seek help from a professional to ensure safety and proper installation.

Overall, converting a chest freezer into a kegerator is a rewarding project that allows you to enjoy the luxury of having draft beer on tap at home. With proper planning and execution, you can create a customized kegerator that suits your beer preferences and adds a touch of style to your space.
Benefits of Converting a Chest Freezer
Converting a chest freezer into a kegerator offers several benefits that make it a popular choice among beer enthusiasts:
Cost Savings: Converting a chest freezer is a cost-effective option compared to buying a commercial kegerator. Chest freezers can be easily found at affordable prices, especially if you opt for a second-hand unit.
Customization: Converting a chest freezer allows you to customize the kegerator based on your specific needs and preferences. You can choose the number of taps, install temperature controls, add drip trays, and even incorporate additional storage space for bottles and keg accessories.
Temperature Control: Chest freezers are designed to provide optimal temperature control and insulation, making them ideal for maintaining beer at the perfect serving temperature. With the right temperature controller, you can accurately control and adjust the temperature to suit your beer type.
Storage Capacity: Chest freezers typically have a larger storage capacity compared to commercial kegerators. This means you can store multiple kegs and have a variety of beer options available for your guests or personal enjoyment.
Long-Term Storage: A converted chest freezer can also double as a long-term storage solution for your kegs. Many beer styles benefit from aging, and a chest freezer provides a controlled environment for aging beer, maintaining its quality over time.
DIY Project: Converting a chest freezer into a kegerator can be a fun and rewarding DIY project. It allows you to showcase your skills and creativity while creating a personalized kegerator that reflects your style and passion for beer.
Overall, converting a chest freezer into a kegerator offers cost savings, customization options, precise temperature control, ample storage capacity, and the satisfaction of completing a DIY project. It’s a practical and enjoyable solution for beer lovers who want to enjoy draft beer at home.
Choosing the Right Chest Freezer
When converting a chest freezer into a kegerator, selecting the right chest freezer is crucial. Here are some important factors to consider before making your purchase:
Size and Capacity:
First, you need to determine the size and capacity of the chest freezer that will best meet your needs. Consider the number of kegs you plan to have on tap at once and the space available in your home or bar. It’s important to choose a freezer that can accommodate your desired number of kegs without overcrowding or wasting space.
Temperature Control:
Look for a chest freezer that has an adjustable temperature control feature. Temperature control is vital for maintaining the ideal temperature range for storing and dispensing beer. Most chest freezers have a built-in thermostat, but it’s always a good idea to double-check that it offers a wide enough temperature range and accuracy.
Frost-Free or Manual Defrost:
Consider whether you want a frost-free or a manual defrost chest freezer. Frost-free freezers automatically defrost themselves, preventing ice buildup and eliminating the need for regular maintenance. On the other hand, manual defrost freezers require occasional defrosting to remove accumulated frost. Each option has its advantages and disadvantages, so choose the one that suits your preferences and needs.
Energy Efficiency:
Choosing an energy-efficient chest freezer can help save on electricity bills in the long run. Look for models with the Energy Star label, as they meet the strict energy efficiency guidelines set by the Environmental Protection Agency (EPA). These freezers are designed to consume less energy while still providing excellent performance.
Convenience Features:
Consider any additional features or conveniences that you may need. This could include features like interior lighting, adjustable shelves, a lockable lid, or a removable storage basket. These features can enhance the overall usability and functionality of your kegerator.
In conclusion, selecting the right chest freezer is essential for converting it into a kegerator successfully. Take the time to evaluate your needs and consider the factors mentioned above to ensure that you choose a chest freezer that suits your requirements and provides optimal performance for your keg storage and dispensing needs.
Supplies Needed for Conversion
Converting a chest freezer to a kegerator requires a few key supplies to ensure a successful transformation. Before getting started, make sure you have the following items:
1. Chest Freezer
The first and most important item you’ll need is a chest freezer. This will serve as the base for your kegerator. Look for a freezer that is large enough to accommodate the number of kegs you plan to have on tap.
2. Temperature Controller
A temperature controller is necessary to regulate the temperature inside the kegerator. This will allow you to set and maintain the optimal temperature for storing and dispensing your beer. There are various types of temperature controllers available, so choose one that suits your needs and budget.
3. CO2 Tank and Regulator
CO2 is an essential component in serving draft beer. You’ll need a CO2 tank to carbonate and dispense the beer. A regulator is also necessary to control the pressure of the gas as it flows into the keg. Make sure to choose the appropriate size CO2 tank based on your kegerator setup.
4. Kegs and Couplers
Of course, you’ll need kegs to store your beer. It’s important to select the correct style and size of kegs for your kegerator. Additionally, you’ll need compatible couplers to connect the kegs to the CO2 tank and beer lines. Make sure to choose the proper couplers based on the type of kegs you’ll be using.
5. Beer Lines and Faucets
Beer lines and faucets are essential for dispensing your beer. You’ll need food-grade beer lines to connect the keg to the faucet, allowing the beer to flow smoothly. Consider the length and diameter of the beer lines to minimize foaming and maintain optimal carbonation levels.
6. Drip Tray
A drip tray is a practical addition to your kegerator setup. It will catch any drips or spills that may occur during the dispensing process, keeping your kegerator clean and tidy. Choose a drip tray that is compatible with the size of your kegerator and easy to clean.
7. Cleaning Supplies
Keeping your kegerator clean is essential for maintaining the quality and taste of your beer. Make sure to have cleaning supplies on hand, including dedicated keg cleaning brushes, a cleaning solution, and sanitizing solution. Regular cleaning will prevent the buildup of bacteria and ensure the longevity of your kegerator.
By gathering these supplies, you’ll have everything you need to convert a chest freezer into a fully functioning kegerator. Remember to adhere to safety guidelines and follow instructions carefully to ensure a successful conversion process.
Step-by-Step Guide to Converting
Converting a chest freezer into a kegerator is a great project for beer enthusiasts who want to have a tap at home and enjoy their favorite brews on draft. With a few basic tools and some supplies, you can easily transform your freezer into a keg storage and dispensing system. Here is a step-by-step guide to help you through the process:
|
Step 1: Gather the Supplies Before you begin, make sure you have all the necessary supplies. This includes a chest freezer, a temperature controller, CO2 regulator, keg coupler, beer lines, faucet, and shank. |
Step 2: Measure and Mark Measure the size of your kegs and mark where you want the tap to be installed on the freezer lid. Make sure there is enough space for the keg(s) and the equipment. |
|
Step 3: Drill the Hole Using a hole saw drill bit, carefully drill a hole for the shank at the marked location. Be cautious to avoid damaging the freezer walls or lid. |
Step 4: Install the Shank Insert the shank through the hole from the inside of the lid, and secure it with a locking nut and washer on the outside. Ensure a tight fit to prevent any leaks. |
|
Step 5: Connect the Beer Lines Connect the beer lines to the shank on one end, and the keg coupler on the other. Use a hose clamp to secure the connection and prevent any air or beer leakage. |
Step 6: Set Up the Temperature Controller Mount the temperature controller on the side of the freezer and plug it in. Set the desired temperature for your kegs and connect the freezer power cord to the controller. |
|
Step 7: Attach the Faucet Screw the faucet onto the shank and tighten it. Make sure it is properly aligned and facing the right direction for easy pouring. |
Step 8: Connect the CO2 Regulator Attach the CO2 regulator to the gas-in port of the keg coupler. Adjust the pressure according to your beer’s carbonation level and connect the regulator to a CO2 tank. |
|
Step 9: Test for Leaks Before adding your keg(s), pressurize the system and check for any leaks. Spray a mixture of soapy water on the connections and look for bubbles, which indicate leaks. |
Step 10: Add the Keg(s) Once the system is leak-free, place your keg(s) inside the freezer and close the lid. Ensure that the temperature controller maintains the desired temperature for optimal beer enjoyment. |
By following these steps, you can successfully convert your chest freezer into a kegerator and start pouring refreshing draft beer in the comfort of your own home.
Installing the Kegerator Components
Once you have prepared your chest freezer, it’s time to install the necessary components to turn it into a kegerator. Follow these steps to ensure a successful installation:
1. Choose the Right Conversion Kit
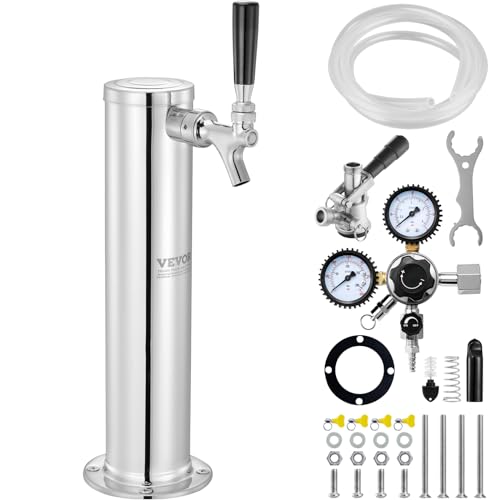
Start by selecting a kegerator conversion kit that fits your needs and the size of your chest freezer. Conversion kits typically include items such as a CO2 tank, regulators, beer lines, faucets, and a keg coupler. Make sure to choose a kit that is compatible with your beer preference and desired setup.
2. Drill Holes for Beer Lines and Faucets
Using a drill and appropriate drill bit, carefully drill holes in the top of the chest freezer for the beer lines and faucets. It’s important to position the holes strategically to ensure easy access to your kegs and proper flow of beer.
3. Install Beer Lines and Faucets
Thread the beer lines through the drilled holes and secure them with appropriate fittings. Connect the beer lines to the keg coupler and faucet. Make sure all connections are tight and free from leaks.
4. Mount the CO2 Tank and Regulator
Attach the CO2 tank to the back of the chest freezer using tank brackets or a secure mounting system. Connect the CO2 regulator to the tank and ensure the regulator is set to the correct pressure. This will control the carbonation level of your beer.
5. Test the System
Before placing any kegs in the kegerator, it’s crucial to test the system for leaks and functionality. Open the CO2 tank valve and check for any leaks in the connections. Pour a small amount of beer to check if the faucet is working properly. Make any necessary adjustments or repairs before proceeding.
6. Set the Temperature
Set the temperature control of your chest freezer to the desired level for serving beer. Typically, beer should be stored and served at a temperature between 36-40°F (2-4°C). Use a digital thermometer to monitor and adjust the temperature accordingly.
Once you have completed the installation of the kegerator components, you can begin enjoying your favorite draft beer from the comfort of your home. Cheers!
Properly Sealing the Chest Freezer
When converting a chest freezer into a kegerator, it is crucial to properly seal the freezer to ensure that it maintains a consistent temperature and prevent any leaks. Here are the steps to properly seal the chest freezer:
1. Clean the Freezer
Before sealing the chest freezer, make sure to clean it thoroughly. Remove any food, ice, or dirt that may be present. Use warm soapy water or a mild cleaning agent to wipe down the interior and exterior surfaces. Rinse the freezer with clean water and dry it completely.
2. Install Weatherstripping
Weatherstripping is an essential component in sealing the chest freezer. It helps create an airtight seal, preventing any air leakage. Measure the dimensions of the freezer lid and cut the weatherstripping to fit. Peel off the adhesive backing and press the weatherstripping firmly onto the lid, ensuring that it covers the entire sealing area.
3. Apply Silicone Sealant
Using a silicone sealant is another effective way to seal the chest freezer. Apply a thin bead of silicone sealant along the edges of the lid where it makes contact with the freezer body. Smooth the sealant using your finger or a caulking tool to ensure a tight seal. Allow the sealant to dry completely according to the manufacturer’s instructions before proceeding to the next step.
4. Check for Leaks
Once the weatherstripping and silicone sealant have dried, it is crucial to check for any leaks. Close the lid and press down firmly to create a seal. Use a flashlight to inspect the inside of the freezer for any visible light leakage. Additionally, you can perform a dollar bill test by closing the lid on a dollar bill and pulling it out. If you can easily pull out the bill, it may indicate a leak that needs to be addressed.
By properly sealing the chest freezer, you can ensure that your kegerator maintains a consistent temperature and prevents any unwanted air or liquid leakage.

Troubleshooting and Maintenance Tips
Converting a chest freezer to a kegerator can be a rewarding project, but it’s important to be aware of potential troubleshooting and maintenance issues that may arise. Here are some tips to help you overcome common problems:
Temperature Control
One of the key challenges with converting a chest freezer to a kegerator is maintaining the right temperature for your beer. If you notice that the temperature is too cold or too warm, check the following:
| Issue | Possible Solution |
|---|---|
| Temperature too cold | Check the thermostat setting and adjust it accordingly. You may also need to insulate the freezer to prevent excessive cooling. |
| Temperature too warm | Ensure that the freezer is properly sealed. Inspect the gaskets and replace if necessary. Also, make sure that the freezer is not in direct sunlight or close to a heat source. |
Foamy Beer
If you’re pouring foamy beer, there are a few potential causes and solutions:
| Cause | Solution |
|---|---|
| Temperature too high | Lower the temperature of the freezer to achieve the right serving temperature for your beer. The ideal temperature for most kegs is between 34-38°F (1-3°C). |
| Excessive pressure | Check the CO2 regulator and adjust the pressure to the appropriate level according to the beer style and carbonation desired. |
| Improperly cleaned lines | Regularly clean the beer lines and keg coupler to remove any buildup or contaminants that may cause foaming. |
Leaking Faucet
If you have a leaking faucet, check the following:
| Issue | Possible Solution |
|---|---|
| Loose fittings | Tighten any loose connections or fittings. Use a wrench if necessary, but be careful not to overtighten. |
| Worn-out O-rings | Inspect the O-rings on the faucet and replace them if they are cracked or damaged. |
| Dirty lines | Clean the beer lines thoroughly to remove any debris or residue that may be causing the leak. |
By following these troubleshooting and maintenance tips, you can ensure that your converted chest freezer kegerator operates smoothly and delivers perfectly chilled beer every time. Cheers!
Enjoying Your Homemade Kegerator
Once you have successfully converted your chest freezer into a kegerator, it’s time to sit back, relax, and enjoy your homemade draft beer. Here are a few tips to enhance your kegerator experience:
| Tip | Description |
|---|---|
| Temperature Control | Make sure to keep your kegerator at the optimal temperature for serving beer. This is generally between 36°F and 40°F (2°C and 4°C). Use a thermometer to monitor and adjust the temperature if needed. |
| Clean the Beer Lines | Regularly clean the beer lines to prevent any build-up and maintain the quality of your beer. Use a cleaning solution recommended for beer lines and follow the instructions provided. |
| Proper Glassware | Invest in a variety of beer glasses to enhance the drinking experience. Different beer styles may require specific glassware to showcase the aroma, flavors, and carbonation of the beer. |
| Tap Handles | Personalize your kegerator by adding unique tap handles. This can be a fun way to showcase your favorite brewery or create a custom design to match your style. |
| Experiment with Different Beers | With your own kegerator, you have the freedom to experiment with different types and flavors of beer. Try new styles, seasonal releases, or even brew your own beer at home to truly make your kegerator a unique experience. |
With these tips in mind, you are ready to enjoy your homemade kegerator and share your love for draft beer with friends and family. Cheers!
FAQ
What is a chest freezer?
A chest freezer is a type of freezer that has a hinged lid on top and opens horizontally. It is primarily used for storing frozen food items.
Is it difficult to convert a chest freezer to a kegerator?
The level of difficulty in converting a chest freezer to a kegerator depends on your DIY skills and experience. If you are comfortable with drilling holes, installing electrical components, and handling beer lines, it shouldn’t be too difficult. However, if you are not confident in your abilities, it may be best to seek the help of a professional or someone with experience in kegerator conversions.


