

If you own a freezer attached to your fridge, it’s important to know how to properly defrost it to maintain its efficiency and prolong its lifespan. Over time, ice can build up in the freezer, which can impact its cooling capacity and increase the energy consumption. In this article, we will guide you through the step-by-step process of defrosting a freezer attached to a fridge.
Step 1: Preparation
Before you start the defrosting process, you should take some time to prepare. First, empty all the food from the freezer and store it in a cooler or another freezer to keep it frozen. Next, unplug the fridge from the power source to ensure your safety and prevent any damage to the appliance.
Step 2: Defrosting
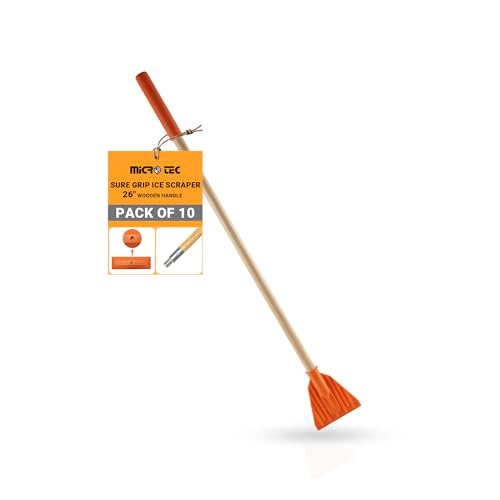
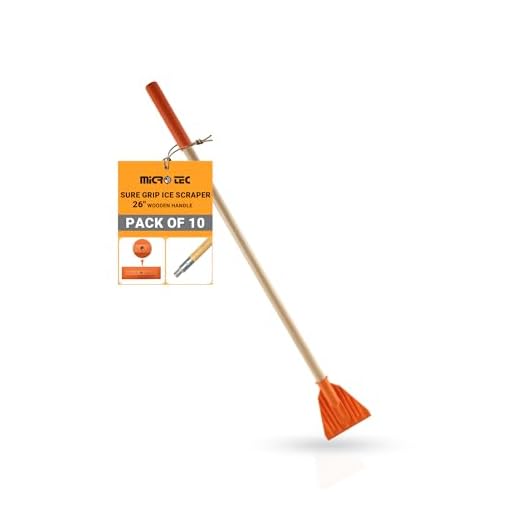
Once you have prepared everything, it’s time to start defrosting the freezer. Open the freezer door and place towels or newspapers at the bottom to absorb the melting ice. You can also use a plastic scraper or spatula to gently remove any large chunks of ice. Avoid using sharp objects that could damage the freezer or cause injuries.
Step 3: Speeding up the process
If you want to speed up the defrosting process, you can place a bowl of hot water in the freezer. The steam will help melt the ice faster. Additionally, you can use a hairdryer on a low heat setting to gently melt the ice. Be careful not to direct the hot airflow directly onto the freezer walls to avoid damaging them.
Step 4: Cleaning
Once all the ice has melted, take the opportunity to clean the freezer. Use a mixture of warm water and mild dish soap to wipe down the interior, shelves, and drawers. Pay special attention to any stains or spills that may have accumulated over time. After cleaning, dry the surfaces thoroughly before plugging the fridge back in.
Step 5: Maintenance tips
To avoid excessive ice build-up in the future, it’s recommended to defrost your freezer attached to the fridge at least once a year. Additionally, make sure the door seals are intact and clean them regularly to prevent warm air from entering the freezer and causing ice formation.
By following these simple steps and practicing regular maintenance, you can keep your freezer attached to your fridge in optimal condition and ensure it continues to perform efficiently for years to come.
Preparing for defrosting
Before you start defrosting your freezer, there are a few important steps you need to take to ensure a smooth and effective process:
- Turn off the power: Start by unplugging the refrigerator from the power source. This is crucial to prevent any electrical accidents during the defrosting process.
- Empty the freezer: Remove all the items from your freezer and place them in a cooler or another suitable storage area. Discard any expired or freezer-burned items.
- Remove ice buildup: If there is a significant amount of ice buildup in your freezer, use a plastic scraper or spatula to gently remove the ice. Be careful not to damage the interior of the freezer while doing this.
- Collect water: Place towels or a large tray at the bottom of the freezer to catch any melting ice or water during the defrosting process. This will help prevent a mess and make cleanup easier.
- Prepare cleaning supplies: Get a bucket, warm soapy water, and a sponge or cloth ready for cleaning the inside of the freezer once it has defrosted.
By following these steps, you will ensure a proper preparation for the defrosting process and make it easier to clean and maintain your freezer afterwards.
Tips for emptying the freezer
Emptying the freezer is an important step when defrosting a freezer attached to a fridge. Here are some tips to help you make the process easier and more efficient:
1. Plan ahead
Before you begin, create a plan for what to do with the food in your freezer. Start by sorting through the items and categorizing them based on their expiration dates. This will help you prioritize what needs to be used or discarded first.
2. Find temporary storage
If you have a second freezer or a cooler, you can temporarily store some of the frozen items there while defrosting your main freezer. Alternatively, you can ask a friend or neighbor if they have some space in their freezer to borrow. Another option is to use ice packs and insulated bags to keep perishable items cold.
3. Use up perishable items
As you empty the freezer, focus on using up perishable items first. This includes meat, fish, and dairy products. Consider meal planning around these items to ensure they are consumed before they spoil.
4. Label and date unmarked items
If you come across any unmarked frozen items, label them with their contents and the date. This will help you keep track of how long they have been stored, preventing food waste in the future.
5. Clean and organize
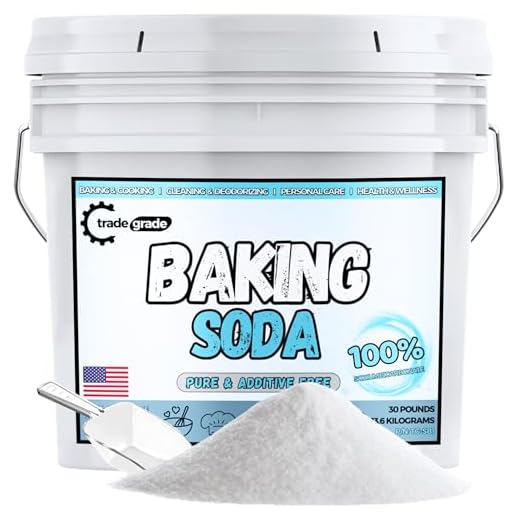
While emptying the freezer, take the opportunity to clean and organize the interior. Wipe down the shelves, drawers, and walls using a mild detergent or a mixture of baking soda and water. This will prevent odors and make it easier to maintain a clean freezer in the future.
By following these tips, you can efficiently empty your freezer and prepare it for the defrosting process.
Unplugging the fridge-freezer
Before you start defrosting your freezer, it is important to unplug your fridge-freezer from the power supply. This will ensure your safety and prevent any risk of electric shock.
To safely unplug your fridge-freezer, locate the power cord at the back of the appliance. Gently pull the plug from the electrical socket, making sure not to use excessive force that could damage the cord or the socket.
Why is it important to unplug?
Unplugging the fridge-freezer is necessary to avoid potential electrical hazards during the defrosting process. Water and ice can cause electric shock when they come into contact with electricity, which is why it is crucial to disconnect the power supply.
How to ensure the fridge-freezer remains unplugged?
After unplugging the appliance, it’s a good idea to tape the power cord to the back of the fridge-freezer or secure it in a way that prevents it from accidentally being plugged back in. This will help you remember that the freezer is still defrosting and needs to remain unplugged until the process is completed.
Defrosting the freezer
Defrosting your freezer is an important task that should be done regularly to keep it running efficiently. Here are the steps to follow:
Step 1: Preparation
Start by unplugging your fridge to ensure safety and prevent any damage. Empty the contents of your freezer and store them in a cooler with ice packs to keep them frozen while you work. It’s also a good idea to lay down towels or old newspapers around the freezer to catch any melting ice.
Step 2: Turn off the freezer
Locate the temperature control dial or switch inside your freezer. Turn it to the “Off” position to stop the compressor from running and prevent any cooling during the defrosting process. If your freezer doesn’t have a dedicated control, you can unplug the entire fridge instead.
Step 3: Speed up the defrosting process
Place bowls of hot water or use a hairdryer on a low heat setting to speed up the defrosting process. This will help melt the ice faster and reduce the overall time it takes to defrost your freezer. Be careful not to use any sharp objects to remove the ice as this can damage the freezer walls.
Step 4: Remove excess water
As the ice melts, use a towel or sponge to soak up any excess water that accumulates. Empty the water into a sink or container, making sure to avoid overflowing and causing a mess. This step may need to be repeated several times during the defrosting process.
Step 5: Clean and dry
Once all the ice has melted, use a mixture of mild dish soap and warm water to clean the inside of the freezer. Wipe down the walls, shelves, and trays to remove any dirt or residue. After cleaning, make sure to dry the freezer thoroughly before plugging it back in.
Step 6: Plug it back in
After the freezer is completely dry, plug it back in or turn the temperature control dial to the desired setting. Wait for a few hours to allow the freezer to cool down before returning the contents.
Remember, regular defrosting of your freezer is essential for maintaining its efficiency and prolonging its lifespan. By following these steps, you can ensure that your freezer continues to work optimally and keep your food fresh for longer.
Removing the ice buildup
Once you have turned off the freezer and unplugged the refrigerator from the power source, you can start removing the ice buildup in the freezer compartment. Here are the steps to follow:
Step 1: Empty the freezer
Remove all the food items from the freezer and place them in a cooler with ice packs or in another freezer if available. This will prevent them from thawing during the defrosting process.
Step 2: Allow the ice to melt
Leave the freezer door open and allow the ice to naturally melt. You can place towels or old newspapers on the floor beneath the freezer to absorb any water that may drip down.
Step 3: Speed up the process
If you want to speed up the defrosting process, you can use a hairdryer or a fan. Gently direct the air towards the ice buildup to help it melt faster. However, be cautious not to use excessive heat or leave the hairdryer unattended as it can cause damage to the freezer.
Step 4: Remove the remaining ice
Once most of the ice has melted, you can use a plastic scraper or a spatula to carefully remove any remaining ice. Avoid using sharp objects that can damage the interior of the freezer.
Step 5: Clean the freezer
After all the ice has been removed, clean the freezer with a mixture of warm water and mild dish soap. This will help remove any residual ice or dirt. Rinse thoroughly and dry the interior with a clean cloth.
Following these steps will ensure that your freezer is defrosted properly and ready to be used again. Remember to plug the refrigerator back into the power source and allow it to cool down before placing the food back into the freezer.
Using hot water to speed up the process
If you want to defrost your freezer quickly, using hot water can be an effective method. Here’s how:
- Prepare a large container filled with hot water. Make sure the container is big enough to hold all the ice and water that will melt from the freezer.
- Turn off the fridge and unplug it from the power source to avoid any electrical hazards.
- Open the freezer door and remove any easily removable items, such as ice trays or food containers. Place them in a cooler or another suitable storage place to keep them chilled.
- Carefully place the container of hot water inside the freezer. Be cautious not to spill any water on the electrical components.
- Close the freezer door and leave it for about 10 minutes to allow the hot water vapors to circulate and melt the ice.
- After 10 minutes, open the freezer door and use a soft cloth or sponge to wipe away the melted ice. Be sure to dry the surfaces thoroughly.
- If there is still some ice remaining, repeat the process until all the ice has melted.
- Once all the ice has melted and the freezer is clean, remove the container of hot water and discard the water appropriately.
- Plug the fridge back into the power source, turn it on, and close the freezer door. Allow the fridge to reach its desired temperature before returning the food items.
Remember, always exercise caution when defrosting your freezer and be mindful of potential electrical hazards. Using hot water can speed up the process, but it’s important to follow safety guidelines to prevent any damage to your fridge or harm to yourself.
Cleaning and drying the freezer
After defrosting the freezer, it is important to clean and dry the interior to prevent the growth of bacteria and mold. Follow these steps to thoroughly clean and dry your freezer:
- Remove all food and ice trays: Take out all frozen food items and ice trays from the freezer. Discard any expired or spoiled food.
- Prepare a cleaning solution: Mix a solution of warm water and mild dish soap in a bucket or sink. Avoid using harsh chemicals or abrasive cleaners, as they can damage the surfaces of the freezer.
- Clean the interior: Using a sponge or cloth, dip it in the cleaning solution and wipe down the interior surfaces of the freezer. Pay special attention to any stains or spills. Rinse the sponge or cloth frequently and continue until all areas are clean.
- Remove stubborn stains: For stubborn stains or sticky residue, mix a paste of baking soda and water. Apply the paste to the affected areas and gently scrub with a soft brush or toothbrush. Wipe away the paste and rinse with clean water.
- Dry the interior: Once the interior is clean, use a clean, dry cloth or paper towel to remove any remaining moisture. Ensure that all surfaces, including shelves and drawers, are thoroughly dry to prevent the formation of ice.
- Replace food and ice trays: After the interior is completely dry, place the food items and ice trays back into the freezer. Arrange them neatly, ensuring there is proper airflow for efficient cooling.
By following these steps, you can keep your freezer clean and hygienic, ensuring the longevity of your appliance and the safety of your food.
Using a mild detergent
If there are stubborn stains or odours inside the freezer, you may want to use a mild detergent to clean it. Before doing this, make sure to unplug the refrigerator and remove all the food.
Create a mixture of warm water and mild detergent in a bucket or sink. Dip a sponge or cloth into the solution and gently scrub the interior walls of the freezer. Pay special attention to any areas with stains or spills.
Be careful not to use any harsh chemicals or abrasive scrubbers, as they could damage the freezer’s surfaces. Instead, opt for a gentle cleaning solution and a soft sponge or cloth.
Once you have finished cleaning, rinse the sponge or cloth thoroughly and wipe down the interior walls with clean water. Make sure to remove all traces of detergent to prevent any potential contamination of your food later on.
Afterward, leave the freezer door open for a few minutes to allow the interior to dry completely. Once it is dry, you can plug the refrigerator back in and return the food to the freezer.
Note: If you are unsure about using detergent on your particular freezer, consult the manufacturer’s instructions or contact their customer service for guidance.
Drying the freezer thoroughly
After defrosting your freezer, it is crucial to dry it thoroughly before switching it back on. This step is important to prevent any moisture from causing damage to the freezer’s internal components.
Here’s how you can ensure that the freezer is completely dry:
| 1. Open the freezer door and allow it to air dry for a few hours. You can also use a fan to speed up the drying process. |
| 2. Avoid using any cloth or towel to dry the interior, as they may leave behind lint or fibers. |
| 3. Check all the corners and crevices for any remaining moisture. Use a dry cloth or paper towel to get rid of any wet spots. |
| 4. Make sure the drainage hole or tray is completely dry before proceeding. |
Remember, moisture can lead to the growth of mold and mildew, which can affect the quality and freshness of your food. Taking the time to dry your freezer thoroughly will ensure its longevity and effectiveness.


