


Plastic is a common material used in the construction of freezers due to its durability and affordability. However, over time, it is possible for the plastic in a freezer to become broken or cracked. This can lead to a variety of issues, including temperature fluctuations and inefficient cooling. Fortunately, there are steps you can take to fix broken plastic in your freezer and restore its functionality.
Identify the broken area: The first step in fixing broken plastic in your freezer is to identify the specific area that is damaged. Inspect the interior and exterior of the freezer carefully, looking for any cracks, chips, or broken pieces. Take note of the size and location of the damage, as this will help determine the best repair method.
Assess the severity of the damage: Once you have identified the broken area, assess the severity of the damage. Minor cracks or chips can often be easily repaired using simple techniques, while larger or more extensive damage may require more advanced repair methods or professional assistance.
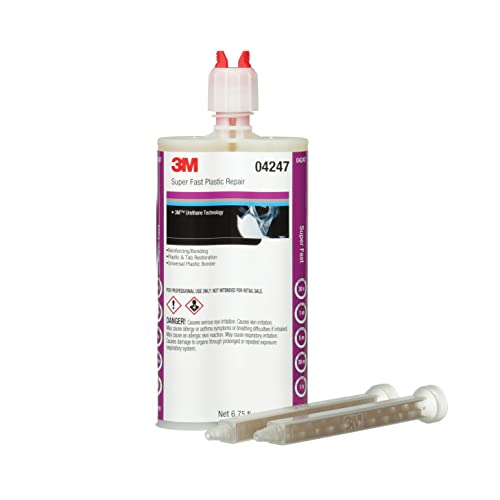
Choose the right repair method: There are several DIY repair methods you can try to fix broken plastic in your freezer. Some options include using epoxy or super glue to bond the broken pieces together, using a heat gun to melt and reshape the plastic, or even using a plastic welding kit for more complex repairs. The best method will depend on the type of plastic and the extent of the damage.
Remember to always follow safety precautions when attempting to fix broken plastic in your freezer. Ensure proper ventilation, wear protective gloves and eyewear, and work in a well-lit area. If you are unsure about your ability to repair the damage, it is always best to consult a professional to avoid causing further damage to your freezer.
Troubleshooting Broken Plastic in Freezer
If you have a broken plastic component in your freezer, don’t panic! There are several troubleshooting steps you can take to fix the issue and get your freezer back up and running again. Here are some common problems and solutions:
1. Cracked or Damaged Shelf
If you have a cracked or damaged plastic shelf in your freezer, the first step is to remove it from the freezer. Inspect the shelf to determine the extent of the damage. If it’s a small crack, you can try using epoxy adhesive to repair it. Apply a thin layer of the adhesive to both sides of the crack and press them together firmly. Let it dry according to the manufacturer’s instructions before re-installing the shelf.
If the shelf is completely broken or the crack is too large to repair, you may need to replace it. Contact the manufacturer or search online for a replacement shelf that is compatible with your freezer model.
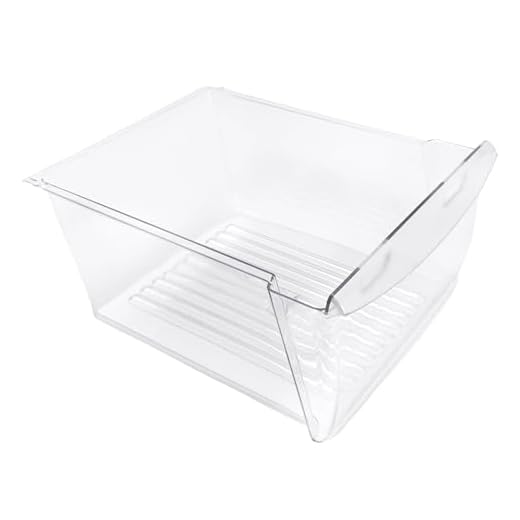
2. Broken Door Bin
If a door bin in your freezer is broken, the first step is to remove it from the door. Inspect the bin to determine the extent of the damage. If it’s a small crack or piece that has broken off, you can try using a strong adhesive or plastic repair kit to fix it.
Clean the broken area thoroughly and follow the instructions on the adhesive or repair kit. Apply the adhesive or repair compound to the broken area and hold it together firmly until it sets. Let it dry completely before re-attaching the bin to the freezer door.
If the door bin is beyond repair or you cannot find a suitable adhesive or repair kit, you may need to purchase a replacement bin. Check with the manufacturer or search online for a compatible replacement.
3. Loose or Misaligned Drawer
If you have a loose or misaligned plastic drawer in your freezer, start by emptying the drawer and removing it from the freezer. Examine the rails or slides that the drawer rests on for any damage or obstructions.
If the rails are damaged, they may need to be replaced. Contact the manufacturer or search online for replacement rails that are compatible with your freezer model.
If the rails are in good condition, but the drawer is still loose or misaligned, try adjusting the rails. Most freezer drawers have adjustable brackets or screws that can be tightened or loosened to properly align the drawer. Refer to your freezer’s manual for specific instructions on how to adjust the drawer.
With these troubleshooting steps, you can fix many common issues with broken plastic in your freezer. If you’re unsure about how to proceed or if the problem persists, it’s always best to consult a professional for assistance.
Identifying the Issue
Before attempting to fix broken plastic in your freezer, it is important to identify the root cause of the issue.
Start by examining the plastic parts that are broken. Is it a drawer, a shelf, or another component? Assess the extent of the damage to determine if it can be repaired or needs to be replaced.
Next, consider what might have caused the plastic to break. Freezers are subject to extreme temperatures and constant use, which can put stress on the plastic components. Excessive weight or force applied to the plastic can also lead to breakage.
It is also essential to check for any underlying issues with your freezer that may have contributed to the plastic breaking. For example, if the freezer is not maintaining a consistent temperature, it can cause the plastic to become more brittle and prone to breaking.
Take note of any other symptoms or problems you have noticed with your freezer, such as unusual noises or ice buildup. These can help identify any larger issues that need to be addressed to prevent further damage.
Understanding the nature of the problem and its potential causes will guide your approach to fixing the broken plastic in your freezer. Whether it is a simple repair or a more complex issue, properly identifying the problem is the first step towards finding a solution.
Assessing the Damage
Before attempting to fix the broken plastic in your freezer, it is important to assess the extent of the damage. This will help you determine the best course of action and whether the repair can be done on your own or if professional help is needed.
Start by examining the broken plastic area in the freezer. Look for any cracks, chips, or missing pieces. Determine if the damage is localized to one specific area or if it affects multiple parts. Assess if the broken plastic is causing any immediate issues, such as leakage or compromised insulation.
Next, take a closer look at the material of the broken plastic. Check if it is a removable part or if it is integrated into the structure of the freezer. This will affect the complexity of the repair and the need for replacing the entire unit or just a specific component.
If possible, consult the manufacturer’s manual or website to understand the design of the freezer and the availability of spare parts. This will help you decide if replacement parts can be easily obtained or if alternative solutions need to be considered.
Document the extent of the damage with notes and pictures. This will be helpful when seeking advice from professionals or when researching possible repair methods online. It will also help you keep track of the progress of the repair and compare before and after results.
Remember to consider the cost of repair versus the cost of replacement. In some cases, it may be more cost-effective to purchase a new freezer instead of attempting to fix the broken plastic. Assess the age and overall condition of the appliance to make an informed decision.
| Steps to Assess the Damage: |
|---|
| 1. Examine the broken plastic area. |
| 2. Determine if the damage is localized or affects multiple parts. |
| 3. Check if the broken plastic is causing any immediate issues. |
| 4. Assess the material of the broken plastic. |
| 5. Consult the manufacturer’s manual or website for spare parts. |
| 6. Document the extent of the damage with notes and pictures. |
| 7. Consider the cost of repair versus replacement. |
Taking the time to thoroughly assess the damage will help you make an informed decision on how to proceed with fixing the broken plastic in your freezer. It will also save you time and effort by avoiding unnecessary repairs or replacement.
Repairing the Broken Plastic
Repairing broken plastic in the freezer is a simple and cost-effective solution that can save you from having to replace the entire unit. Here are some steps you can follow to fix the broken plastic:
- Assess the damage: Start by examining the broken plastic to see the extent of the damage. Determine if it can be repaired or if it needs to be replaced entirely.
- Clean the area: Before starting the repair process, make sure to clean the area around the broken plastic. Use a mild detergent and warm water to remove any dirt or debris.
- Gather the necessary materials: Depending on the type of plastic and the extent of the damage, you may need to gather some materials such as adhesive glue, epoxy, or a plastic repair kit.
- Apply adhesive: Using the appropriate adhesive or epoxy, carefully apply it to the broken edges of the plastic. Make sure to follow the instructions provided with the adhesive, as different types may have different curing times.
- Hold the pieces together: After applying the adhesive, hold the broken pieces of plastic together firmly for the recommended amount of time. This will allow the adhesive to bond the plastic together securely.
- Allow time for curing: Once the adhesive has been applied and the pieces are held together, allow the plastic to cure for the recommended time. This will ensure a strong and durable repair.
- Test the repair: After the curing time, carefully test the repair by applying pressure or gently flexing the plastic. If the repair holds and the plastic remains stable, the repair is successful.
- Reassemble the freezer: Once the repair has been tested and deemed successful, reassemble the freezer and ensure that everything is functioning properly.
By following these steps and taking the necessary precautions, you can easily repair broken plastic in your freezer and extend its lifespan.
Preventing Future Damage
Once you have successfully fixed the broken plastic in your freezer, it is essential to take precautions to prevent future damage. Here are some tips to help you maintain the integrity of your freezer and avoid any further issues:
1. Proper Loading and Organization
Load food items properly: Avoid overpacking your freezer, as this can put unnecessary pressure on the plastic components. Make sure to leave enough space for cold air to circulate around the items.
Organize with containers: Use plastic containers or bins to store smaller items. This will help prevent them from shifting around and potentially causing damage.
2. Regular Cleaning and Maintenance
Keep it clean: Regularly clean your freezer to remove any spills or debris that may compromise the plastic. Use a mild detergent and warm water to wipe down the inside and outside surfaces.
Inspect for wear and tear: Periodically check the plastic components for any signs of damage, such as cracks or weak spots. Address these issues promptly to prevent further deterioration.
3. Avoid Extreme Temperatures
Avoid temperature fluctuations: Keep your freezer at a consistent temperature to minimize stress on the plastic. Avoid frequently opening the freezer door, as this can lead to temperature fluctuations.
Protect from extreme temperatures: If your freezer is located in an area that is exposed to extreme temperatures, consider insulating it to prevent any potential damage to the plastic caused by expansion or contraction.
By following these preventive measures, you can reduce the risk of future plastic damage in your freezer and ensure its optimal performance for a longer time.
FAQ
What causes plastic in the freezer to break?
Plastic in the freezer can break due to extreme temperature changes, sharp objects, or improper handling.
Can I use glue to fix broken plastic in the freezer?
Yes, you can use a strong adhesive specifically designed for plastic to fix broken plastic in the freezer.
Is it possible to prevent plastic from breaking in the freezer?
While it is difficult to completely prevent plastic from breaking in the freezer, you can minimize the risk by avoiding sudden temperature changes and being careful when handling plastic items.
What are some alternative methods to fix broken plastic in the freezer?
Aside from using glue, you can also try using epoxy resin or a plastic welding kit to fix broken plastic in the freezer.


