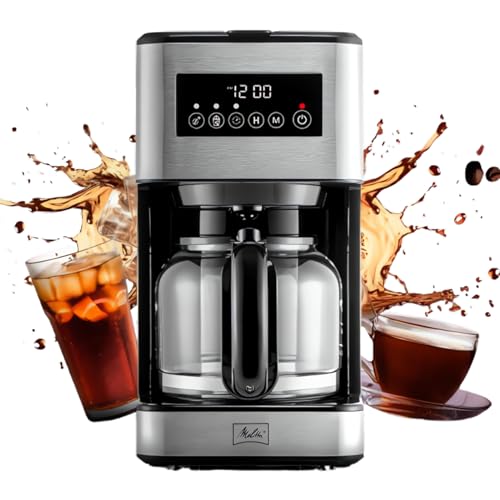


Moving a freezer shelf can be a challenging task, especially if you are not familiar with the process. However, with the right techniques and a little bit of patience, you can successfully move a freezer shelf without causing any damage to your appliance. In this article, we will guide you through the step-by-step process of safely moving a freezer shelf.
Step 1: Empty the freezer
Before you start moving the freezer shelf, it is important to empty the freezer completely. This will not only make the shelf easier to handle but also prevent any items from falling and causing damage. Take out all the food items and place them in a cooler or another freezer if available. Remember to unplug the freezer to ensure your safety.
Step 2: Remove the existing shelf
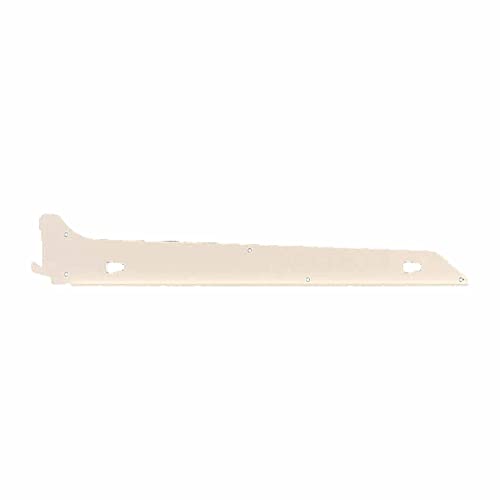
To remove the existing shelf, locate the clips or brackets that hold it in place. These can usually be found on the sides or back of the shelf. Carefully push the clips or brackets inwards and lift the shelf up and out of the freezer. Depending on the design of your freezer, you may need to tilt the shelf at an angle to remove it. Be cautious as some shelves can be heavy and may require assistance.
Step 3: Adjust the new shelf
Once the old shelf is removed, it’s time to adjust the new one. Measure the dimensions of the freezer and the shelf to ensure a perfect fit. If necessary, you may need to trim the new shelf using a saw or other appropriate tools. Be sure to follow the manufacturer’s instructions during this step to avoid any mishaps.

Step 4: Install the new shelf
With the new shelf properly adjusted, carefully place it into the freezer. Ensure that it is level and secure by hooking the clips or brackets into their designated slots. Give it a gentle push to make sure it is properly seated. Once the shelf is in place, double-check that it is stable and will not wobble or tip over easily.
Step 5: Reload the freezer
After successfully moving the freezer shelf, it is time to reload your freezer with the food items you removed earlier. Take the opportunity to organize your freezer and dispose of any expired or unwanted items. This will not only make it easier for you to find what you are looking for but also ensure optimal storage conditions for your food.
By following the steps outlined in this article, you can safely and effectively move a freezer shelf. Remember to take your time and be cautious. If you are unsure about any step of the process, it is always better to seek professional assistance.
Why You Should Move A Freezer Shelf
If you have a freezer at home, you may find it necessary to move a freezer shelf at some point. Whether you need to create more space or reorganize your frozen foods, moving a freezer shelf can be a practical solution. Here are a few reasons why you should move a freezer shelf:
- Maximize Space: By moving a freezer shelf, you can optimize the available space and fit more items inside your freezer. This is particularly useful when you need to store large or bulky items that cannot fit on a standard-sized shelf.
- Organize Frozen Foods: Moving a freezer shelf allows you to better organize your frozen foods. You can create separate sections or categories for different types of foods, making it easier to locate specific items when needed.
- Accessibility: If you find it difficult to reach certain items in your freezer, moving a shelf can improve accessibility. You can rearrange the shelves according to your needs, ensuring that frequently used items are within easy reach.
- Create Customized Storage: Moving a freezer shelf enables you to create customized storage solutions. You can adjust the height or position of the shelf to accommodate different sizes of containers or packages.
- Prevent Wasted Space: Sometimes, freezer shelves may be set too far apart, resulting in wasted space. By moving a shelf closer or increasing the number of shelves, you can utilize the available space more efficiently and prevent wastage.
- Accommodate Different Freezer Contents: If you frequently store a variety of frozen foods with different shapes and sizes, moving a freezer shelf can help accommodate these diverse contents. You can adjust the shelf configuration to ensure that each item has its proper place.
Overall, moving a freezer shelf offers several benefits, including maximizing space, organizing frozen foods, improving accessibility, creating customized storage, preventing wasted space, and accommodating different freezer contents. So, don’t hesitate to rearrange your freezer shelves to make the most of your freezer storage!
Step-by-Step Guide On Moving A Freezer Shelf
Moving a freezer shelf can be a delicate task, but with the right precautions and a step-by-step approach, it can be done easily. Here is a guide on how to move a freezer shelf:
1. Empty the Freezer
Before attempting to move the freezer shelf, make sure your freezer is empty. Remove all the items stored on the shelf and place them in a cooler or another suitable storage container to keep them cold during the moving process.
2. Disconnect the Freezer
Unplug the freezer from the power source and, if necessary, disconnect any water supply lines if your freezer has an icemaker or water dispenser. This will ensure the safety of both the appliance and yourself during the shelf moving process.
3. Remove the Contents of the Shelf
Take out all the items on the shelf one by one and set them aside. Make sure the shelf is completely empty before attempting to move it.
4. Detach the Shelf Anchors
Look for any brackets or anchors holding the shelf in place. These are usually located at the sides or back of the freezer. Check if there are any screws or clips securing the shelf, and if so, use a screwdriver or pliers to detach them carefully.
5. Lift the Shelf
With the anchors detached, carefully lift the shelf from the freezer. Be cautious not to damage the sides or interior of the freezer during this process. If needed, ask for assistance to ensure the shelf is properly lifted and supported.
6. Transport the Shelf
Transfer the shelf to the desired location while keeping it level and stable. If it is a long distance or if you are concerned about stability, consider placing the shelf in a large box or using padding to protect it during transport.
7. Reinstall the Shelf
Carefully place the shelf in its new position inside the freezer. Align the anchors with the corresponding slots or brackets, and gently lower the shelf into place. Ensure that the shelf is properly secured before placing any items back on it.
8. Reconnect the Freezer
Once the shelf is securely in place, reconnect the freezer to the power source and, if applicable, reconnect any water supply lines. Allow the freezer to cool down before returning the items you removed earlier.
Following these step-by-step instructions will help you safely and successfully move your freezer shelf without any hassle. Remember to always exercise caution and seek assistance if needed.
Safety Precautions Before Moving A Freezer Shelf
When it comes to moving a freezer shelf, it is important to prioritize safety. Following these safety precautions can help prevent accidents and injuries. Here are some steps to take before moving a freezer shelf:
1. Turn off the power: Before attempting to move a freezer shelf, make sure to turn off the power supply. This will help prevent any electric shocks or malfunctions during the process.
2. Wear protective gear: It is crucial to wear appropriate protective gear to safeguard yourself during the moving process. This includes gloves, goggles, and sturdy footwear.
3. Clear the area: Before moving the freezer shelf, ensure that the surrounding area is clear of any obstacles or tripping hazards. This will help prevent accidents and make the moving process easier.
4. Empty the freezer shelf: Remove all items from the freezer shelf before attempting to move it. This will make it lighter and easier to handle.
5. Secure the shelf: Before moving the freezer shelf, make sure it is securely fastened or held in place. This will prevent it from falling or sliding during the moving process.
6. Use proper lifting techniques: When lifting and carrying the freezer shelf, remember to use proper lifting techniques to avoid straining your back or causing injury. Bend your knees, keep your back straight, and lift with your legs.
7. Ask for assistance: Moving a freezer shelf can be a two-person job, especially if it is heavy or bulky. Ask for assistance from a family member or friend to make the process easier and safer.
8. Take breaks if needed: If you feel fatigued or strained during the moving process, take breaks as needed. Pushing yourself too hard can lead to accidents and injuries.
By following these safety precautions, you can ensure a smooth and safe process when moving a freezer shelf. Remember, it is better to take your time and prioritize safety rather than rushing and risking harm to yourself or the appliance.
Tools You Will Need To Move A Freezer Shelf
When it comes to moving a freezer shelf, having the right tools can make the task much easier. Here are the tools you will need:
- Gloves – It’s always a good idea to protect your hands when handling heavy objects. Make sure to wear gloves to provide grip and prevent injury.
- Tape Measure – Before attempting to move the freezer shelf, measure the dimensions of the opening or the space where you plan to relocate it. This will ensure a proper fit.
- Phillips Screwdriver – Many freezer shelves may be secured with screws. A Phillips screwdriver will be necessary to remove the screws and disconnect the shelf.
- Flathead Screwdriver – In some cases, a flathead screwdriver may be needed to pry the shelf from its position or to remove any clips or brackets holding it in place.
- Adjustable Wrench – If there are any bolts or nuts securing the freezer shelf, an adjustable wrench will come in handy for loosening or tightening them.
- Dolly – Freezer shelves can be heavy and awkward to carry on your own. Using a dolly or hand truck will allow you to transport the shelf with ease.
- Moving Blankets or Towels – To prevent any scratches or damage to the freezer shelf or other items in transit, wrap the shelf in moving blankets or towels for protection.
By having these tools on hand, you will be well-equipped to safely and efficiently move a freezer shelf to its new location.
Tips For Removing A Freezer Shelf
If you need to remove a freezer shelf for cleaning or rearranging items, here are some helpful tips to ensure the process is smooth and safe:
1. Empty the freezer
Before attempting to remove the freezer shelf, make sure the freezer is fully empty. Take out all the frozen items and place them in a cooler or another freezer if available. This will make it easier to lift and maneuver the shelf.
2. Read the freezer manual
Consult the freezer manual or look for specific instructions on how to remove the shelf. Different freezer models may have slightly different mechanisms for shelf removal, so it’s important to follow the manufacturer’s guidelines.
3. Check for any locks or fasteners
Inspect the shelf to see if there are any locks or fasteners holding it in place. Some shelves may have clips or hooks that need to be released before they can be lifted out. Gently push or slide the locks to their respective positions to unlock the shelf.
4. Lift the shelf with caution
Using both hands, carefully lift the freezer shelf upwards. Slowly tilt it at an angle if necessary to clear any obstacles or tracks that may be present. Be mindful of any glass shelves that may be fragile and handle them with extra care.
5. Clean the shelf before reinstallation
Once you have removed the freezer shelf, take the opportunity to clean it thoroughly with warm soapy water or a mild cleaning solution. This will ensure any food residue or spills are removed, maintaining a hygienic freezer environment.
Remember to let the shelf dry completely before reinserting it into the freezer. Check the freezer manual for any specific reinstallation instructions.
By following these tips, you can safely and easily remove a freezer shelf for cleaning or organizing purposes.
How To Clean A Freezer Shelf After Moving It
After successfully moving your freezer shelf, it is important to properly clean and maintain it to ensure the longevity and cleanliness of your freezer. Here are some steps to help you clean your freezer shelf:
1. Remove all items from the shelf
Before starting the cleaning process, remove all items from the freezer shelf and set them aside. This will allow you to thoroughly clean the shelf without any obstructions.
2. Prepare a cleaning solution
Mix a mild detergent with warm water to create a cleaning solution. Avoid using harsh chemicals or abrasive cleaners, as these can damage the shelf’s surface.
3. Scrub the shelf
Dip a soft sponge or cloth into the cleaning solution and gently scrub the entire surface of the freezer shelf. Pay special attention to any stains or spills, using a bit more pressure if needed.
4. Rinse with clean water
After scrubbing, rinse the shelf with clean water to remove any soapy residue. Ensure all the detergent is completely washed away.
5. Dry the shelf
Using a clean cloth, dry the freezer shelf thoroughly. This will prevent any water spots or potential rusting from occurring.
After completing these steps, you can place the cleaned freezer shelf back into your freezer and return any items you had removed. Remember to regularly clean your freezer shelf to maintain its cleanliness and efficiency.
Proper Technique For Transporting A Freezer Shelf
Transporting a freezer shelf may seem like a daunting task, but with the right technique, it can be done safely and efficiently. Follow these steps to ensure a smooth and hassle-free experience:
- Empty the freezer: Before even attempting to move the shelf, make sure the freezer is completely empty. Remove all items from the shelf and place them in a secured container.
- Remove any obstacles: Check the surrounding area for any obstacles that might hinder the movement of the shelf. Clear the path and make sure you have enough space to maneuver.
- Secure the shelf: Make sure the shelf is properly secured in place before transporting it. This can usually be done by locking it in with the freezer’s built-in locking mechanism or using securing straps.
- Use proper lifting techniques: To avoid straining your back or causing any injuries, make sure to use proper lifting techniques. Bend your knees, keep your back straight, and lift with your legs.
- Get assistance if needed: If the shelf is heavy or awkwardly shaped, don’t hesitate to ask for help. Having an extra pair of hands can make the task much easier and safer.
- Move slowly and carefully: When transporting the shelf, move slowly and carefully to avoid any sudden movements or accidents. Take your time, watch your surroundings, and proceed with caution.
- Secure the shelf in transit: Once the shelf is out of the freezer, secure it properly for transportation. Use padding or blankets to protect it from scratches or damage.
- Reassemble the freezer: After safely moving the shelf, carefully reassemble the freezer. Make sure all parts are properly aligned and secured.
By following these steps and using the proper technique, you can safely transport a freezer shelf without any hassle or damage. Remember to always prioritize your safety and take your time during the process.
Installing A Freezer Shelf In A New Location
If you need to move your freezer shelf to a different location, follow these steps to ensure a proper installation.
1. Prepare the new location
Before installing the freezer shelf in a new location, make sure the area is clean and free of any debris. Ensure there is enough space for the shelf and that it is level.
2. Remove items from the freezer
Remove all items from the freezer before removing the shelf. This will prevent any damage to the items or the shelf during the installation process.
3. Remove the existing shelf
Start by removing the existing freezer shelf from its current location. Check for any screws or clips holding it in place and loosen or remove them. Carefully lift the shelf out of the freezer.
4. Position the new shelf
Place the new shelf in the desired location within the freezer. Make sure it is level and fits securely. Depending on the design of your freezer, there may be slots or grooves for the shelf to slide into. Align the shelf properly before proceeding.
5. Secure the new shelf
If your freezer shelf requires screws or clips to secure it in place, use them according to the manufacturer’s instructions. Make sure the shelf is stable and does not wobble.
Once the new freezer shelf is properly installed, you can start placing your items back into the freezer. Make sure to organize them in a way that maximizes space and allows for proper air circulation.
By following these steps, you can easily install a freezer shelf in a new location and ensure it is secure and functional.
Frequently Asked Questions About Moving Freezer Shelves
Here are some common questions people have about moving freezer shelves:
1. Can I remove the freezer shelves without emptying the freezer?
Yes, it is possible to remove freezer shelves without emptying the freezer. However, it is recommended to remove any items that may be fragile or prone to tipping over before attempting to remove the shelves.
2. How do I safely remove a freezer shelf?
To safely remove a freezer shelf, first, empty the shelf of any items. Then, locate the clips or brackets that hold the shelf in place and release them by either pushing or lifting. Once the clips or brackets are released, gently pull the shelf towards you until it is completely removed from the freezer.
3. Can I adjust the height of the freezer shelves?
Some freezer shelves have adjustable height options, while others may be fixed in place. Consult the freezer’s user manual to determine if the shelves can be adjusted. If they can be adjusted, follow the instructions provided in the manual to change the shelf height.
4. Do I need to defrost the freezer before moving the shelves?
It is not necessary to defrost the freezer before moving the shelves, unless specifically stated in the freezer’s user manual. However, it is advisable to remove any ice build-up or frost that may hinder the movement of the shelves.
5. How should I clean the freezer shelves before moving them?
To clean the freezer shelves before moving them, remove all items from the shelves and wipe them down with a mild detergent solution. Rinse the shelves thoroughly with clean water and allow them to dry completely before reinserting them into the freezer.
Remember to always consult the freezer’s user manual for specific instructions on how to safely and properly move the shelves according to the model and make of your freezer.
FAQ
How do I remove a shelf from my freezer?
To remove a shelf from your freezer, start by emptying the shelf and removing any items that may be on it. Carefully lift the front edge of the shelf and tilt it upwards. Once the front edge is lifted, you can slide the shelf towards you and out of the freezer.
Is it necessary to empty the shelf before moving it?
Yes, it is important to empty the shelf before moving it. This will prevent any items from falling or spilling during the process and ensure a safe and smooth removal of the shelf.
Can I remove and reposition a freezer shelf?
Yes, you can remove and reposition a freezer shelf. To do this, follow the steps mentioned earlier to remove the shelf. Once you have removed it, you can reposition it in a different slot or adjust its height according to your needs.
Will removing a freezer shelf affect the cooling efficiency?
No, removing a freezer shelf will not significantly affect the cooling efficiency of the appliance. However, it is important to not overcrowd the freezer with items and ensure proper air circulation for optimal cooling performance.
What should I do if the shelf is stuck and won’t come out?
If the freezer shelf is stuck and won’t come out, try lifting it from different angles to see if that helps. If that doesn’t work, check if there are any screws or attachments that need to be removed before the shelf can be taken out. If the issue persists, it is recommended to consult the appliance manual or contact the manufacturer for further assistance.