Homemade soup is a comforting and delicious meal option, especially during the colder months. Making a big batch of soup is a great way to save time and effort, as you can enjoy it over several meals. But what do you do with the leftovers? Freezing your soup is a simple and convenient solution that allows you to enjoy your homemade goodness at a later time.
When it comes to storing homemade soup in the freezer, there are a few important things to keep in mind. First and foremost, it’s essential to cool your soup completely before transferring it to the freezer. This helps prevent the growth of bacteria and ensures that your soup maintains its quality.
Once your soup has cooled down, it’s time to think about containers. It’s best to use airtight containers or resealable freezer bags to keep your soup fresh and prevent freezer burn. Be sure to label your containers with the date and type of soup, so you can easily identify them later on. Additionally, it’s a good idea to portion your soup into individual servings, so you can defrost only what you need.
Essential Tips for Storing Homemade Soup in the Freezer
Storing homemade soup in the freezer is a great way to have a quick and convenient meal on hand whenever you need it. However, there are a few essential tips to keep in mind to ensure that your soup stays fresh and delicious.
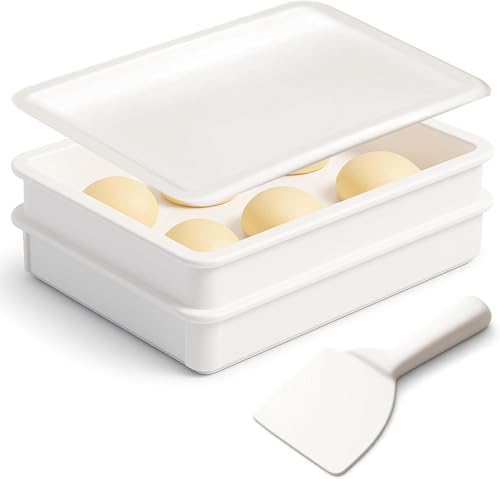
1. Use the right containers: When freezing soup, it’s important to use containers that are freezer-safe and airtight. This will help prevent freezer burn and keep your soup tasting its best. Plastic containers with tight-fitting lids or heavy-duty freezer bags are good options.
2. Cool the soup before freezing: Before transferring your homemade soup to the freezer, allow it to cool completely. This prevents condensation and ice crystals from forming, which can negatively affect the texture and taste of the soup.
3. Label and date the containers: To avoid confusion, be sure to label each container with the type of soup and the date it was made. This will make it easier to know what you have on hand and prioritize consumption based on freshness.
4. Portion the soup: Consider dividing your homemade soup into individual or family-sized portions before freezing. This allows for easier thawing and reheating, as you can defrost only what you need at a time.
5. Leave room for expansion: When filling containers with soup, make sure to leave some room at the top to allow for expansion as the soup freezes. Not doing so can cause the container to crack or burst.
6. Freeze in flat shapes: If you’re using freezer bags, consider storing them flat instead of upright. This allows for more efficient use of freezer space and quicker thawing when you’re ready to enjoy the soup.
7. Store in the coldest part of the freezer: To maintain the best quality, store your homemade soup in the coldest part of the freezer. This is often the back or bottom shelf. Avoid placing the containers near the freezer door, as they may be subject to temperature fluctuations every time the door is opened.
| Container Type | Pros | Cons |
|---|---|---|
| Plastic containers with lids | Durable, reusable | Take up more freezer space |
| Freezer bags | Space-saving, easy to stack | Less durable, can leak if not sealed properly |
Remember, homemade soup can typically be stored in the freezer for 2 to 3 months. Be sure to check the quality and freshness before consuming. By following these essential tips, you’ll have delicious homemade soup ready to enjoy whenever you want!
Choosing the Right Containers
When it comes to storing homemade soup in the freezer, choosing the right containers is crucial. Not all containers are suitable for freezing, and using the wrong ones can result in freezer burn and compromised taste and quality of your soup. Here are some tips on selecting the right containers:
1. Freezer-Safe Containers
Make sure you use containers that are specifically designed for freezer storage. These containers are usually made from materials such as glass, rigid plastic, or heavy-duty freezer bags. They are designed to withstand the low temperatures of the freezer without cracking or breaking.
2. Airtight Seals
Look for containers that have airtight seals to prevent air and moisture from entering. This will help maintain the freshness of your soup and prevent freezer burn. Freezer bags should have a zip-top closure or double seal to ensure a tight seal.
3. Size and Shape
Consider the size and shape of the containers based on your storage needs. Individual serving size portions are ideal if you want to defrost only what you need at a time. Rectangular or square-shaped containers are more space-efficient and stackable, while round containers are easier to fill and empty.
Finally, don’t forget to label your containers with the date and contents to help you keep track of what’s in your freezer and ensure proper rotation of your homemade soup.
| Container Material | Pros | Cons |
|---|---|---|
| Glass Containers | Durable, non-toxic, and reusable | Heavy and can break if dropped |
| Rigid Plastic Containers | Lightweight, stackable, and shatterproof | May absorb odors and stain over time |
| Freezer Bags | Flexible, space-saving, and easy to store | Not reusable and prone to leaks if not sealed properly |
Properly Cooling Homemade Soup
Properly cooling homemade soup is essential to ensure that it stays fresh and safe to eat when you store it in the freezer. Here are some steps to follow:
1. Allow the soup to cool down: After cooking, let the soup cool down to room temperature before transferring it to the freezer. This helps prevent the formation of bacteria and ensures that the soup freezes evenly.
2. Use shallow containers: Instead of storing the soup in one large container, divide it into smaller, shallow containers. This allows the soup to cool down more quickly and reduces the risk of bacteria growth.
3. Cover containers: Once the soup has cooled down, cover the containers with airtight lids or plastic wrap. This helps prevent freezer burn and keeps the soup fresh for longer.
4. Label and date: Don’t forget to label each container with the type of soup and the date it was made. This will help you keep track of how long the soup has been in the freezer and ensure that you use it within a safe timeframe.
5. Freeze properly: Place the containers of soup in the freezer in an organized manner, allowing enough space between them for air to circulate. This helps the soup freeze quickly and evenly.
6. Consume within recommended time: While properly stored soup can typically be kept in the freezer for 2-3 months, it’s best to consume it within 1-2 months for optimal taste and quality.
By following these steps, you can ensure that your homemade soup stays fresh and delicious for future consumption.
Labeling and Dating Containers
Properly labeling and dating your homemade soup containers is essential for keeping track of what you have stored in your freezer. It can help prevent confusion and ensure that you use your soup before it expires. Here are some tips for labeling and dating your soup containers:
1. Use clear and legible labels: Write the contents of the container clearly on a label or use a permanent marker directly on the container. Make sure the label is easy to read and won’t smudge or fade over time. Clear labels are especially important if you plan to reuse containers for other purposes.
2. Include the date: Write the date on the label or container to indicate when the soup was made. This will help you determine how long the soup has been stored and when it should be used by. It is recommended to consume homemade soup within 3-4 months of freezing.
3. Use food-safe materials: When choosing labels or markers, make sure they are food-safe and won’t transfer any harmful substances into your soup. Look for labels or markers specifically designed for use with food storage containers.
4. Consider using freezer-safe labels: Freezer-safe labels are designed to withstand freezing temperatures without losing their adhesive or becoming damaged. These labels are often resistant to moisture, oil, and grease, making them perfect for labeling soup containers stored in the freezer.
5. Arrange containers for easy access: Once you have labeled and dated your soup containers, arrange them in a way that makes it easy to find what you need. Consider organizing them by date or type of soup to ensure you use the oldest ones first.
By following these tips for labeling and dating your soup containers, you can easily keep track of your homemade soup in the freezer and ensure you enjoy it at its best quality.
Freezing Individual Portions
If you prefer to have single-serving portions of soup ready to eat, you can freeze the soup in individual containers or bags. This makes it easy to grab a portion whenever you want without having to thaw and reheat the whole batch.
Here’s how to freeze individual portions of homemade soup:
| Step | Instructions |
|---|---|
| 1 | Ladle the soup into individual containers, leaving about an inch of space at the top to allow for expansion during freezing. |
| 2 | Alternatively, you can use freezer bags. Pour the soup into the bags, squeeze out any excess air, and seal them tightly. Lay the bags flat on a baking sheet or tray for easier storage. |
| 3 | Label each container or bag with the date and type of soup. |
| 4 | Place the containers or bags in the freezer and make sure they are stored in an upright position to prevent leaks. |
| 5 | When you’re ready to enjoy a portion of soup, simply remove it from the freezer and thaw it in the refrigerator overnight. Once thawed, you can heat it in a microwave or on the stove. |
| 6 | Do not refreeze thawed soup. It’s best to consume it within 2-3 days. |
By freezing individual portions of homemade soup, you can have a quick and convenient meal whenever you need it. Just remember to follow proper freezing and thawing techniques to ensure the best quality and taste.
Avoiding Freezer Burn
Freezer burn is a common issue when storing homemade soup in the freezer. It occurs when the moisture in the soup evaporates and causes the quality of the soup to deteriorate. The result is dry, discolored patches on the surface of the soup, which can affect its taste and texture.
Here are some tips to avoid freezer burn:
- Use proper containers: Choose freezer-safe containers or storage bags that are airtight and leak-proof. This will help prevent air from getting in and moisture from escaping, reducing the risk of freezer burn.
- Fill containers correctly: Leave enough headspace in the container for the soup to expand as it freezes. This will prevent the container from bursting and causing freezer burn.
- Label and date containers: Always label the containers with the name of the soup and the date it was made. This will help you keep track of how long the soup has been stored and ensure you use the oldest ones first.
- Remove excess air: If using storage bags, squeeze out as much air as possible before sealing them. This will help create a vacuum-like seal and reduce the risk of freezer burn.
- Store in the coldest part of the freezer: Place the containers of soup in the coldest part of your freezer, such as the back or bottom shelf. This will help maintain a consistent temperature and prevent fluctuations that can lead to freezer burn.
- Don’t store for too long: While properly stored homemade soup can last for several months in the freezer, it’s best to use it within 3-4 months to maintain its quality. The longer it sits in the freezer, the higher the risk of freezer burn.
- Thaw properly before reheating: When you’re ready to enjoy the soup, thaw it in the refrigerator overnight or use the defrost setting on your microwave. Avoid thawing at room temperature as it can promote the growth of harmful bacteria.
By following these tips, you can successfully avoid freezer burn and keep your homemade soup fresh and delicious for longer periods of time.
Thawing and Reheating Homemade Soup
When it comes to enjoying your homemade soup, proper thawing and reheating techniques are essential to maintain its flavor and quality. Here are some guidelines to ensure that your soup is thawed and reheated safely:
Thawing Homemade Soup
If you have stored your soup in the freezer, you will need to thaw it before reheating. Here are a few methods to thaw your homemade soup:
- Refrigerator: The safest way to thaw your soup is to transfer it from the freezer to the refrigerator. Leave it to thaw slowly overnight or for about 24 hours, depending on the quantity of soup.
- Cold Water Bath: If you need to thaw your soup quickly, you can place the frozen container of soup in a sealed plastic bag and submerge it in a cold water bath. Make sure the bag is sealed tightly to avoid any water reaching the soup. Change the water every 30 minutes until the soup is thawed.
- Microwave: If you’re in a hurry, you can use the defrost setting on your microwave to thaw the soup. Be sure to check and stir the soup frequently to ensure even thawing and prevent any hot spots. Once thawed, transfer the soup to a pot for reheating.
Note: Do not thaw the soup at room temperature, as this can allow bacterial growth and compromise the safety of the soup.
Reheating Homemade Soup
Once your soup is thawed, it’s time to reheat it so that it’s hot and ready to enjoy. Follow these steps to reheat your homemade soup:
- Stovetop: Transfer the thawed soup to a pot and heat it over medium heat, stirring occasionally to prevent sticking or scorching. Heat the soup until it reaches a simmer, avoiding boiling, as this can overcook the soup and affect its taste and texture.
- Microwave: If you prefer to use a microwave, transfer the soup to a microwave-safe container and cover it with a microwave-safe lid or microwave-safe plastic wrap. Heat on high in one-minute intervals, stirring in between, until the soup is hot throughout. Be careful when removing the lid or wrap, as the steam can be hot.
Note: The exact reheating time will vary depending on the quantity and thickness of the soup, as well as the power of your microwave or stovetop. Use a food thermometer to ensure the soup reaches a safe internal temperature of 165°F (74°C) before consuming.
By following these thawing and reheating guidelines, you can enjoy your homemade soup safely and savor all its delicious flavors each time you serve it.
Storage Duration and Safety Guidelines
When it comes to storing homemade soup in the freezer, it is important to follow certain guidelines to ensure its safety and quality. Here are some tips on how to properly store your homemade soup:
Storage Duration:
Homemade soup can typically be stored in the freezer for up to three months. It is important to label your containers with the date you prepared the soup, so you can keep track of its storage duration.
Safety Guidelines:
Follow these safety guidelines to ensure your homemade soup remains safe to eat:
- Allow the soup to cool completely before freezing it. This helps prevent bacteria growth.
- Divide the soup into individual portions or in sizes that suit your needs. This makes it easier to thaw and reheat smaller portions without wasting any soup.
- Use airtight and freezer-safe containers or resealable plastic bags to store the soup. This helps prevent freezer burn and keeps the soup fresh.
- Label each container with the type of soup and the date it was prepared.
- Store the soup in the freezer at a temperature below 0°F (-18°C).
Remember to always thaw and reheat your homemade soup properly before consuming. Thaw the soup in the refrigerator overnight or use the defrost setting on your microwave. Reheat the soup on the stovetop or in the microwave until it reaches a safe internal temperature of 165°F (74°C).
By following these guidelines, you can safely store your homemade soup in the freezer and enjoy it for months to come!
FAQ
What is the best way to store homemade soup in the freezer?
The best way to store homemade soup in the freezer is to let it cool completely before transferring it to airtight containers or freezer bags. It’s important to leave some space at the top of the container for expansion during freezing. Label the containers with the name and date and store them in the freezer.
Can I freeze homemade soup in glass jars?
Yes, you can freeze homemade soup in glass jars, but it’s important to follow some guidelines. Make sure the jars are freezer-safe and leave enough headspace for the soup to expand during freezing. Let the soup cool completely before pouring it into the jars, and be careful to avoid thermal shock by not placing hot jars in the freezer. It’s also a good idea to place a piece of plastic wrap or parchment paper on top of the soup before sealing the jars to prevent freezer burn.
How long can I store homemade soup in the freezer?
You can store homemade soup in the freezer for up to three months. It’s best to consume it within this time frame for optimal freshness and taste. Make sure to label the containers or bags with the date, so you know how long they have been stored. If the soup develops any off smells or tastes, it’s best to discard it.