

Jam is a delicious and versatile spread that can be enjoyed on toast, biscuits, or even in baking. Many people enjoy making homemade jam as a way to use up an abundance of fruits and create unique flavor combinations. But once you have made your jam, you may be wondering how long it will last in the refrigerator.
The shelf life of homemade jam can vary depending on several factors. One important factor is how the jam is stored. Properly storing your jam in the refrigerator is key to extending its shelf life. When stored correctly, homemade jam can typically last for up to 3 weeks in the refrigerator. However, it’s important to note that this is just a general guideline, and the actual shelf life can vary depending on the specific recipe and ingredients used.
To ensure that your homemade jam lasts as long as possible, it’s important to store it in an airtight container. This will help to prevent air and moisture from reaching the jam, which can cause it to spoil more quickly. Additionally, it’s important to keep the jam refrigerated at all times, as this will help to slow down the growth of bacteria and mold.
When checking if your homemade jam is still good to eat, there are a few signs to look out for. If you notice any mold growth, a strange odor, or a change in color or texture, it’s best to discard the jam. It’s also important to always use clean utensils when serving the jam to help prevent contamination.
In conclusion, homemade jam can last up to 3 weeks in the refrigerator when stored properly. By storing it in an airtight container, keeping it refrigerated, and checking for any signs of spoilage, you can enjoy your homemade jam for as long as possible.
Overview of Homemade Jam
Making homemade jam is a delightful and rewarding process that can be enjoyed by both novice and experienced cooks. Jam can be made from a variety of fruits, including strawberries, raspberries, blueberries, and more.
The Jam-Making Process
The first step in making homemade jam is to select and prepare your fruit. It’s important to use ripe and fresh fruit to ensure the best flavor. Wash and chop the fruit, removing any stems, seeds, or pits.
Next, you’ll need to combine the fruit with sugar and lemon juice in a saucepan. The sugar will help to sweeten and preserve the jam, while the lemon juice provides acidity, which helps with the gelatinization process. Heat the mixture over medium heat, stirring frequently, until the sugar dissolves.
Once the sugar has dissolved, increase the heat and bring the mixture to a boil. Boil the jam for a few minutes while continuing to stir. This will help to ensure that the jam thickens and reaches the desired consistency.
After boiling, you’ll need to do a “jam test” to determine if it has reached the correct consistency. Simply place a small amount of the hot jam on a chilled plate or spoon and allow it to cool for a few seconds. If it wrinkles when you push it with your finger, it’s ready. If not, continue boiling and test again after another minute or so.
Storing Homemade Jam
Once your jam has reached the desired consistency, it’s time to store it. While there are different methods for storing jam, one common approach is to pour the hot jam into sterilized jars, leaving a small headspace at the top. Wipe the rims of the jars to ensure a good seal, then cover with sterilized lids and rings.
Homemade jam can be stored in the refrigerator for up to a month. It’s important to keep the jam in a cool, dark place to maintain its quality. If you have excess jam that won’t be consumed within a month, you can also preserve it by canning it using a water bath method.
When properly stored, homemade jam can be enjoyed for several months, if not longer. However, it’s important to check for signs of spoilage before consuming. If the jam develops mold, an off smell, or an off taste, it should be discarded.
In conclusion, making homemade jam allows you to enjoy the delicious flavor of fresh fruit all year long. By following proper storage and canning methods, you can extend the shelf life of your homemade jam and savor it for months to come.
Factors Affecting the Shelf Life of Homemade Jam
When making homemade jam, it’s important to consider several factors that can affect its shelf life. By understanding these factors, you can ensure that your homemade jam remains safe to eat and retains its quality for as long as possible.
1. Ingredients
The quality and freshness of the ingredients used in the jam-making process play a significant role in determining its shelf life. Using fresh, ripe fruits and high-quality sugar can help prolong the jam’s freshness. Additionally, adding lemon juice, which is high in acidity, can act as a natural preservative.
2. Sterilization
Proper sterilization of jars and lids is vital to prevent the growth of bacteria and other microorganisms that can spoil the jam. Before filling the jars, they should be thoroughly cleaned and then sterilized by boiling them in water for at least 10 minutes. The lids can also be boiled separately or washed thoroughly with hot, soapy water.
3. Processing and Sealing
The correct processing and sealing of the jars are essential to create a vacuum seal that prevents air and bacteria from reaching the jam. This can be achieved by filling the jars with hot jam, leaving 1/4 inch of headspace, and immediately sealing them with sterilized lids and bands. The sealed jars should be processed in a boiling water bath for the recommended time to ensure proper preservation.
4. Storage Conditions
Storing homemade jam in the refrigerator is the best way to extend its shelf life. The cold temperature inhibits the growth of microorganisms and helps maintain the jam’s quality. The jam should be kept in airtight containers to prevent oxidation and absorption of odors from the refrigerator.
Overall, the shelf life of homemade jam can vary depending on these factors. However, when prepared and stored correctly, it can typically last up to one year in the refrigerator. It’s always important to check for any signs of spoilage before consuming homemade jam, such as mold growth, off-putting odor, or changes in consistency or color.
Storing Homemade Jam in the Refrigerator
Once you have made your delicious homemade jam, you will need to store it properly to ensure its freshness and longevity. Storing homemade jam in the refrigerator is a great way to preserve it and keep it tasting its best.
Choosing the Right Container
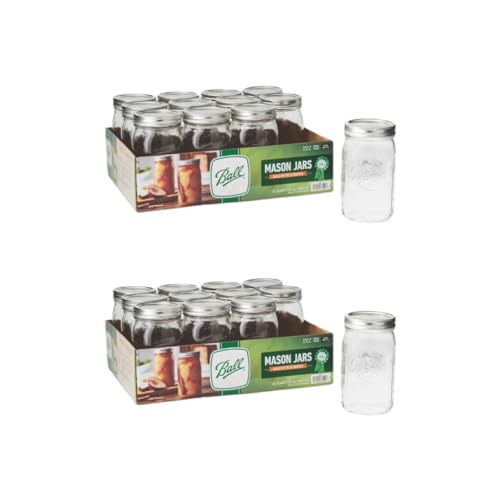
When it comes to storing homemade jam in the refrigerator, choosing the right container is essential. Opt for glass jars or containers with a tight-fitting lid. Glass containers are ideal as they are non-reactive and won’t affect the taste or quality of the jam.
Properly Sealing the Jam
To extend the shelf life of your homemade jam, it is important to ensure the containers are properly sealed. Make sure the lids are tightly closed to prevent air and moisture from entering. This will help in maintaining the freshness and flavor of the jam for a longer period.
It is recommended to use new lids or clean, undamaged lids when sealing your homemade jam. This will ensure a proper seal and minimize the risk of contamination.
Label each container with the date of preparation to keep track of its freshness. This will help you identify older jams and use them before newer batches.
Refrigerator Storage
After sealing your homemade jam in the chosen containers, place them in the refrigerator immediately. The cool temperature of the refrigerator will slow down the growth of bacteria, preserving the jam for an extended period.
Store your homemade jam in the coldest part of the refrigerator, such as the bottom shelf or the back of the fridge. This will ensure a consistent temperature and further prolong its shelf life.
Keep in mind that homemade jam stored in the refrigerator can last up to 6 months if properly stored and sealed. However, it is always best to check for any signs of spoilage, such as mold or bad odor, before consuming.
By following these guidelines, you can enjoy your homemade jam for an extended period, spreading its deliciousness on toast, pastries, or using it as a filling in various recipes.
Signs of Spoiled Homemade Jam
Homemade jam is a delightful treat that can be enjoyed on toast, in yogurt, or even as a topping for ice cream. However, it’s important to know when your homemade jam has gone bad to avoid any potential health risks. Here are some signs that your homemade jam may have spoiled:
1. Mold
Mold is a clear sign that your homemade jam has spoiled. If you notice any fuzzy or colorful spots on the surface of the jam, it’s best to discard it immediately. Consuming moldy jam can lead to food poisoning and other health issues.
2. Off-smell
If your homemade jam has a strange or foul odor, it’s a sign that it has spoiled. The smell may be sour, rancid, or simply off-putting. Trust your sense of smell and don’t consume jam that doesn’t smell fresh and fruity.
Additionally, if your jam has an alcoholic or yeasty smell, it may have undergone fermentation, which can also indicate spoilage.
3. Texture changes
Spoiled jam may have a slimy or stringy texture that is different from its usual consistency. If you notice any clumps, separation, or unusual textures, it’s best to err on the side of caution and avoid consuming it.
It’s important to note that while these signs indicate that your jam is no longer safe to consume, they may not always be present. Some bacteria may be present in spoiled jam without any visible signs. It’s always best to use your judgment and discard jam that you suspect has gone bad.
FAQ
Can I keep homemade jam in the refrigerator?
Yes, you can definitely keep homemade jam in the refrigerator.
How long does homemade jam last in the refrigerator?
Homemade jam can last for about 6 to 12 months in the refrigerator.
What is the best way to store homemade jam in the refrigerator?
The best way to store homemade jam in the refrigerator is to transfer it to sterilized jars or airtight containers, and make sure to keep it refrigerated at all times.
How can I tell if homemade jam has gone bad?
If homemade jam has developed an off smell, strange texture, or if you see mold growing on it, then it is best to discard it as it has likely gone bad.
Can I consume homemade jam after its expiry date?
While homemade jam can still be safe to eat after its expiry date, it is best to check for any signs of spoilage and use your own discretion. If in doubt, it is safer to discard it.


