When your refrigerator gasket starts to wear out or becomes damaged, it can cause your fridge to lose its ability to maintain a consistent temperature. Not only can this lead to spoiled food and increased energy costs, but it can also put unnecessary strain on your refrigerator’s compressor. Fortunately, replacing a refrigerator gasket is a relatively simple and cost-effective DIY project that you can easily tackle on your own.
Step 1: Gather the necessary tools and supplies
Before you begin, make sure you have all the tools and supplies you’ll need for the job. This may include a new gasket, a screwdriver (flathead or Phillips, depending on your refrigerator model), a putty knife, and a hairdryer or heat gun. It’s also a good idea to have some soapy water or a mixture of water and vinegar on hand for cleaning the gasket and the refrigerator door.
Pro tip: It’s important to check your refrigerator’s user manual or consult the manufacturer’s website to ensure you have the correct replacement gasket for your specific make and model.

Step 2: Remove the old gasket
Use the screwdriver to carefully remove the screws holding the old gasket in place. Start at one corner and work your way around the door, being careful not to force or damage the gasket. Once you’ve removed all the screws, gently peel the gasket away from the door, using the putty knife if necessary to loosen any stubborn parts.
Pro tip: If your gasket is glued or sealed in place, you may need to use a hairdryer or heat gun to soften the adhesive before attempting to remove it.
What is a Refrigerator Gasket?
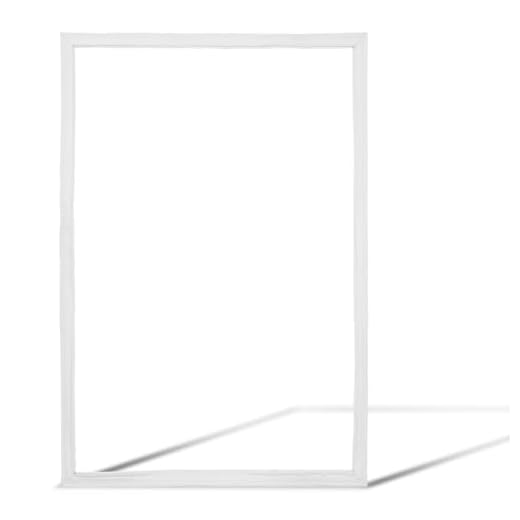
A refrigerator gasket, also known as a refrigerator door seal, is a rubber or silicone strip that is attached to the edge of the refrigerator door. Its main purpose is to form an airtight seal between the refrigerator and its door, preventing cold air from escaping and warm air from entering the refrigerator cavity.
A refrigerator gasket plays a crucial role in maintaining the temperature inside the refrigerator, ensuring that perishable food items stay fresh for a longer period. It acts as a barrier, preventing the exchange of air between the inside and outside of the refrigerator.
The refrigerator gasket helps the refrigerator maintain its energy efficiency by reducing the workload on the compressor. When the door is closed, the gasket seals the refrigerator shut, allowing the compressor to maintain a constant temperature without having to work harder. This not only saves energy but also extends the lifespan of the refrigerator.
Over time, the refrigerator gasket may become worn out or damaged, resulting in the loss of its sealing properties. This can lead to a variety of issues, such as increased electricity consumption, fluctuating temperatures, and food spoilage. In such cases, it is important to replace the gasket to restore the refrigerator’s efficiency and ensure proper food storage.
Understanding the crucial role of a refrigerator gasket
The refrigerator gasket is an essential component of any refrigerator. It serves as a seal between the door and the body of the refrigerator, ensuring that the cold air remains inside while keeping the warm air out.
One of the main functions of the gasket is to create an airtight seal. This is important because any gaps or leaks in the seal can result in temperature fluctuations inside the refrigerator. If the gasket is not functioning properly, the refrigerator may have to work harder to maintain the desired temperature, leading to increased energy consumption and higher electricity bills.
In addition to maintaining the temperature, the gasket also helps to prevent moisture and condensation inside the refrigerator. It acts as a barrier, preventing warm, moist air from entering the refrigerator and causing the build-up of condensation. This not only helps in preserving the quality of the food but also prevents the growth of mold and bacteria.
Furthermore, a properly functioning gasket plays a crucial role in keeping the noises and vibrations of the refrigerator to a minimum. It acts as a cushion, absorbing any noise or vibration that may be generated by the compressor. This contributes to a quieter and more pleasant kitchen environment.
Over time, the gasket may wear out, become loose or damaged, which can compromise its effectiveness. To ensure optimal performance, it is important to regularly inspect the gasket for any signs of wear and tear. If any defects are found, it is recommended to replace the gasket as soon as possible.
Changing a refrigerator gasket may seem like a daunting task, but it is a relatively simple process that can be done with a few basic tools. By following the right steps, you can easily replace the gasket and restore the seal of your refrigerator, ensuring its efficiency and longevity.
Signs of a Damaged Gasket
A refrigerator gasket is an essential part of the appliance that seals the door, preventing warm air from entering and cold air from escaping. Over time, the gasket may become damaged or worn out, compromising the efficiency of the refrigerator. Here are some signs that indicate a damaged gasket:
1. Visible Wear and Tear
Inspect the gasket for any visible signs of wear and tear. Look for cracks, tears, or gaps in the material. These can allow air to pass through, causing temperature fluctuations and higher energy consumption.
2. Condensation Buildup
If you notice condensation or moisture on the inside of the refrigerator or around the door, it may be a sign of a faulty gasket. A damaged gasket fails to create an airtight seal, causing humidity to enter the refrigerator.
3. Difficulty in Closing the Door
If you find it increasingly difficult to close the refrigerator door or notice that it pops open on its own, it could be due to a faulty gasket. The lack of a proper seal prevents the door from closing securely, leading to temperature fluctuations and potential food spoilage.
4. Higher Energy Bills
When the gasket is damaged, the refrigerator has to work harder to maintain the desired temperature, resulting in increased energy consumption. If you notice a sudden spike in your energy bills without any other explanation, it could be a sign that the gasket needs to be replaced.
5. Mold or Mildew Growth
A damaged or worn-out gasket can accumulate moisture, creating a breeding ground for mold or mildew. If you see any signs of mold or mildew on the gasket, it is essential to replace it promptly to ensure food safety and prevent health risks.
In conclusion, it is crucial to regularly inspect your refrigerator gasket for any signs of damage. If you notice any of these signs, it is recommended to replace the gasket to maintain optimal performance and energy efficiency of your refrigerator.
Identifying indications of a worn-out refrigerator gasket
A refrigerator gasket is a rubber seal that is supposed to keep the cool air inside the fridge while also preventing warm air from entering. Over time, this gasket can wear out due to constant opening and closing of the refrigerator door, which can lead to air leaks and an inefficient cooling system. Here are some signs to look out for to determine if your refrigerator gasket needs to be changed:
1. Visible damage
Inspect the gasket for any visible signs of damage such as cracks, tears, or disintegration. The gasket should be smooth and intact all the way around the refrigerator door. If you notice any obvious signs of wear and tear, it is a clear indication that the gasket needs to be replaced.
2. Condensation and frost buildup
If you notice excessive condensation or frost buildup on the inside of your refrigerator, it could be a sign that the gasket is not sealing properly. When warm air enters the fridge due to a faulty gasket, it can cause condensation or frost to form. This can lead to mold and bacteria growth, as well as reduced efficiency of cooling.
Note: It’s normal to have a small amount of condensation or frost in your refrigerator, but if it becomes excessive, it’s time to check the gasket.
Remember that a worn-out refrigerator gasket not only affects the efficiency of your refrigerator but also increases your energy bills. It’s always a good idea to regularly inspect your gasket and replace it if necessary to ensure optimal performance and prolong the lifespan of your appliance.
Tools and Materials You Will Need
Before you start replacing the refrigerator gasket, make sure you have the following tools and materials:
- Flat-head screwdriver
- Phillips-head screwdriver
- New refrigerator gasket
- Tape measure
- Warm, soapy water
- Clean cloth or sponge
- Hairdryer or heat gun
- Scissors or utility knife
Having these tools and materials ready will help you complete the task efficiently and effectively. Make sure to read the manufacturer’s instructions on how to replace the gasket, as different refrigerators may require specific steps and tools.
Gathering the necessary equipment to replace the gasket
Before you can replace the gasket on your refrigerator, it is important to gather all the necessary equipment. Having everything ready will make the process much smoother and efficient. Here is a list of items you will need:
- New refrigerator gasket
- Screwdriver
- Tape measure
- Clean cloth or sponge
- Warm, soapy water
- Patience and steady hands
Make sure to double-check the make and model of your refrigerator to ensure you purchase the correct gasket. The screwdriver should be the right size for the screws on your refrigerator door. A tape measure will come in handy to measure the dimensions of the old gasket, ensuring the new one is the right size.
Having a clean cloth or sponge and warm, soapy water will be useful for cleaning the area around the gasket and removing any dirt or debris. It is crucial to work in a clean environment to prevent any additional issues.
Lastly, remember that changing a refrigerator gasket requires patience and steady hands. Take your time and follow the instructions carefully to achieve the best results.
Step-by-Step Guide to Changing a Refrigerator Gasket
Replacing a worn or damaged refrigerator gasket is crucial to maintaining proper temperature and preventing energy loss. Follow these steps to change the gasket of your refrigerator:
Step 1: Unplug the refrigerator from the power supply to ensure your safety during the replacement process.
Step 2: Locate the screws that secure the gasket to the door of the refrigerator. Use a screwdriver to carefully remove these screws.
Step 3: Once the screws are removed, carefully peel off the old gasket from the door. Take note of the way the gasket is affixed and how it is positioned.
Step 4: Clean the area where the gasket was attached using mild soap and water. Ensure that there is no residue or debris left on the surface.
Step 5: Open the new gasket and position it on the door, aligning it properly with the reference marks or grooves left by the old gasket. Make sure it is securely attached before moving on to the next step.
Step 6: Insert the screws back into their respective holes, starting from one corner and working your way to the opposite corner. Tighten the screws firmly, but do not overtighten them.
Step 7: Once you have secured all the screws, carefully inspect the gasket to ensure there are no gaps or wrinkles. If necessary, adjust the position of the gasket to eliminate any imperfections.
Step 8: Plug the refrigerator back into the power supply and close the door. Allow the refrigerator to run for a few hours to ensure that the new gasket is properly sealed and functioning.
Step 9: Regularly clean and maintain the gasket to prolong its lifespan and ensure its effectiveness in keeping your refrigerator properly insulated.
Note: If you encounter any difficulty during the replacement process, consult the refrigerator’s user manual or consider hiring a professional to assist you.
Easy-to-follow instructions for replacing the gasket yourself
Is your refrigerator gasket worn out or not sealing properly? Don’t worry! Replacing the gasket is a simple DIY task that you can easily do yourself. Just follow these easy step-by-step instructions:
Step 1: Gather the necessary tools
Before you begin, make sure you have all the necessary tools handy. You will need a flathead screwdriver, a putty knife, a new gasket (make sure it matches the make and model of your refrigerator), and a mild detergent solution.
Step 2: Remove the old gasket
Start by carefully peeling off the old gasket from the refrigerator door. You can use a putty knife to gently lift the edges and loosen the adhesive. Be careful not to damage the door or any surrounding parts during this process.
Pro tip: It’s a good idea to take pictures or notes of how the old gasket is installed. This will help you later during the installation of the new gasket.
Step 3: Clean the door surface
Once the old gasket is removed, thoroughly clean the door surface using a mild detergent solution. Make sure to remove any dirt, grease, or adhesive residue for better adhesion of the new gasket.
Step 4: Install the new gasket
Take the new gasket and align it with the door, making sure that it matches the original positioning. Starting from one corner, firmly press the gasket onto the door surface, working your way around the door. Use a flathead screwdriver to help tuck in any stubborn corners or edges.
Pro tip: If the new gasket seems stiff, you can soak it in warm water for a few minutes before installation. This will soften the material and make it more pliable.
Step 5: Check the seal and make adjustments if needed
Once the new gasket is installed, close the refrigerator door and check for proper sealing. Gently tug on the gasket to ensure it is secure and creates a tight suction when closed. If any adjustments are needed, use the flathead screwdriver to align or tighten the gasket as necessary.
Step 6: Clean and maintain the gasket
Regularly clean the gasket with mild detergent and water to prevent the buildup of dirt, grease, or mold. Avoid using harsh chemicals or abrasive materials that could damage the gasket. Additionally, check the gasket periodically for wear and tear, and replace it when necessary.
By following these simple instructions, you can easily replace the gasket of your refrigerator and ensure proper sealing, which will help maintain the cooling efficiency and prolong the life of your appliance.
FAQ
Why do I need to change the refrigerator gasket?
You may need to change the refrigerator gasket if it is damaged or worn out. A damaged gasket can lead to a loss of cold air, which can affect the efficiency of your refrigerator and result in higher energy bills.
How can I tell if my refrigerator gasket needs to be replaced?
There are a few signs that indicate a refrigerator gasket needs to be replaced. These include: visible damage to the gasket, cold air leaking from the refrigerator, condensation or frost buildup inside the refrigerator, and difficulty in closing the refrigerator door.
What tools do I need to change a refrigerator gasket?
You will need a screwdriver, a putty knife, and a replacement gasket. Some models may require additional tools, such as a heat gun or adhesive. Check the user manual of your refrigerator for specific instructions.
Can I change the refrigerator gasket myself, or do I need to hire a professional?
You can change the refrigerator gasket yourself if you are comfortable with basic DIY tasks. However, if you are unsure of the process or would prefer professional help, it is recommended to hire a technician to do the job.
How often should I change the refrigerator gasket?
The frequency at which you should change the refrigerator gasket depends on its condition and usage. Generally, it is recommended to inspect the gasket regularly for any signs of damage and replace it every few years or when necessary.