Blenders have become an essential kitchen appliance for many households. Whether you want to make smoothies, soups, or even grind nuts, a blender is the perfect tool for the job. However, using a blender may not be as straightforward as it seems. This article will guide you through the best blender instructions to ensure that you get the most out of your appliance.
Choosing the right blender
Before diving into the instructions, it is important to choose the right blender for your needs. There are various types of blenders available, including personal blenders, countertop blenders, and immersion blenders. Consider factors such as power, capacity, and functionality to determine which blender will best suit your requirements.
Basic operation
Once you have selected the blender that suits you, it’s time to learn the basic operation. Start by placing the blender on a flat, stable surface. Next, attach the pitcher or jar securely to the base. Add the ingredients you want to blend, ensuring not to overfill the container. Secure the lid tightly to prevent any spills. Finally, select the desired speed or program and start the blender. Keep the lid on while blending and use the pulse function for any chunky or thick ingredients.
Cleaning and maintenance
Proper cleaning and maintenance of your blender are crucial for its longevity and performance. After each use, disassemble the blender and wash the removable parts, such as the pitcher, lid, and blades, with warm soapy water. Use a brush to remove any stubborn residue. Wipe the base with a damp cloth, making sure to avoid getting water inside the electrical components. Regularly check for any wear and tear, and if necessary, replace any damaged or worn-out parts.
By following these best blender instructions, you can ensure that your blender operates efficiently and effectively, providing you with delicious blended creations for years to come.
Choosing the Right Blender
When it comes to choosing the right blender for your needs, there are several factors to consider. First and foremost, you should think about what you plan on using the blender for. Are you looking to make smoothies, soups, or sauces? Different blenders offer various blending functions, so it’s essential to choose one that can handle the specific tasks you have in mind.
Power is another crucial aspect to consider when selecting a blender. Blenders with higher wattage and horsepower tend to blend ingredients more efficiently, resulting in smoother textures. If you plan on blending hard or frozen ingredients frequently, a blender with a high-powered motor would be ideal. On the other hand, if you only plan on blending softer ingredients, such as fruits and vegetables, a less powerful blender may suffice.
- Consider the size and capacity of the blender. If you have a small kitchen or limited counter space, a compact blender may be more suitable for you. However, if you frequently entertain guests or have a large family, a blender with a larger capacity would be more practical.
- Look for blenders with durable materials and solid construction. Stainless steel blades and BPA-free plastic containers are long-lasting and easy to clean. Additionally, blenders with sturdy bases and secure lid locks ensure stability and safety during operation.
- Finally, consider the price range that fits your budget. While there are many high-end blenders on the market, there are also more affordable options that offer great performance and durability. It’s important to find a blender that meets your needs without breaking the bank.
In conclusion, choosing the right blender involves considering factors such as intended purpose, power, size and capacity, materials, and price. By taking these aspects into account, you can find a blender that perfectly suits your blending needs and preferences.
Factors to Consider for Your Blending Needs
Choosing the right blender for your blending needs can make all the difference in achieving perfect results. There are several factors to consider when selecting a blender that will suit your specific requirements.
Power: The power of a blender is an essential factor to consider. A high-powered blender will be able to blend even the toughest ingredients, such as ice and frozen fruits, effortlessly. Look for a blender with a wattage of at least 1000 watts to ensure it can handle all your blending needs.
Blades: The type and quality of the blades in a blender are crucial for achieving smooth and consistent blends. Stainless steel blades are known for their durability and ability to crush through tough ingredients. Look for a blender with sharp and sturdy blades that can withstand frequent use.
Capacity: Consider the capacity of the blender’s jar when making your decision. If you plan on making large batches of smoothies or other blended recipes, opt for a blender with a larger capacity jar. However, if you only need to blend small quantities, a smaller jar size may be more suitable.
Setting up Your Blender
Before you can start using your blender, it is important to properly set it up. Here are the steps to follow for a successful setup:
- Unboxing: Begin by carefully unboxing your blender and remove all the packaging materials. Check to ensure that all the necessary parts and accessories are included.
- Base Assembly: Place the base of the blender on a stable and flat surface. Make sure it is positioned securely and will not wobble during use. Connect the pitcher or container to the base by aligning the notches and twisting it into place.
- Blade Attachment: Check the user manual to determine the correct blade attachment for your desired blending task. Attach the blade to the pitcher or container, making sure it is securely fastened.
- Power Connection: Locate the power cord and plug it into a grounded electrical outlet. Make sure the outlet is suitable for the blender’s power requirements.
- Controls and Settings: Familiarize yourself with the blender’s controls and settings. These may include buttons or knobs for power, speed, and various blending functions. Adjust them as needed, following the manufacturer’s instructions.
- Final Checks: Before using the blender, ensure that all parts are properly assembled and tightened. Ensure that the pitcher or container is clean and dry, and that no foreign objects are inside. Close the lid tightly to prevent any spills during operation.
Following these steps will help you properly set up your blender, ensuring its optimal performance and longevity. Now you are ready to start enjoying delicious smoothies, soups, and other blended creations!
Step-by-Step Guide to Assembling Your Blender
Assembling your blender properly is essential to ensure its optimal performance and longevity. Here is a step-by-step guide to help you assemble your blender correctly:
1. Gather all the parts
Before you start assembling your blender, make sure you have all the necessary parts handy. This typically includes the blender base, the pitcher or jug, the lid, and the blade assembly. Check the user manual or the manufacturer’s website for the specific components of your blender model.
2. Insert the blade assembly
The blade assembly is a crucial component that sits at the bottom of the pitcher or jug. To insert it, flip the pitcher upside down and align the tabs on the blade assembly with the corresponding slots in the pitcher. Twist the blade assembly clockwise until it is securely locked in place.
3. Attach the pitcher to the base
Place the pitcher on top of the blender base, aligning it with the designated slots or connectors. Ensure that the pitcher sits flush and stable on the base. Depending on your blender model, you may need to twist the pitcher or lock it into place using buttons or levers.
4. Secure the lid
Attach the lid to the pitcher by aligning it with the designated grooves and snapping it into place. Make sure the lid is tightly sealed to prevent any spills or leaks during blending.
5. Final checks
Before using your blender, double-check that all the parts are properly assembled and secure. Ensure that the pitcher is firmly locked onto the base, the blade assembly is tightly in place, and the lid is securely sealed. Refer to the user manual for any specific guidelines or safety precautions.
By following this step-by-step guide, you can confidently assemble your blender and start enjoying its benefits for various blending tasks, from making smoothies to processing ingredients for your favorite recipes.
Operating Your Blender
When it comes to operating your blender, there are a few key steps to follow in order to achieve the best results. First, make sure that the blender is placed on a stable and flat surface. This will prevent any accidents or spills during the blending process. Additionally, ensure that the blender jar is securely attached to the base before turning it on.
Before adding any ingredients, it is important to familiarize yourself with the blender’s speed settings. Most blenders offer a range of speeds, allowing you to control the consistency of your blend. Start with a low speed and gradually increase it as needed. You can also use the pulse setting for short bursts of blending. This is particularly useful when dealing with tougher ingredients or creating chunky textures.
TIPS:
- Do not fill the blender jar to its maximum capacity, as this may cause overflow during blending.
- Always start with softer ingredients and gradually add tougher ones to avoid overloading the blender.
- If your blend requires liquid, add it gradually to achieve the desired consistency.
- Make sure to securely place the lid on the blender jar to prevent any spills or splatters.
- After each use, clean the blender thoroughly to prevent any residue or odors from lingering.
By following these simple instructions, you will be able to operate your blender confidently and efficiently, creating delicious blends for your enjoyment.
Proper Usage of Blender Functions and Controls
Blenders are versatile kitchen appliances that can be used for a variety of purposes, from making smoothies and soups to crushing ice and blending ingredients. To make the most of your blender, it is important to understand the different functions and controls available.
Blender Speed Settings: Most blenders come with multiple speed settings, typically ranging from low to high. These speed settings allow you to control the blending process and achieve the desired texture for your recipes. Start with a low speed for softer ingredients, such as fruits or vegetables, and gradually increase the speed for tougher ingredients like ice or frozen fruits.
Pulse Function: The pulse function on a blender is designed to provide short bursts of power. This function is useful for quickly breaking down ingredients, especially when you want to achieve a chunky texture or need to control the blending time. Use the pulse function by holding down the button in short intervals rather than keeping it held down continuously.
- Ice Crushing: If your blender is equipped with an ice crushing function, you can easily crush ice to add to your beverages or create icy treats. Add a few ice cubes to the blender and use the ice crushing function to achieve the desired consistency. It is important to remember not to overload the blender with too much ice at once.
- Blend Modes: Some blenders have specific blend modes for different types of recipes, such as smoothies, soups, or sauces. These modes are pre-set programs that automatically adjust the speed and blending time for optimal results. Refer to the blender’s user manual to understand the specific blend modes and their corresponding functions.
- Cleaning and Maintenance: To ensure the longevity of your blender, it is important to clean it thoroughly after each use. Most blenders have removable parts that can be easily washed with warm, soapy water. Avoid submerging the base of the blender in water and instead wipe it clean with a damp cloth.
By understanding and utilizing the various functions and controls of your blender, you can create a wide range of delicious recipes and ensure that your blender remains in good condition for years to come.
Maintaining Your Blender
Proper maintenance of your blender is essential to ensure its longevity and optimal performance. Follow these tips to keep your blender in top shape:
Cleaning
- After each use, detach the blender jar from the base and clean both parts thoroughly with warm soapy water.
- Use a brush or sponge to scrub any stains or residue from the blades and the inside of the jar.
- Wipe the base of the blender with a damp cloth and make sure it is completely dry before reassembling.
Storage
- Store your blender in a clean and dry area away from direct sunlight and moisture.
- If possible, disassemble the blender and store the parts separately to prevent any build-up of moisture or odor.
- Ensure that the blender jar and lid are completely dry before storing to prevent the growth of bacteria or mold.
Blade Maintenance
- Check the blades regularly for any signs of wear or damage. If they are dull or chipped, it may be time to replace them.
- Keep the blade assembly clean and free from any food particles or debris to maintain its efficiency.
- Avoid using abrasive cleaners or scrubbers on the blades as they can cause damage.
Usage Tips
- Avoid overfilling the blender jar to prevent spills and ensure smooth blending.
- Start with low speeds and gradually increase to higher speeds for better blending results.
- Avoid blending hot liquids as they can cause pressure buildup and potentially damage the blender.
By following these maintenance tips, you can extend the lifespan of your blender and enjoy its smooth blending performance for years to come.
10 Best Blender Instructions
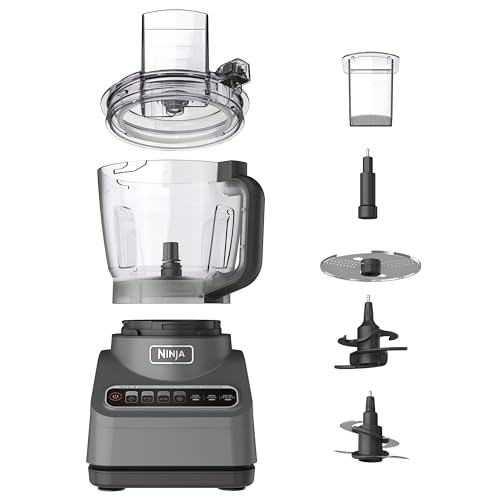
Ninja Professional Countertop Blender 72 Oz
Features
| Part Number | BL610 |
| Model | BL610 |
| Warranty | 1 year limited warranty |
| Is Adult Product | |
| Size | Оne Расk |
| Language | English |
Ninja Nutri Blender with To-Go Cups
Features
| Model | BN300 |
| Color | Silver |
| Size | Small |
Ninja 1200 Watts Professional Blender 2.0
Features
| Part Number | BR201AMZ |
| Model | BR201AMZ |
| Color | Dark Grey |
| Release Date | 2023-11-07T00:00:01Z |
| Size | 72 oz. |
FAQ
How often should I clean my blender?
You should clean your blender after every use to prevent food residue from building up and creating a potential health hazard.
Can I put the blender jug and blades in the dishwasher?
Most blender jugs and blades are dishwasher safe, but it’s always best to check the manufacturer’s instructions to be sure. If they are dishwasher safe, place them on the top rack for best results.
What is the best way to remove stubborn stains from the blender jug?
A mixture of warm water and dish soap or a baking soda paste can help to remove stubborn stains from the blender jug. Let the mixture sit for a few minutes, then scrub with a soft brush or sponge. Rinse thoroughly afterwards.
How should I store my blender when not in use?
It is best to store your blender with the jug and blade assembly removed. Rinse the jug and blades thoroughly, then allow them to dry completely before storing. Place the jug and blades in a clean, dry area to prevent any moisture build-up or odors.
When should I replace the blades in my blender?
You should replace the blades in your blender if they become dull or damaged, as this can affect the blender’s performance. Additionally, if you notice any rust developing on the blades, it’s time to replace them.
Conclusion
In conclusion, properly maintaining your blender is essential for its longevity and optimal performance. Regular cleaning, including disassembling and washing individual parts, is crucial to ensure a sanitary blending experience. Additionally, taking care to avoid overloading the blender and using proper blending techniques will prevent strain on the motor and potential damage to the blender. Finally, storing the blender in a cool and dry place, away from direct sunlight and moisture, will help prolong its lifespan. By following these maintenance tips, you can enjoy using your blender for years to come.