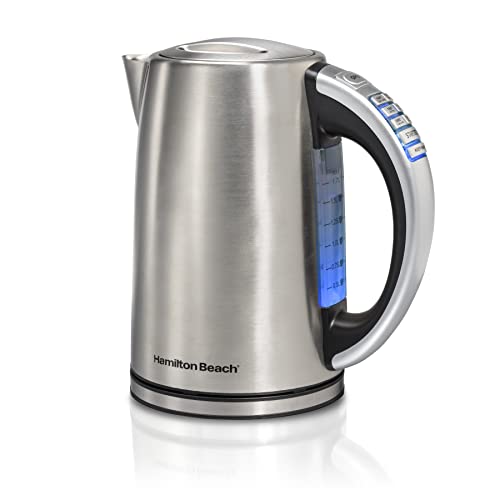
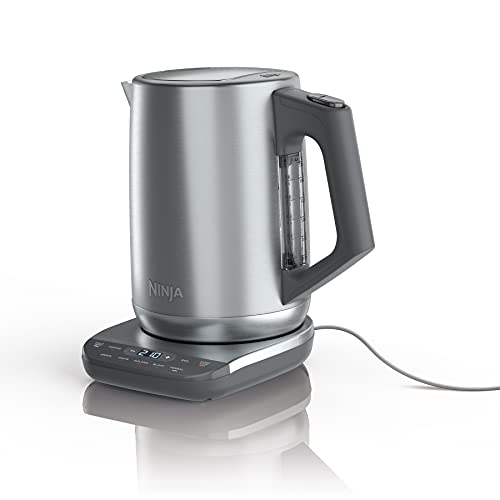
Electric kettles have become a staple in many households, making it quick and convenient to boil water for a cup of tea or coffee. However, like any other appliance, electric kettles can break down over time. The good news is that many common issues can be easily fixed at home, saving you the hassle and expense of buying a new kettle.
One common problem with electric kettles is that they stop boiling water. This could be due to a faulty heating element, a malfunctioning thermostat, or a build-up of mineral deposits. Another common issue is when the kettle doesn’t switch off automatically after boiling, which can be a safety hazard. Additionally, a broken lid or a leaky spout can also cause frustration and inconvenience.
Before attempting any repairs, it’s important to unplug the kettle from the power source and allow it to cool down completely. Safety should always be the top priority when dealing with electrical appliances. Once you’ve taken the necessary precautions, you can start troubleshooting the problem and finding a solution.
Identifying the Problem
Before you can fix a broken electric kettle, it’s important to identify the problem first. There can be several reasons why your electric kettle is not working properly. Here are a few common problems you might encounter:
1. No power: If your electric kettle is not turning on at all, it could be due to a power issue. Check if the power cord is properly connected to the outlet, and if there is power in the outlet itself. You can test this by plugging in another appliance.
2. Water leakage: If you notice water leaking from your electric kettle, it could be due to a faulty seal or gasket. Inspect the kettle for any visible cracks or damage. If you find any, it might be time to replace the seal or gasket.
3. Slow heating: If your electric kettle is taking longer than usual to heat up, it might be due to mineral buildup on the heating element. Hard water can leave mineral deposits on the element, reducing its efficiency. To fix this, you can try descaling the kettle using vinegar or a descaling solution.
4. Strange taste or smell: If your boiled water has a strange taste or smell, it could be due to mineral buildup or a dirty kettle. Cleaning the kettle regularly can help remove any bacteria or impurities that might affect the taste or smell of your water.
Identifying the problem is the first step towards fixing your broken electric kettle. Once you’ve identified the issue, you can move on to the appropriate troubleshooting or repair steps.
Common Issues with Electric Kettles
Electric kettles are a convenient and efficient way to boil water for tea, coffee, and other hot beverages. However, like any electrical appliance, they can sometimes experience issues. Here are some common problems that you may encounter with your electric kettle:
| Issue | Possible Cause |
|---|---|
| Not turning on | 1. Power cord not properly connected 2. Faulty power outlet 3. Defective power switch |
| Water not heating up | 1. Insufficient power supply 2. Heating element malfunction 3. Limescale build-up on the heating element |
| Leaking water | 1. Damaged or worn-out rubber gasket 2. Cracked or broken kettle body 3. Loose or faulty water spout |
| Strange taste or odor in boiled water | 1. Limescale build-up inside the kettle 2. Residue from previous use 3. Low-quality or contaminated water source |
| Automatic shut-off not working | 1. Defective thermostat 2. Faulty electrical circuit 3. Overloaded power supply |
| Noisy operation | 1. Loose or damaged heating element 2. Misaligned components 3. Hard water deposits causing vibrations |
Preventive Measures
To avoid encountering these issues with your electric kettle, you can take some preventive measures. Regularly clean and descale the kettle to prevent limescale build-up. Use filtered or bottled water to minimize mineral deposits. Handle the kettle with care to avoid physical damage. Avoid overfilling the kettle to prevent leaking or spilling. Additionally, ensure that the power outlet and cord are in good condition to maintain a proper electrical connection.
Conclusion
While electric kettles are generally reliable, they can experience common issues that can be easily resolved. By understanding the possible causes and taking preventive measures, you can keep your electric kettle in good working condition and enjoy hot beverages whenever you need them.
Gathering the Tools
Before attempting to fix your broken electric kettle, it is important to gather the necessary tools. Having the right tools on hand will make the repair process much easier and ensure that you have everything you need to successfully fix the issue.
1. Screwdriver
A screwdriver will be required to open up the electrical kettle and access its internal components. Make sure you have a screwdriver that is appropriate for the screws used in your specific kettle model.
2. Multimeter
A multimeter is an essential tool for troubleshooting electrical issues. This device will help you test and measure electrical current, voltage, and resistance, allowing you to identify any faulty components.
Other tools and supplies you may need include:
- Wire cutters
- Wire strippers
- Electrical tape
- Soldering iron
- Solder
- Replacement parts (if necessary)
Once you have gathered all the necessary tools, you will be ready to begin the process of fixing your broken electric kettle.
Essential Tools for Repairing Electric Kettles
When your electric kettle breaks down, it may be tempting to immediately replace it with a new one. However, with the right tools and a little know-how, you can often fix the problem yourself and save some money. Here are some essential tools you’ll need to repair your electric kettle:
- Screwdriver set: A set of screwdrivers with different sizes and types of heads is essential for disassembling your kettle and accessing the internal components.
- Multimeter: This tool is used to test the electrical continuity and voltage in different parts of the kettle to identify faulty components.
- Heat-resistant gloves: Since you’ll be working with electrical components that may be hot, it’s important to protect your hands with heat-resistant gloves to avoid burns.
- Wire cutters/strippers: These tools are handy for cutting and stripping wires when replacing faulty components or making repairs.
- Replacement parts: Depending on the issue with your kettle, you may need to replace certain components such as heating elements, thermostats, or power cords. Make sure you have the necessary replacement parts on hand before starting the repair.
- Cleaning supplies: In some cases, the problem with your kettle may simply be a buildup of limescale or mineral deposits. Having cleaning supplies such as descaling solutions, vinegar, and a soft brush can help you remove these deposits and restore the functionality of your kettle.
Before attempting any repairs, it’s important to disconnect the kettle from the power source and ensure it is completely cool. Additionally, make sure you refer to the manufacturer’s instructions or seek professional help if you are unsure about any aspect of the repair process. With the right tools and caution, you may be able to fix your electric kettle and enjoy many more cups of hot tea or coffee.
Disassembling the Kettle
Before attempting to fix a broken electric kettle, it’s important to disassemble the appliance carefully. Follow these steps to safely disassemble your kettle:
1. Unplug the kettle: Before disassembling the kettle, ensure that it is unplugged from the power source. This will prevent any accidental shock or electrocution.
2. Empty the kettle: Make sure the kettle is empty and does not contain any water or liquid. This will prevent any accidental spills or leaks during the disassembly process.
3. Remove the lid and filter: Take off the lid of the kettle and remove any filters or other removable parts. Keep them aside in a safe place to avoid losing them.
4. Remove the base: Turn the kettle upside down and locate the base. Most electric kettles have a removable base that attaches to the main body. Gently twist and remove the base from the kettle.
5. Unscrew the heating element: Locate the screws or fasteners that hold the heating element in place. Use a screwdriver to loosen and remove them. Carefully take out the heating element, ensuring that you do not damage any other parts.
6. Remove other components: Depending on the issue you are facing, you may need to remove other components such as the thermostat or the power switch. Refer to the kettle’s user manual for specific instructions on removing these parts.
7. Clean and inspect the parts: Once you have disassembled the kettle, clean all the parts thoroughly. Inspect each component for any signs of damage or wear and tear.
8. Reassemble the kettle: After fixing or replacing the faulty parts, carefully reassemble the kettle in the reverse order of disassembly. Ensure that all the components are securely fastened.
Remember, if you are not confident in your ability to fix the kettle, it’s best to consult a professional technician or consider buying a new one. Always prioritize safety when working with electrical appliances.
Step-by-Step Guide to Dismantling an Electric Kettle
Dismantling an electric kettle might seem like a daunting task, but with the right tools and a step-by-step guide, it can be a straightforward process. Follow these steps to dismantle your electric kettle and troubleshoot any issues you may be experiencing:
Step 1: Gather the Necessary Tools
Before you begin dismantling your electric kettle, make sure you have the following tools handy:
| – Screwdriver |
| – Wire cutters |
| – Pliers |
Step 2: Disconnect the Power
Safety should always be a priority when working with electrical appliances. To begin, unplug the electric kettle from the power source. This will ensure that you are protected from any potential electric shock during the dismantling process.
Step 3: Remove the Base Plate
The base plate is typically held in place with screws. Use your screwdriver to carefully remove these screws and set them aside. Once the screws are removed, you can easily lift off the base plate.
Step 4: Disconnect the Heating Element
Locate the heating element inside the kettle. It is usually connected to the base plate. Use your wire cutters to snip the wires connecting the heating element to the base plate. Take note of how the wires are connected so you can properly reassemble the kettle later.
Step 5: Remove any Remaining Components
Take a look inside the kettle to see if there are any other components that need to be removed. This could include sensors, switches, or other wiring. Use your pliers or screwdriver to gently detach these components, taking care to avoid causing any damage.
Step 6: Clean and Inspect the Components
Once all the components are removed, take the opportunity to clean them thoroughly. Use soap and water to remove any built-up residue. Inspect each component for any signs of damage or wear and tear. If any parts are damaged, they will need to be replaced before reassembling the kettle.
By following these step-by-step instructions, you can successfully dismantle your electric kettle and identify any issues that may be causing it to malfunction. Remember to proceed with caution and refer to the manufacturer’s instructions if available.
Repairing the Fault
Once you have identified the issue with your electric kettle, it’s time to proceed with the repair process. Here are some common problems and their corresponding solutions:
1. Faulty Power Cord
If the kettle doesn’t turn on at all, then the power cord might be the culprit. Inspect the cord for any physical damage or loose connections. If you find any issues, replace the power cord with a new one that’s compatible with your kettle’s specifications.
2. Heating Element Issues
If the kettle’s water is not heating up as expected, the heating element could be malfunctioning. To fix this, you’ll need to open the kettle’s base and locate the heating element. Check for any signs of damage, such as corrosion or overheating. If necessary, replace the heating element with a new one that matches your kettle model.
3. Water Leakage
If you notice water leaking from the kettle, it’s crucial to address this issue promptly. First, check the kettle for any cracks or damaged seals. If you find any, replace the damaged parts. Additionally, inspect the kettle’s spout and ensure it’s properly aligned and tightly sealed. If necessary, adjust or replace the spout to prevent further leakage.
4. Auto Shut-Off Malfunction
If the kettle fails to shut off automatically, it could be due to a faulty thermostat or sensor. Open the kettle and locate the auto shut-off mechanism. Clean any debris or mineral deposits that might be affecting its function. If cleaning doesn’t solve the issue, consider replacing the thermostat or sensor with a new one.
Remember, electrical repairs should be performed by individuals with the necessary knowledge and expertise. If you’re not confident in your abilities, it’s best to seek professional help or replace the kettle altogether.
Q&A
Why is my electric kettle not working?
If your electric kettle is not working, it could be due to a variety of reasons. One common reason is a faulty power cord or plug. Make sure that the kettle is properly plugged in and try using a different power outlet. Another possible reason is a tripped circuit breaker or a blown fuse. Check your circuit breaker panel or fuse box to ensure that the circuit is not overloaded or that a fuse is not blown. Additionally, a malfunctioning heating element or thermostat could be causing the issue. In this case, it may be necessary to replace these components.
How can I fix a leaking electric kettle?
If your electric kettle is leaking, it is important to address the issue promptly to prevent further damage and potential hazards. First, unplug the kettle and allow it to cool down. Once it is cool, inspect the kettle for any visible cracks or damage. If you find any, it may be necessary to replace the kettle altogether. If there are no visible cracks, the leakage could be due to a faulty gasket or seal. In this case, you can try replacing the gasket or seal to see if it resolves the issue. If the leaking persists, it is recommended to contact the manufacturer or seek professional help to diagnose and repair the kettle.