If you own a plumbed in espresso machine, it is important to regularly descale it in order to maintain its performance and prolong its lifespan. Descaling is the process of removing mineral deposits, such as limescale, from the internal parts of the machine. Over time, these deposits can build up and clog the machine, affecting its ability to brew coffee and causing potential damage.
Why is descaling necessary?
Plumbed in espresso machines are connected directly to a water source, which means they are more prone to mineral buildup compared to machines with water tanks. Accumulated limescale can affect the taste of your coffee, as well as the temperature and pressure of the machine. Regular descaling helps to ensure optimal performance and prolong the life of your espresso machine.
How often should you descale?
The frequency of descaling depends on the hardness of your water and how often you use the machine. In general, it is recommended to descale a plumbed in espresso machine every 1-3 months. However, if you notice a decrease in performance or taste quality, it may be necessary to descale more frequently.
How to descale your plumbed in espresso machine:
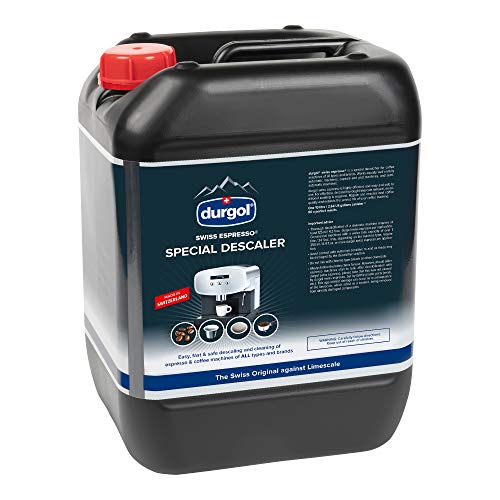
1. Prepare the descaling solution: There are commercially available descaling solutions specifically designed for espresso machines. Follow the instructions on the package to prepare the solution. Make sure to use an appropriate descaler that is compatible with your machine.
2. Empty the machine: Remove the water tank and empty any remaining water. Rinse the tank thoroughly and refill it with the descaling solution according to the recommended ratio.
3. Run the descaling cycle: Turn on the machine and initiate the descaling cycle. This may involve pressing specific buttons or following a specific procedure, as per the machine’s instructions. Allow the solution to run through the machine, including the brew head and steam wand.
4. Rinse thoroughly: Once the descaling cycle is complete, empty the water tank and fill it with clean water. Run a few cycles of water through the machine to rinse out any remaining solution and prevent any residue from affecting the taste of your coffee.
5. Clean the external parts: After descaling, wipe down the external surfaces of the machine with a damp cloth to remove any residue or descaling solution. Pay attention to the brew head, steam wand, and any other removable parts.
By following these steps and descaling your plumbed in espresso machine regularly, you can ensure optimal performance, delicious coffee, and a longer lifespan for your machine.
Prepare the descaling solution
Before you begin the descaling process, you will need to prepare the descaling solution. Here are the steps to follow:
| 1. | Refer to the user manual of your espresso machine to determine the recommended descaling solution. |
| 2. | Gather all the necessary ingredients and equipment, including the descaling solution, water, a measuring cup, and a container to catch the water and solution mixture. |
| 3. | Measure the appropriate amount of descaling solution as indicated in the user manual. Use the measuring cup to ensure accuracy. |
| 4. | Depending on your machine’s specifications, mix the descaling solution with a specific amount of water. Refer to the user manual for the correct ratio. |
| 5. | Pour the descaling solution and water mixture into the container that will be placed under the espresso machine’s water outlet. |
Once you have prepared the descaling solution, you will be ready to proceed with the descaling process.
Turn off the espresso machine
Before starting the descaling process, it is crucial to turn off the espresso machine and unplug it from the power source. This step will ensure your safety and prevent any accidents from occurring.
Make sure the machine is completely cooled down before proceeding to the next steps. This will help avoid any burns or injuries during the descaling process.
Steps to Turn off the Espresso Machine:
- Locate the power switch on the machine.
- Switch off the power by turning the switch to the “off” position.
- Once the machine is turned off, unplug it from the power source.
By turning off and unplugging the espresso machine, you are creating a safe working environment to proceed with the descaling process.
Empty the water reservoir
Before starting the descaling process, it is important to empty the water reservoir of your plumbed in espresso machine. This is necessary to ensure that the descaling solution can work effectively and that any residual water does not dilute the solution.
To empty the water reservoir, follow these steps:
1. Turn off the machine
Before removing the water reservoir, make sure the espresso machine is turned off. This will prevent any accidents or mishaps during the process.
2. Remove the water reservoir
Locate the water reservoir, which is usually located at the back or side of the machine. Carefully remove it from its position, taking care not to spill any remaining water.
Some espresso machines have removable water reservoirs, while others may require you to unscrew or unclip the reservoir from the machine. Refer to your machine’s manual for specific instructions.
Once the water reservoir is removed, dispose of any remaining water and rinse it with clean water to remove any debris or residue.
By emptying the water reservoir before descaling, you can ensure that the descaling solution can work effectively and that your plumbed in espresso machine remains in optimal condition.
Run the descaling solution through the machine
After preparing the descaling solution according to the manufacturer’s instructions, it’s time to run it through your plumbed-in espresso machine. Prior to beginning this process, make sure to remove the water tank and filter holder from the machine.
To start, locate the water inlet valve on your machine. This valve is typically found on the side or back of the machine and is labeled as “Water In” or indicated with an arrow. Open the valve to allow the descaling solution to flow into the machine.
Next, switch on the machine and allow the descaling solution to run through the internal pipes. This may take several minutes, so be patient and avoid interrupting the process. The solution will break down the limescale and other buildup that has accumulated in the machine.
While the descaling solution is flowing through the machine, you may notice the water becoming discolored or cloudy. This is a normal part of the descaling process, as it indicates that the solution is effectively removing the mineral deposits from the internal components of the machine.
Once the descaling solution has completely passed through the machine, close the water inlet valve to stop the flow. It is important to ensure that no more solution enters the machine at this point.
Now, it’s time to flush out any remaining descaling solution from the machine. Fill the water tank with clean, fresh water and replace it in the machine. Open the steam wand or hot water dispenser and allow the water to flow through, rinsing away any residual solution.
Repeat the rinsing process a few more times to ensure that all traces of the descaling solution are removed from the machine. You should notice that the water becomes clear and free from any discoloration.
Finally, once the machine has been thoroughly rinsed, you can reassemble any removable parts that were taken off earlier. The machine is now ready to be used again, this time free from limescale buildup and ready to produce delicious espresso.
Flush and clean the espresso machine
Before descaling the espresso machine, it is important to flush and clean it to remove any leftover coffee residue or debris. This will ensure that the descaling process is effective and the machine is thoroughly cleaned.
1. Empty the water reservoir
Start by emptying the water reservoir of the espresso machine. Dispose of any remaining water and rinse the reservoir with clean water.
2. Clean the brew group
The brew group is a critical component of the espresso machine that needs regular cleaning. Remove the brew group according to the manufacturer’s instructions and clean it using a soft brush or cloth. Pay close attention to the coffee grinds or residue that may have accumulated in the group and remove any debris.
3. Clean the portafilter and filter basket
The portafilter and filter basket are another important part of the espresso machine that needs cleaning. Remove the portafilter from the machine and separate the filter basket. Rinse both parts with warm water and use a nylon brush to gently scrub away any coffee residue. Make sure to remove any trapped coffee grounds in the filter basket holes.
4. Clean the steam wand
The steam wand should also be cleaned to ensure optimal performance. Use a damp cloth to wipe the steam wand and remove any built-up milk residue. Run steam through the wand for a few seconds to purge any remaining milk from the system.
5. Run clean water through the machine
Fill the water reservoir with fresh, clean water. Run the machine without coffee or descaling solution to flush out any remaining residues. This will help remove any remaining cleaning agents or debris from the internal components of the machine.
By following these steps, you can effectively flush and clean your plumbed-in espresso machine, ensuring that it is ready for the descaling process.
Q&A
Why should I descale my plumbed in espresso machine?
Descaling is important to remove mineral deposits and build-up that can affect the performance and taste of your espresso machine.
How often should I descale my plumbed in espresso machine?
The frequency of descaling depends on the hardness of the water in your area and how often you use the machine, but it is generally recommended to descale every 2-3 months.
What equipment do I need to descale my plumbed in espresso machine?
To descale your espresso machine, you will need a descaling solution or a mixture of citric acid and water, a container to hold the solution, a cloth or sponge, and access to the water tank or plumbing lines.