


Preparing a fondue can be an incredibly fun and delicious experience. Whether you’re hosting a dinner party or enjoying a cozy night in, filling a fondue burner is an essential step in the process. The burner is responsible for heating the fondue pot and keeping it at the perfect temperature throughout your meal. In this article, we will guide you through the steps of filling a fondue burner correctly to ensure a safe and enjoyable fondue experience.
Step 1: Before filling the fondue burner, make sure it is completely cool and detached from the fondue pot. This ensures that there are no accidental spills or burns during the process. Safety should always be your top priority.
Step 2: Take a close look at your fondue burner to determine the type of fuel it uses. The most common types are liquid fuel, gel fuel, or canister fuel. This information can usually be found in the instruction manual or on the burner itself. It’s important to use the correct type of fuel to prevent any mishaps.
Step 3: If your fondue burner uses liquid fuel, carefully pour the fuel into the designated fuel reservoir. It’s crucial to follow the manufacturer’s instructions and not overfill the reservoir. Leaving some space at the top allows for expansion and prevents spills when the fuel heats up.
Step 4: For gel or canister fuel, remove the cap or lid and simply place the fuel canister into the burner. Make sure it is securely in place before lighting the burner. Gel fuel canisters often come in a pre-filled and sealed form, whereas canister fuels can be refilled or replaced as needed.
Step 5: Once the fuel is in place, carefully reattach the fondue burner to the fondue pot. Make sure it is fitted securely, so there are no leaks or wobbling. Safety is paramount when dealing with open flames and hot substances, so double-checking the attachment is essential.
Now that you have successfully filled your fondue burner, you can proceed with heating the fondue pot and enjoying a delightful culinary adventure. Remember to always follow safety guidelines, never leave the burner unattended, and enjoy the fondue experience to the fullest!
Preparing Your Fondue Burner
Before you begin your fondue party, it’s important to properly prepare your fondue burner to ensure a safe and enjoyable experience. Follow these simple steps to get your fondue burner ready:
Step 1: Assemble Your Fondue Burner
If your fondue burner comes in several parts, take a moment to assemble it according to the manufacturer’s instructions. This typically involves placing the burner inside the metal stand and attaching any necessary components.
Step 2: Check for Fuel Compatibility
Before adding fuel, double-check the type of fuel your fondue burner requires. Most fondue burners use either liquid fuel, such as alcohol or gel fuel canisters. Make sure you have the correct fuel on hand before proceeding.
Step 3: Fill the Burner
Carefully open the fuel canister or container and pour the fuel into the designated compartment of the fondue burner. Take care not to overfill the burner, as this can lead to unnecessary spills or accidents.
Note: If you are using alcohol or gel fuel, be cautious of any open flames or heat sources nearby. It’s important to handle these fuels responsibly and maintain a safe working environment.
Step 4: Check for Leaks
After filling the burner, check for any leaks by inspecting the fuel compartment and connections. Look for any signs of dripping or fuel seepage. If you notice any leaks, do not use the burner and consult the manufacturer for further assistance.
Step 5: Secure the Burner
Once you have filled the burner and checked for leaks, securely attach it to the fondue pot or stand, ensuring a stable and steady setup. Make sure the burner is tightly fastened to avoid any accidental movement or tipping during use.
Remember to always read and follow the specific instructions provided by the manufacturer of your fondue burner for proper usage and safety guidelines.
Choosing the Right Fuel
When it comes to filling a fondue burner, choosing the right fuel is essential for a successful fondue experience. The fuel you choose can affect the taste and safety of your fondue, so it’s important to make the right choice.
Type of Fuel
There are different types of fuels that can be used for fondue burners, including liquid fuels and gels. Each type has its pros and cons, so it’s important to consider your needs and preferences when making a choice.
- Liquid fuels such as ethanol or methylated spirits are commonly used for fondue burners. They are easy to find and provide a consistent heat source. However, they can produce a strong smell and may leave residues on your fondue pot.
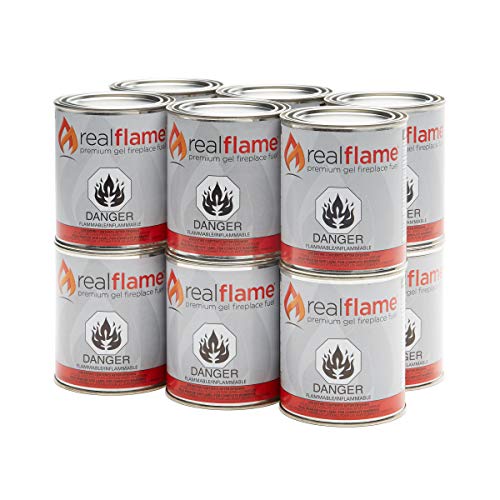
- Gel fuels are another popular option for fondue burners. They burn cleanly and do not produce any odor. However, they may not provide as much heat as a liquid fuel, so it may take longer for your fondue to heat up.
Safety Considerations
When choosing a fuel for your fondue burner, it’s important to consider safety. Here are a few things to keep in mind:
- Always follow the manufacturer’s instructions for your fondue burner regarding the type of fuel to use.
- Make sure to use a fuel that is specifically designed for fondue burners. Using the wrong type of fuel can be dangerous.
- Never refill the burner while it’s still lit or hot. Allow it to cool down completely before adding more fuel.
- Store the fuel in a safe place away from heat sources and out of reach of children.
- When lighting the fondue burner, use long matches or a long-handled lighter to avoid burning yourself.
By choosing the right fuel and following safety guidelines, you can ensure a safe and enjoyable fondue experience.
Inspecting and Cleaning the Burner
Before filling your fondue burner, it is important to inspect it and ensure it is clean and in good working order. Follow these steps to inspect and clean your fondue burner:
- Check the fuel canister for any signs of damage, such as dents or leaks. If you notice any damage, do not use the burner and replace the canister.
- Remove the burner from the fondue pot and examine it for any debris or residue. Use a soft brush or cloth to clean off any dirt or buildup.
- Inspect the burner’s wick. If it is damaged or frayed, it will need to be replaced. Wick replacement kits can be purchased at most kitchen supply stores.
- Check the burner’s fuel adjustment valve to ensure it is functioning properly. This valve controls the flame size and should move freely without sticking.
- If your burner has a snuffer cap, inspect it for any cracks or damage. The snuffer cap is used to extinguish the flame when you are finished with the fondue.
- Once you have inspected and cleaned the burner, reassemble it and make sure it is securely fastened to the fondue pot.
By regularly inspecting and cleaning your fondue burner, you can ensure it is safe to use and will provide a consistent heat source for your fondue dinners. Remember to always follow the manufacturer’s instructions for your specific fondue burner model.
Filling the Fondue Burner
Before you can start your fondue party, you’ll need to fill your fondue burner with fuel. Follow these simple steps to ensure a successful and safe fondue experience.
Step 1: Choose the right fuel for your fondue burner. Many burners use alcohol-based fuels such as denatured alcohol or methylated spirits. Make sure to check the manufacturer’s instructions to see which fuel is recommended for your specific burner.
Step 2: Find a well-ventilated area to fill the burner. It’s important to fill the burner away from any open flames or heat sources.
Step 3: Remove the burner from the fondue pot. This will allow you to have easier access to the burner and prevent any accidental spillage during the filling process.
Step 4: Unscrew the cap or lid of the fuel reservoir. Take care not to lose the cap, as it will be needed to extinguish the flame when you’re finished with your fondue meal.
Step 5: Slowly pour the fuel into the reservoir, being careful not to overfill. It is important to leave some space at the top to allow for expansion when the fuel heats up.
Step 6: Once the fuel is filled, securely screw the cap or lid back on the reservoir. Make sure it is tightly sealed to prevent any fuel leakage.
Step 7: Carefully place the burner back into the fondue pot. Make sure it is positioned securely and level to avoid any spills or accidents.
Step 8: Now you’re ready to light the burner and start enjoying your fondue! Use a long match or lighter to ignite the fuel. Always follow the manufacturer’s instructions for lighting and extinguishing the flame.
Note: It’s important to exercise caution when handling the burner and fuel. Keep it away from children and pets, and never leave it unattended while it is lit.
Opening the Burner
Before filling the fondue burner, it’s important to open it properly. The burner typically has a lid or cover that needs to be removed before adding fuel.
Step 1: Make sure the burner is cool to the touch. It’s important to avoid any risk of burns when handling the burner.
Step 2: Gently remove the lid or cover from the burner. This can usually be done by lifting it straight up or unscrewing it, depending on the design of the burner.
Step 3: Set the lid or cover aside in a safe place. It’s a good idea to keep it nearby so that it can be easily replaced after filling the burner.
Note: Some burners may have additional safety features, such as a latch or lock, that need to be released before opening. Refer to the manufacturer’s instructions for specific details on opening your fondue burner.
Pouring the Fuel
Before using a fondue burner, it is important to fill it with the appropriate fuel. Follow these steps to ensure a safe and successful fondue experience:
Step 1: Choose the right fuel
There are different types of fondue burners that require different types of fuel. Check the manufacturer’s instructions or the packaging of your burner to determine the appropriate fuel to use. Most commonly, fondue burners use liquid or gel fuel.
Step 2: Prepare the burner
Make sure the burner is clean and dry before filling it with fuel. Place it on a stable and heat-resistant surface to avoid any accidents or spills.
Step 3: Add the fuel
Open the fuel container and carefully pour the fuel into the designated reservoir of the burner. Take caution not to overfill the burner, as this may cause the flame to become too large and difficult to control.
Tip: It is recommended to fill the burner only up to three-quarters of its capacity to ensure a safe and controlled flame.
Step 4: Ignite the flame
After filling the burner with fuel, use a long-reach lighter or a match to ignite the flame. Hold the flame to the burner until it catches and starts burning steadily.
Caution:
When handling the fuel and igniting the flame, always follow proper safety precautions. Keep flammable materials away from the burner and never leave the flame unattended.
By following these steps, you can safely pour the fuel into your fondue burner and enjoy a delightful fondue experience.
Q&A
What is a fondue burner and why is it important?
A fondue burner is a small device used to heat the fondue pot. It is important because it provides a consistent source of heat to keep the fondue warm throughout the meal.
How do I fill a fondue burner?
To fill a fondue burner, first check what type of fuel it requires. If it uses liquid fuel, such as alcohol, pour the fuel into the designated fuel compartment. If it uses gel fuel, place the gel fuel canister in the designated area and light it according to the manufacturer’s instructions.
Can I use any type of fuel for a fondue burner?
No, you should only use the type of fuel specified by the manufacturer. Using the wrong fuel can be dangerous and may cause the fondue burner to malfunction.
How long does the fuel in a fondue burner last?
The duration of the fuel depends on the size of the burner and the type of fuel used. Generally, a full fuel compartment can last for several hours, but it is always a good idea to have extra fuel on hand just in case.
Are there any safety precautions I should take when using a fondue burner?
Yes, there are some safety precautions to consider when using a fondue burner. Make sure to place the burner on a stable and heat-resistant surface, away from any flammable materials. Never leave the burner unattended while it is lit, and always follow the manufacturer’s instructions for proper use.


