Many people wonder if they need to preheat their air fryer before using it. The answer to this question depends on what you’re cooking and personal preference.
Preheating your air fryer can have its benefits. It helps to create a crispy and evenly cooked meal. When you preheat the air fryer, the food starts cooking immediately, and the hot air circulates more efficiently, resulting in a better texture and taste.
However, not all recipes require preheating. Some dishes, like frozen fries or nuggets, can be cooked directly in a cold air fryer. The cooking time may be slightly longer, but the end result will still be delicious.

So, whether you choose to preheat your air fryer or not, it’s essential to follow the recipe instructions. They will provide you with the necessary cooking time and temperature for the best outcome. Experiment with preheating to find out what works best for you and your preferred dishes.
In summary, preheating your air fryer can improve the cooking process and result in a better meal. However, it’s not always necessary, especially for simple dishes. Ultimately, it comes down to personal preference and the recipe you’re using.
Benefits of Preheating an Air Fryer
Preheating an air fryer before you start cooking your food can offer several benefits. Here are a few reasons why preheating is a good practice:
1. Improved Cooking Time
Preheating allows the air fryer to reach the desired cooking temperature before you place the food inside. This ensures that the food starts cooking immediately as soon as it is placed in the air fryer. As a result, the cooking time is reduced, and you can enjoy your meals faster.
2. Enhanced Food Texture
By preheating the air fryer, you create a hot cooking environment that allows for a better texture and crispness of the food. The preheated air circulates quickly around the food, helping to achieve a golden brown crust on the outside while keeping the inside moist and tender. Whether you’re cooking fries, chicken wings, or vegetables, preheating can help you achieve that desirable crispy texture.
However, it’s important to note that not all foods require preheating. Some frozen foods, for example, can be cooked directly in a cold air fryer. Be sure to check the specific instructions for the food you’re cooking.
In conclusion, preheating your air fryer can help improve cooking times and enhance the texture of your food. It’s a simple step that can make a noticeable difference in the final result. Give it a try and enjoy the benefits of preheating!
Improved Cooking Time
One of the biggest advantages of preheating your air fryer is the improved cooking time. When you preheat your air fryer, it reaches the desired cooking temperature much faster, allowing you to start cooking your food right away. This means you can enjoy your crispy, delicious meals in a shorter amount of time.
Preheating also ensures that your food cooks evenly. By preheating, you are ensuring that the entire air fryer is heated to the same temperature, which helps to avoid any hot or cold spots in the cooking process. This results in food that is evenly cooked and has the perfect texture throughout.
| Without Preheating | With Preheating |
|---|---|
| Cooking Time: 20 minutes | Cooking Time: 15 minutes |
| Texture: Inconsistent | Texture: Even and crispy |
| Taste: Average | Taste: Delicious and flavorful |
By taking a few extra minutes to preheat your air fryer, you can greatly improve the overall cooking time and quality of your meals. It’s a small step that can make a big difference in the end result.
Enhanced Cooking Results
One of the benefits of preheating your air fryer before using it is that it enhances cooking results. Preheating allows the air fryer to reach the desired temperature, ensuring that your food is cooked evenly and thoroughly.
When you preheat the air fryer, the hot air circulates more effectively, creating a consistent cooking environment. This results in crispy and golden-brown exteriors, while maintaining a moist and tender interior for your food.
In addition, preheating helps to reduce cooking time. By starting with a preheated air fryer, you eliminate the time it takes for the appliance to heat up. This means you can enjoy your delicious meals faster, making preheating a time-saving technique.
Crispy Texture
Preheating the air fryer allows your food to develop the desired crispy texture. As the hot air circulates around the ingredients, it creates a Maillard reaction. This chemical reaction enhances the flavors and creates the golden-brown crust that gives your food that crispy and crunchy texture we all love.
Whether you’re cooking fries, chicken wings, or vegetables, preheating the air fryer ensures that they will turn out perfectly crispy every time.
Even Cooking
Another advantage of preheating is that it ensures even cooking throughout your food. When the air fryer is preheated, the hot air is immediately available, evenly distributing the heat to all sides of the food.
This even distribution of heat helps prevent any cold spots or undercooked areas. It ensures that every bite is cooked to perfection, allowing you to enjoy delicious and evenly cooked meals.
So, if you want enhanced cooking results with a crispy texture and even cooking, don’t forget to preheat your air fryer before using!
Steps to Preheat an Air Fryer
To ensure that your air fryer cooks your food evenly and efficiently, it is often recommended to preheat it before use. Here are the steps to preheat your air fryer:
Step 1: Place your air fryer on a flat, heat-resistant surface and plug it into a power source.
Step 2: Check the manufacturer’s instructions for the recommended preheating temperature and time. Different air fryer models may have different preheating requirements.
Step 3: Set the temperature and time on the air fryer control panel according to the manufacturer’s instructions. Some air fryers have a preheat button that you can use to easily set the desired temperature and time.
Step 4: Allow the air fryer to preheat for the recommended time. This can range from 3 to 5 minutes depending on the model.
Step 5: While the air fryer is preheating, prepare your food by seasoning and arranging it in the fryer basket. It is best to preheat the air fryer with the food already inside, as this helps to achieve a more even cooking result.
Step 6: Once the preheating time is complete, place the food-filled fryer basket into the preheated air fryer. Close the air fryer drawer or basket securely.
Step 7: Set the desired cooking time and temperature for your recipe on the air fryer control panel.
Step 8: Start the cooking process by pressing the appropriate button on the air fryer control panel. The air fryer will now cook your food with the preheated air.
Step 9: During the cooking process, it is important to check on your food periodically and shake the fryer basket to ensure even cooking and prevent sticking.
Step 10: Once the cooking time is complete, carefully remove the food from the air fryer using heat-resistant tongs or a spatula. Serve and enjoy your delicious crispy creations!
Preheating your air fryer ensures that it reaches the desired cooking temperature, allowing your food to cook evenly and efficiently. By following these simple steps, you can make the most out of your air fryer and enjoy perfectly cooked meals every time!
Plug in the Air Fryer
Before using your air fryer, you need to make sure it is plugged into an electrical outlet. This will provide the necessary power to the appliance and allow you to operate it.
Locate a suitable outlet in your kitchen or cooking area and ensure it has a grounded socket. It’s important to use a grounded socket to reduce the risk of electrical shock or damage to the appliance.
Once you have found a suitable outlet, plug the air fryer power cord into the socket. Make sure the plug is inserted securely and fully into the outlet to establish a reliable connection.
Once the air fryer is plugged in, you can proceed to preheat and use it according to the manufacturer’s instructions. Always follow the guidelines provided by the manufacturer to ensure safe and proper usage of the appliance.
Remember to keep the cord and plug away from water or any other liquid to avoid electrical hazards. Additionally, avoid using extension cords or adapters, as they can interfere with the proper functioning of the air fryer and potentially cause safety issues.
Important tip: Always unplug the air fryer when it is not in use or during cleaning to prevent any accidents or electrical hazards.
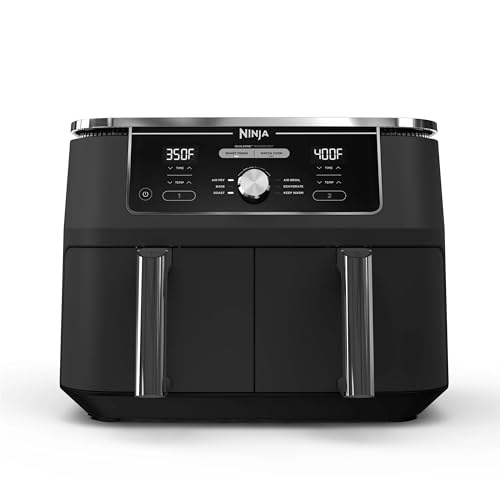
Set the Temperature
Once you have preheated your air fryer, you will need to set the temperature for the specific recipe you are following. Each recipe will have its own recommended temperature, which can vary depending on what you are cooking.
Most air fryers have a temperature range of 200°F to 400°F (93°C to 204°C), allowing you to adjust the heat according to your needs. It’s important to note that the cooking time and temperature may vary depending on the model of your air fryer, so it’s always a good idea to consult the user manual for specific instructions.
Setting the temperature correctly is crucial for achieving the desired results. If the temperature is too low, your food may not cook evenly or become as crispy as desired. On the other hand, if the temperature is too high, your food may cook too quickly on the outside while remaining undercooked on the inside.
For most recipes, a temperature of around 400°F (204°C) is recommended for achieving a crispy and golden-brown finish. However, for delicate foods or items that require a longer cooking time, a lower temperature may be necessary to ensure that the food is cooked through without burning the exterior.
It’s best to start with the recommended temperature in the recipe you are following, and then adjust it as needed based on your preferences and the specific air fryer you are using. Keeping an eye on your food while it cooks will also help you determine if any adjustments need to be made.
By setting the temperature correctly, you can ensure that your food is cooked to perfection in your air fryer every time.
Set the Timer
Once you have preheated your air fryer, it’s important to set the timer for your desired cooking time. Each recipe will have specific instructions on how long to cook the food, so be sure to follow those guidelines.
Here are a few general tips for setting the timer on your air fryer:

1. Refer to the Recipe
Always refer to the recipe you are using to determine the appropriate cooking time. Different foods require different cooking times, so it’s crucial to follow the recipe’s instructions to achieve the best results.
2. Adjust for Personal Preference
If you prefer your food to be more crispy or less crispy, you can adjust the cooking time accordingly. For example, if a recipe suggests cooking chicken wings for 15 minutes, but you prefer them to be extra crispy, you can add a few minutes to the cooking time.
It’s important to note that adjusting the cooking time may require some trial and error to find your desired level of crispiness. Keep in mind that cooking times may also vary depending on the size and thickness of the food you are cooking.
| Food | Cooking Time |
|---|---|
| Frozen French Fries | 15-20 minutes |
| Chicken Wings | 20-25 minutes |
| Fish Fillets | 10-12 minutes |
| Vegetables | 8-10 minutes |
These cooking times are just general guidelines, so be sure to adjust them based on your personal preference and the specific recipe you are using.
Once you have set the timer, you can sit back and relax as your air fryer cooks your food to perfection. Just make sure to keep an eye on the cooking process to prevent overcooking or undercooking. Enjoy your delicious and crispy air-fried meals!
Preheat the Air Fryer
Preheating your air fryer before each use is a crucial step to ensure optimal cooking results. Just like with conventional ovens, preheating the air fryer allows the cooking chamber to reach the desired temperature before you start cooking your food. This ensures that your food is evenly cooked and comes out crispy on the outside while tender on the inside.
Most air fryer models have a preheat function that you can easily select. Simply set the desired temperature and let the air fryer preheat for a few minutes. It typically takes around 3-5 minutes for the air fryer to reach the set temperature. Keep in mind that the preheating time may vary depending on the model and size of your air fryer.

Why is preheating important? Preheating helps to seal in the moisture of the food and create a beautiful crust on the outside. When you cook without preheating, the air fryer needs to work harder to reach the desired temperature, which can result in longer cooking times and less desirable texture.
When should you preheat? It is recommended to preheat your air fryer for all types of foods, especially when you want a crispy outer layer. Whether you’re cooking frozen fries, chicken wings, or even baking a cake, preheating ensures that the cooking process starts at the right temperature, giving you the best possible results.
So don’t forget to preheat your air fryer before each use. It’s a simple step that can make a big difference in the quality of your cooking outcomes. Happy air frying!
Q&A
Do I need to preheat my air fryer before using it?
Yes, it is recommended to preheat your air fryer before using it. Preheating helps to ensure that your food cooks evenly and thoroughly.
How long should I preheat my air fryer?
The preheating time for an air fryer can vary depending on the model and the desired cooking temperature. However, a general guideline is to preheat the air fryer for around 3-5 minutes.
What happens if I don’t preheat my air fryer?
If you don’t preheat your air fryer, your food may not cook evenly. The cooking time may also be longer, as the air fryer will need to heat up while it is cooking your food.
Can I skip preheating the air fryer if I’m in a hurry?
While it is not recommended, you can skip preheating the air fryer if you are in a hurry. However, keep in mind that your food may not cook as evenly and the cooking time may be slightly longer.
Is there a specific temperature I should preheat my air fryer to?
The specific temperature to preheat your air fryer to can vary depending on the recipe or type of food you are cooking. It is best to consult the cooking instructions or recipe for the specific temperature recommendation.