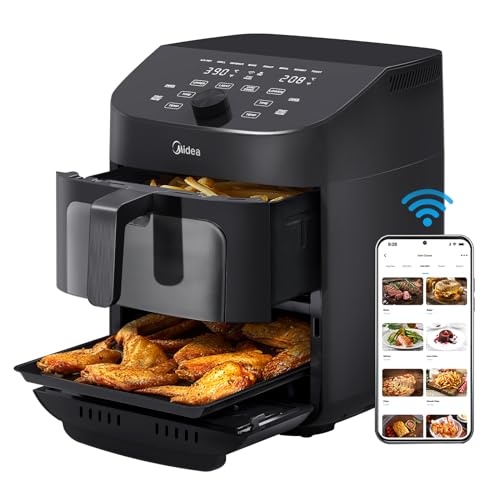
Are you tired of waiting for hours to bake bread in your conventional oven? If you are looking for a faster and more efficient way to bake bread, then using an air fryer might be the perfect solution for you. The Air Fryer Ninja is a versatile kitchen appliance that can cook a wide variety of dishes, including bread.
So, how long does it take to bake bread in the Air Fryer Ninja? The baking time can vary depending on the size and type of bread you are making. In general, it takes about 15 to 25 minutes to bake bread in the Air Fryer Ninja. This is significantly faster compared to baking in a traditional oven, which can take up to an hour or more.
When baking bread in the Air Fryer Ninja, it is important to preheat the appliance for a few minutes before placing the bread inside. This helps to ensure that the bread bakes evenly and gets a nice golden crust. Once the Air Fryer Ninja is preheated, you can place the bread in the baking pan and set the temperature and time according to the recipe or your preference.
It is worth noting that the baking time can also vary depending on the thickness of the bread. Thicker bread may require a longer baking time, while thinner bread may bake faster. To ensure that your bread is baked to perfection, it is recommended to check on it periodically during the baking process, especially towards the end of the recommended baking time.
In conclusion, if you are looking for a quicker and more efficient way to bake bread, the Air Fryer Ninja is a great option. With its shorter baking time and ability to bake a variety of bread types, you can enjoy freshly baked bread in no time. Just remember to preheat the appliance, adjust the baking time according to the thickness of the bread, and periodically check on the bread to ensure it is baked to your liking. Happy baking!
Preparing Your Air Fryer Ninja
Before you start baking bread in your Air Fryer Ninja, it’s important to properly prepare your appliance to ensure the best results. Here are the steps to follow:
1. Read the Instruction Manual
Take the time to read and understand the instruction manual that came with your Air Fryer Ninja. This will familiarize you with the specific features and settings of your particular model.
2. Clean the Interior
Thoroughly clean the interior of the Air Fryer Ninja using warm soapy water and a non-abrasive sponge or cloth. Rinse off any soap residue and dry the interior completely before use.
3. Preheat the Air Fryer
Preheating the Air Fryer Ninja is essential to achieve even and consistent baking results. Set your appliance to the desired temperature and let it preheat for a few minutes before placing the bread dough inside.
4. Utilize Accessories
Check if your Air Fryer Ninja comes with any specific baking accessories such as baking pans or trays. These accessories can optimize the baking process and help prevent the bread from sticking to the interior of the appliance.
5. Adjust Baking Time
Since every Air Fryer Ninja model may have slightly different temperature and time settings, it’s important to adjust the baking time according to your specific appliance. Experiment with different baking times to achieve the perfect loaf.
By following these steps and properly preparing your Air Fryer Ninja, you can ensure that your bread bakes evenly, resulting in delicious homemade loaves every time.
Setting up the Air Fryer Ninja
Before you start baking bread in your Air Fryer Ninja, it’s important to properly set it up to ensure the best results.
1. Read the Manual
Begin by reading the instruction manual that comes with your Air Fryer Ninja. This will give you important information on how to assemble and operate the device correctly.
2. Clean the Air Fryer
It’s crucial to clean the Air Fryer Ninja before use. Remove all packaging materials and wash the cooking basket, tray, and any removable parts with warm, soapy water. Rinse and dry them thoroughly.
3. Preheat the Air Fryer
Next, preheat your Air Fryer Ninja by setting the temperature to 400°F (200°C) and the timer to 5 minutes. This will help ensure that your bread bakes evenly.
4. Arrange the Bread Dough
Prepare your bread dough according to your recipe’s instructions. Once the dough is ready, shape it into your desired loaf or rolls and place it on a baking sheet lined with parchment paper.
5. Place the Bread in the Air Fryer
When the Air Fryer Ninja is preheated, carefully transfer the baking sheet with the bread dough into the cooking basket. Make sure there is enough space around the bread for proper air circulation.
6. Set the Cooking Time and Temperature
Refer to your bread recipe for the recommended cooking time and temperature. Adjust the settings on your Air Fryer Ninja accordingly. A general guideline for baking bread in an air fryer is 350°F (180°C) for 15-20 minutes, but this may vary depending on the size and type of bread you are making.
7. Monitor the Bread
Keep an eye on the bread as it bakes in the Air Fryer Ninja. The transparent lid will allow you to observe the progress without opening the fryer and releasing heat. Adjust the time or temperature if necessary.
8. Check for Doneness
After the recommended baking time, carefully remove the bread from the Air Fryer Ninja using oven mitts or tongs. Tap the bottom of the bread to check for a hollow sound, which indicates that it is fully baked.
9. Cool and Enjoy
Allow the bread to cool on a wire rack before slicing and enjoying. The Air Fryer Ninja will provide a crispy crust and a soft, fluffy interior, making it a perfect choice for baking bread.
Following these steps will help you properly set up your Air Fryer Ninja and achieve delicious bread every time.
Choosing the Right Bread Recipe
When baking bread in the Air Fryer Ninja, it is important to choose the right bread recipe. The right recipe can make a big difference in the end result of your bread. Here are a few considerations to keep in mind:
1. Type of Bread
There are many different types of bread that you can make in an Air Fryer Ninja, such as white bread, whole wheat bread, sourdough, or even cheese bread. Consider what type of bread you want to make and find a recipe that suits your taste.
2. Ingredients
Pay attention to the ingredients required in the recipe. Some recipes might require special ingredients like yeast, bread flour, or even specific types of grains. Make sure you have all the necessary ingredients before starting the baking process.

Additionally, consider any dietary restrictions or preferences you may have. There are many bread recipes available that are gluten-free, dairy-free, or vegan-friendly. Look for recipes that cater to your specific needs.
3. Baking Time and Temperature
Each recipe may have different recommended baking times and temperatures. Pay close attention to these instructions as cooking times may vary depending on the size and thickness of the bread. It’s important to follow the recipe’s instructions for the best results.
Remember that baking bread in an Air Fryer Ninja is different from using a traditional oven. Air fryers cook at a higher temperature and require less time. Adjust the baking time and temperature accordingly if necessary.
By choosing the right bread recipe, you can ensure that the bread you bake in your Air Fryer Ninja turns out delicious and perfectly cooked every time!
Baking Bread in Air Fryer Ninja
The Air Fryer Ninja is a versatile kitchen appliance that allows you to bake bread quickly and efficiently. Whether you’re making bread from scratch or using pre-packaged dough, the Air Fryer Ninja can help you achieve crispy, golden results.
Preparing the Dough
Before you begin baking bread in the Air Fryer Ninja, you’ll need to prepare your dough. If you are making bread from scratch, follow your favorite bread recipe and let the dough rise until it has doubled in size. If you are using pre-packaged dough, follow the package instructions for proofing or rising.
Getting Ready to Bake
Once your dough is ready, preheat your Air Fryer Ninja to the recommended baking temperature. This will vary depending on the recipe or type of bread you are making. It’s important to preheat the appliance to ensure that the bread bakes evenly and thoroughly.
While the Air Fryer Ninja is preheating, you can shape your dough into the desired bread shape. You can make a loaf, baguettes, or even rolls. Be sure to place the shaped dough on a greased or lined baking tray that will fit inside the Air Fryer Ninja.
Baking the Bread
Once the Air Fryer Ninja is preheated and your dough is shaped and ready to go, carefully place the baking tray inside the appliance. Set the cooking time and temperature according to your recipe or bread type.
Generally, bread in the Air Fryer Ninja will bake at a temperature of 350°F (180°C) for about 15-20 minutes. However, this may vary depending on the size and shape of your bread, as well as the specific model of the Air Fryer Ninja you are using.
During the baking process, it’s important to keep an eye on your bread to prevent it from burning. You may need to rotate the baking tray halfway through cooking to ensure even browning. A wooden skewer or toothpick can be inserted into the center of the bread to check for doneness. If it comes out clean, the bread is ready.
Once your bread is baked to perfection, carefully remove it from the Air Fryer Ninja using oven mitts or tongs. Allow the bread to cool on a wire rack before slicing and serving.
Remember, the Air Fryer Ninja is a powerful appliance that can bake bread in a fraction of the time compared to a traditional oven. Experiment with different recipes and techniques to find your perfect loaf!
Preheating the Air Fryer Ninja
Before baking bread in the Air Fryer Ninja, it is essential to preheat the device. Preheating helps to ensure that the bread bakes evenly and achieves a golden, crispy exterior while remaining soft and fluffy on the inside.
To preheat the Air Fryer Ninja, follow these simple steps:
| Step | Instructions |
|---|---|
| 1 | Plug in the Air Fryer Ninja and place it on a heat-resistant, stable surface. |
| 2 | Open the Air Fryer Ninja’s cooking drawer and remove any accessories or trays. |
| 3 | Adjust the temperature dial to the desired temperature for your bread recipe. |
| 4 | Set the timer dial to the recommended preheating time, typically 3-5 minutes. |
| 5 | Press the “Start” button to begin preheating the Air Fryer Ninja. |
| 6 | During the preheating process, keep the cooking drawer open to allow any excess heat to escape. |
| 7 | Once the preheating time is complete, the Air Fryer Ninja is ready to bake your bread. |
Remember to always follow the specific preheating instructions provided in your Air Fryer Ninja’s user manual, as different models may have slight variations in preheating times and temperatures.
By preheating your Air Fryer Ninja before baking bread, you can ensure that your homemade loaves come out perfectly cooked and delicious every time!
Placing the Bread in the Air Fryer Ninja
Once you have prepared your bread dough and allowed it to rise, it is time to bake it using your Air Fryer Ninja. Follow these simple steps to ensure a perfectly baked loaf:
1. Preheat the Air Fryer Ninja: Before placing your bread in the air fryer, make sure to preheat it to the recommended temperature. This will help ensure even cooking and a nicely browned crust.
2. Grease the Air Fryer Basket: To prevent the bread from sticking to the basket, lightly grease it with cooking spray or use a small amount of oil. This will also help create a crispy crust.
3. Shape the Bread: Shape your bread dough into the desired size and shape. You can make a traditional loaf, rolls, or even a baguette, depending on your preference.
4. Place the Bread in the Basket: Carefully place the shaped bread dough into the greased air fryer basket. Make sure to leave enough space between the pieces for them to expand during baking.
5. Adjust the Cooking Time and Temperature: Follow the recipe instructions for the recommended cooking time and temperature. Keep in mind that cooking times may vary depending on the size and thickness of your bread.
6. Start the Cooking Process: Once you have set the desired cooking time and temperature, start the air fryer. The circulating hot air will cook the bread evenly from all sides, resulting in a perfectly baked loaf.
7. Check for Doneness: Towards the end of the cooking time, check the bread for doneness. Gently tap the top of the loaf – if it sounds hollow, it is likely done. Alternatively, you can use a digital thermometer to check the internal temperature, which should be around 190-200°F (88-93°C) for most breads.
8. Remove and Cool: Once the bread is done, carefully remove it from the air fryer using oven mitts or tongs. Place it on a wire rack to cool for a few minutes before slicing and serving.
By following these simple steps, you can bake a delicious homemade bread in your Air Fryer Ninja. Experiment with different types of bread and flavors to find your perfect recipe!
Setting the Timer and Temperature
When it comes to baking bread in an Air Fryer Ninja, setting the right timer and temperature is essential for achieving the perfect loaf.
First, preheat your Air Fryer Ninja to the desired temperature. This usually takes a few minutes, so be sure to factor in the preheating time when planning your baking schedule.
Next, determine the appropriate baking time for your bread recipe. This will depend on the size and type of bread you are baking. As a general guideline, a small loaf of bread may take around 25-30 minutes to bake, while larger loaves may take 35-40 minutes or longer.
It’s always a good idea to consult your bread recipe for specific baking times. The recipe should provide guidance on the appropriate baking time and temperature for best results in an Air Fryer.
Once you have preheated your Air Fryer and determined the baking time, set the timer according to your recipe. If your Air Fryer has a digital timer, simply input the desired baking time. If your Air Fryer has a manual timer, turn the dial to the appropriate time.
In terms of temperature, most bread recipes call for a temperature of around 350-375°F (180-190°C) for baking in an Air Fryer Ninja. However, it’s important to refer to your specific recipe for the recommended temperature.
During the baking process, it’s a good idea to check on your bread periodically to ensure it’s not over or undercooked. You can do this by using a toothpick or cake tester to check for doneness. If the toothpick comes out clean with no raw batter sticking to it, your bread is ready.
Once your bread is fully baked, carefully remove it from the Air Fryer using oven mitts or tongs, as it will be hot. Allow the bread to cool for a few minutes before slicing and serving.
By meticulously setting the timer and temperature, you can ensure that your bread turns out perfectly baked and delicious every time you use your Air Fryer Ninja.
Q&A
Can I bake bread in an air fryer?
Yes, you can bake bread in an air fryer, including in the Air Fryer Ninja model. However, the baking time may vary depending on the recipe and the size of the bread you are making.

How long does it take to bake bread in an Air Fryer Ninja?
The baking time for bread in an Air Fryer Ninja can range from 20 to 40 minutes. It depends on the size and thickness of the bread, as well as the desired level of crustiness.
What temperature should I set my Air Fryer Ninja to bake bread?
The recommended temperature for baking bread in an Air Fryer Ninja is around 350 degrees Fahrenheit (175 degrees Celsius). However, you may need to adjust the temperature based on your specific recipe and preferences.
Can I use store-bought dough to bake bread in an Air Fryer Ninja?
Yes, you can use store-bought dough to bake bread in an Air Fryer Ninja. Just follow the instructions on the packaging for baking temperature and time, and adjust as needed for the air fryer.
What tips can you give for baking bread in an Air Fryer Ninja?
When baking bread in an Air Fryer Ninja, it is important to preheat the air fryer before placing the bread inside. You may also want to cover the bread with foil halfway through baking to prevent excessive browning. Additionally, testing the internal temperature of the bread with a thermometer can help ensure it is fully cooked.