Philips air fryers are a popular choice for those who want to enjoy delicious fried food with less oil and hassle. One of the great features of Philips air fryers is that they can be connected to your home’s Wi-Fi network, allowing you to control and monitor your cooking from anywhere using a smartphone or tablet.
To connect your Philips air fryer to Wi-Fi, you will need to follow a few simple steps. First, make sure that your air fryer is turned on and connected to a power source. Next, download and install the Philips Airfryer app on your smartphone or tablet from the App Store or Google Play Store.
Once the app is installed, open it and create an account or log in if you already have one. Follow the on-screen instructions to set up your air fryer. You will need to enter the Wi-Fi network name and password to connect your air fryer to your home’s Wi-Fi network.
Once connected, you will be able to control your air fryer remotely through the app. You can adjust the cooking temperature and time, turn the air fryer on or off, and even receive notifications when your food is done. With the ability to connect your Philips air fryer to Wi-Fi, cooking has never been so convenient!
Step-by-Step Guide
Connecting your Philips Air Fryer to your Wi-Fi network may seem daunting at first, but with this step-by-step guide, you’ll have it up and running in no time. Follow these instructions carefully to ensure a successful connection.
1. Check Your Wi-Fi Network
Before starting the connection process, make sure you have a stable Wi-Fi network available. Check your network settings and ensure that you have the correct Wi-Fi credentials handy (network name and password).
2. Power on the Air Fryer
Plug in your Philips Air Fryer and turn it on. Wait for it to initialize and get ready for the connection process.
3. Navigate to the Wi-Fi Settings
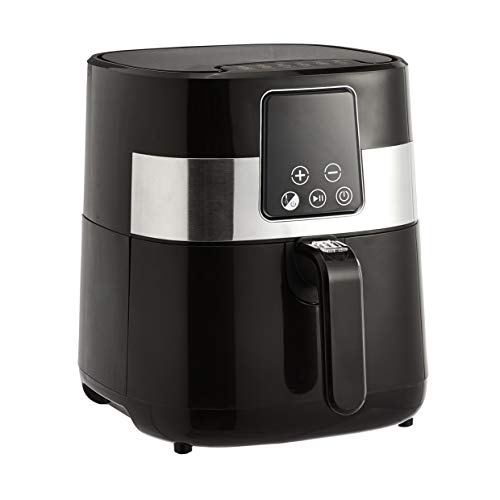
On the control panel of your Air Fryer, locate the Wi-Fi settings option. It is usually represented by a small network icon. Press the icon to enter the Wi-Fi settings menu.
4. Select Wi-Fi Network
In the Wi-Fi settings menu, you will find a list of available networks. Using the control panel buttons, scroll through the list and select your Wi-Fi network from the options. Press the appropriate button to confirm your selection.
5. Enter Wi-Fi Credentials
Once you have selected your Wi-Fi network, the Air Fryer will prompt you to enter the Wi-Fi credentials (network name and password). Use the control panel buttons to enter the information accurately. Double-check for any typos or mistakes before proceeding.
6. Connect to Wi-Fi
After entering the Wi-Fi credentials, select the “Connect” or “Join” option on the control panel. The Air Fryer will attempt to connect to your Wi-Fi network using the provided credentials. Wait for the connection process to complete.
7. Confirm Connection
Once the connection process is complete, the Air Fryer will display a confirmation message on the control panel. It may take a few moments for the connection to establish fully.
8. Test the Connection
To ensure that the Air Fryer is successfully connected to Wi-Fi, you can perform a quick test. Use the Air Fryer’s control panel to access any available Wi-Fi features, such as remote control or smart functionalities. If these features work correctly, it indicates a successful Wi-Fi connection.
9. Enjoy Wi-Fi-Enabled Features
Congratulations! Your Philips Air Fryer is now connected to your Wi-Fi network. You can now enjoy the convenience of controlling your Air Fryer remotely, exploring online recipes, and benefitting from other Wi-Fi-enabled features.
| Troubleshooting Tip: | If you encounter any issues during the connection process, try restarting your Air Fryer and Wi-Fi router. Make sure you are entering the correct Wi-Fi credentials, and your Wi-Fi network has a stable internet connection. |
Requirements and Compatibility
Before you can connect your Philips Air Fryer to Wi-Fi, there are a few requirements and compatibility factors to consider. Make sure you have the following:
1. Philips Air Fryer with Wi-Fi Capability
First and foremost, you will need a Philips Air Fryer model that supports Wi-Fi connectivity. Not all Philips Air Fryers have this feature, so it is essential to check the specifications of your particular model.
2. Wi-Fi Network
You will also need a stable Wi-Fi network at your home or the location where you plan to use the air fryer. Ensure that your Wi-Fi network is working correctly and has a reliable internet connection.
3. Compatible App
To connect your Philips Air Fryer to the Wi-Fi network, you will need to use a compatible app. This app can vary depending on the model of your air fryer. Check the user manual or Philips website for the recommended app for your specific model.
4. Smartphone or Tablet
You will need a smartphone or tablet with the compatible app installed. Ensure that your mobile device is connected to the same Wi-Fi network that you want to use with the air fryer.
Once you have all these requirements in place, you can proceed with the steps to connect your Philips Air Fryer to Wi-Fi.
| Requirement | Description |
|---|---|
| Philips Air Fryer with Wi-Fi Capability | Check if your air fryer model supports Wi-Fi connectivity |
| Wi-Fi Network | Ensure you have a stable Wi-Fi network with an internet connection |
| Compatible App | Install the recommended app for your air fryer model |
| Smartphone or Tablet | Have a smartphone or tablet with the compatible app installed |
Setting up the Air Fryer
Before connecting your Philips Air Fryer to Wi-Fi, it is important to go through the initial setup process. Follow these simple steps to get your air fryer up and running:
1. Unboxing and Inspection
Unbox the air fryer and inspect it for any signs of damage. Make sure all the accessories are included and in good condition.
2. Cleaning the Air Fryer
Before using the air fryer for the first time, clean all the removable parts with warm soapy water. Dry them thoroughly before reassembling.
3. Preparing the Air Fryer
Place the air fryer on a flat, heat-resistant surface, ensuring there is enough space around it for proper air circulation. Plug it into the power outlet.
4. Familiarizing with the Control Panel
Take a moment to familiarize yourself with the control panel of your specific model. This will help you navigate through the settings and functions later on.
5. Inserting the Food Basket
Open the air fryer drawer and insert the food basket. Close the drawer securely to ensure proper cooking and safety.
6. Setting the Time and Temperature
Set the desired cooking time and temperature according to your recipe. Refer to the user manual for recommended settings.
7. Preheating the Air Fryer (optional)
If your recipe requires preheating, press the preheat button and wait for the air fryer to reach the desired temperature before adding the food.
8. Adding the Food
Open the drawer and place the food inside the food basket. Make sure not to overcrowd the basket to allow proper air circulation.
9. Cooking Process
Once the food is in the air fryer, close the drawer and start the cooking process. Monitor the cooking progress as needed.
10. Cleaning the Air Fryer
After cooking, let the air fryer cool down and then clean the removable parts with warm soapy water. Wipe the interior with a damp cloth.
Following these steps will ensure that your Philips Air Fryer is set up correctly and ready for use. Now, let’s move on to connecting it to Wi-Fi.
Connecting to Wi-Fi Network
Connecting your Philips Air Fryer to a Wi-Fi network allows you to control and monitor it remotely using the companion app on your smartphone or tablet. Here’s how to connect your Air Fryer to Wi-Fi:
Step 1: Prepare your Air Fryer
Make sure your Air Fryer is plugged into a power outlet and turned on. Also, ensure that your smartphone or tablet is connected to a stable Wi-Fi network.
Step 2: Download and Install the Air Fryer App
Go to the App Store or Google Play Store and search for the Philips Air Fryer app. Download and install it on your smartphone or tablet.
Step 3: Launch the App
Open the Air Fryer app on your device. Create an account if prompted or log in using your existing Philips account.
Step 4: Connect to Wi-Fi
Follow the on-screen instructions to connect your Air Fryer to Wi-Fi. Usually, you will need to press and hold the Wi-Fi button on your Air Fryer until the Wi-Fi indicator starts blinking. Then, open the Wi-Fi settings on your device and select the network with the same name as your Air Fryer.
Note: The Wi-Fi password is usually printed on the back or bottom of your Air Fryer. If not, refer to the user manual or contact Philips support for assistance.
Step 5: Complete the Setup
Once connected, the Air Fryer app will guide you through the remaining setup process. This may include selecting your preferred language, setting the time, and personalizing cooking preferences.
Tip: Keep your Air Fryer within range of your Wi-Fi network for a stable connection.
With your Philips Air Fryer connected to Wi-Fi, you can now explore the app’s features, such as browsing recipes, creating cooking presets, and adjusting temperature and time settings directly from your device. Enjoy the convenience of controlling your Air Fryer from anywhere in your home with just a few taps on your smartphone or tablet!
Troubleshooting and Tips
If you are facing issues while connecting your Philips Air Fryer to Wifi, here are some troubleshooting tips to help you out:
1. Check your internet connection
The first thing you need to do is ensure that your internet connection is working properly. Check if other devices are able to connect to the WiFi network without any issues. If there are any problems with your internet connection, contact your internet service provider for assistance.
2. Reset your Air Fryer
If you are still unable to connect your Air Fryer to WiFi, you can try resetting the device. To do this, locate the reset button on your Air Fryer (usually found on the back or bottom) and press and hold it for about 10 seconds. Once the device resets, try connecting to WiFi again.
3. Ensure correct WiFi credentials
Double-check the WiFi name (SSID) and password you are entering are correct. Make sure there are no typos or spaces before or after the credentials. If you are unsure about your WiFi password, you can find it on your router’s settings or contact your internet service provider for assistance.
4. Move closer to the router
If your Air Fryer is located far from the WiFi router, it may have trouble connecting. Try moving the Air Fryer closer to the router and see if it helps. Thick walls or interference from other electronic devices can also affect the signal strength. Avoid placing the Air Fryer near other devices that may cause signal interference.
5. Contact Philips Support
If you have tried all the troubleshooting steps mentioned above and are still unable to connect your Air Fryer to WiFi, it is recommended to contact Philips support for further assistance. They will be able to provide you with specific instructions or troubleshoot the issue with your device.
Following these troubleshooting tips should help you resolve any connectivity issues with your Philips Air Fryer and get it connected to WiFi successfully.
Questions and Answers
Can I connect my Philips Air Fryer to WiFi?
Yes, you can connect your Philips Air Fryer to WiFi. This allows you to control and monitor your air fryer remotely using the Philips NutriU app.
What is the benefit of connecting my Philips Air Fryer to WiFi?
Connecting your Philips Air Fryer to WiFi offers several benefits. Firstly, it allows you to control your air fryer from anywhere in your home, so you can start cooking or adjust settings without having to be in the same room. Secondly, it enables you to use the Philips NutriU app, which offers a variety of recipes, cooking tips, and personalized recommendations. Lastly, it provides software updates for your air fryer, ensuring that you have the latest features and functions.
Can I use my Philips Air Fryer without connecting it to WiFi?
Yes, you can still use your Philips Air Fryer even if it is not connected to WiFi. The WiFi feature is optional and is mainly designed to offer convenience and additional functionality. You can manually control your air fryer using the control panel on the appliance itself, without needing the app.