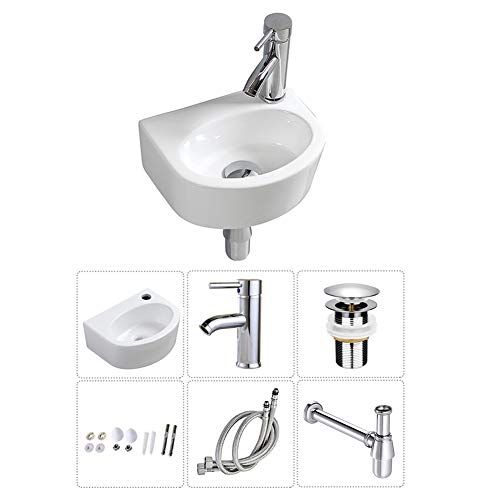
Is your kitchen mixer tap leaking? One of the most common causes of a leaking tap is a worn-out ceramic washer. The good news is that replacing the ceramic washer is a relatively simple task that you can do yourself with just a few basic tools.
The first step is to turn off the water supply. Look for the shut-off valve underneath the sink and turn it clockwise to stop the flow of water. It’s important to make sure that there is no water pressure in the tap before you start working on it.
Next, you’ll need to remove the handle of the tap. This can usually be done by unscrewing a small screw on the underside of the handle. Once the screw is removed, carefully lift off the handle and set it aside. Underneath the handle, you’ll find the cartridge or valve, which is where the ceramic washer is located.
To remove the cartridge or valve, you may need to use a wrench or pliers. Take care not to damage the cartridge or valve while removing it. Once the cartridge or valve is out, you can easily remove the old ceramic washer and replace it with a new one. Make sure to clean any debris or sediment from the area before installing the new washer.
Finally, reassemble the tap by following the steps in reverse. Put the cartridge or valve back in place and secure it with the wrench or pliers. Then, place the handle back on top and tighten the screw underneath. Once everything is back in place, turn on the water supply and test the tap for any leaks.
By following these simple steps, you can save yourself the expense and hassle of replacing the entire tap. Changing the ceramic washer on your kitchen mixer tap is a quick and easy DIY fix that anyone can do. So don’t let a leaking tap ruin your day – get ready to tackle the problem head-on!
Step-by-Step Guide: Changing Ceramic Washer on Kitchen Mixer Tap
Are you experiencing a leaky kitchen mixer tap? If so, the culprit could be a worn-out ceramic washer. Luckily, this is a simple fix that you can do yourself. Follow these steps to change the ceramic washer on your kitchen mixer tap:
Step 1: Turn off the water supply
Before you start working on your kitchen mixer tap, it’s important to turn off the water supply. Look for the shut-off valves under your sink and turn them clockwise to close. This will prevent any water from flowing while you make the repair.
Step 2: Gather the necessary tools
To change the ceramic washer, you will need a few basic tools. Make sure you have a wrench, pliers, a screwdriver, and a cloth or towel to catch any water that may come out during the process. Having these tools on hand will make the job much easier.
Step 3: Remove the tap handle
Most kitchen mixer taps have a small screw on the side or back of the handle. Use a screwdriver to remove this screw and pull the handle off. If your tap handle is stuck, try gently wiggling it back and forth while pulling. Be careful not to apply too much force, as you could damage the handle or the tap.
Step 4: Locate the ceramic washer
Once the tap handle is removed, you should see the cartridge or valve assembly. The ceramic washer is located inside this assembly. Use pliers or a wrench to carefully unscrew the assembly and remove it from the tap. Take note of the orientation of the assembly, as you will need to put it back in the same way.
Step 5: Replace the ceramic washer
Now that you have the cartridge or valve assembly removed, look for the ceramic washer. It is a small circular piece that is usually white or off-white in color. Carefully remove the old washer and replace it with a new one. Make sure the new washer is the same size and shape as the old one.
Step 6: Reassemble the tap
Once you have replaced the ceramic washer, it’s time to put everything back together. Start by reinserting the cartridge or valve assembly into the tap. Use your wrench or pliers to secure it in place, making sure it is tight but not over-tightened. Then, reattach the tap handle by screwing it back on.
Step 7: Turn on the water supply
With everything reassembled, it’s time to test your kitchen mixer tap. Turn on the water supply by turning the shut-off valves counterclockwise. Slowly turn the tap on and check for any leaks. If you don’t see any leaks, congratulations! You have successfully changed the ceramic washer on your kitchen mixer tap.
Remember, if you are unsure or uncomfortable with any step of this process, it is always best to consult a professional plumber. They have the knowledge and experience to ensure the job is done correctly.
By following these simple steps, you can easily change the ceramic washer on your kitchen mixer tap and put an end to that bothersome leak. Now you can enjoy a fully functional and leak-free tap in your kitchen!
Gather the necessary tools
Before you start changing the ceramic washer on your kitchen mixer tap, make sure you have all the necessary tools. Here is a list of items you will need:
- Adjustable wrench
- Screwdriver (flathead or Phillips, depending on the type of screws)
- Allen key (if necessary)
- New ceramic washer
- Teflon tape
- Bucket or towel to catch any water drips
- Gloves (optional)
Having these tools ready before you start will make the process easier and smoother. Make sure to double-check that you have everything you need before proceeding to the next steps.
Turn off the water supply
Before you begin changing the ceramic washer on your kitchen mixer tap, it is important to turn off the water supply. This will prevent any water leakage and potential flooding during the process.
Locate the water shut-off valves that are usually situated under the sink. Turn the valve clockwise to shut off the water supply. If you cannot find the shut-off valves under the sink, you may need to turn off the main water supply for your entire home.
Once the water supply is turned off, turn on the tap to release any pressure and drain any remaining water in the pipes. This step will help minimize any potential mess or water damage.
Additional Precautions:
It is recommended to place a towel or bucket under the tap to catch any water that may still be in the pipes.
Before you proceed, make sure to check if any hot water is still present in the tap by turning the hot water tap on. If there is hot water, wait for it to cool down before continuing.
| Caution: | Always exercise caution when working with water and plumbing fixtures to avoid injury or damage. |
Disassemble the tap
Before replacing the ceramic washer on your kitchen mixer tap, you will need to disassemble the tap. This process involves removing the handle, unscrewing the cartridge, and accessing the ceramic washer.
Step 1: Turn off the water supply
Before starting any work on the tap, make sure to turn off the water supply to avoid any potential water leakage. Locate the shut-off valves under the sink and turn them clockwise to close them.
Step 2: Remove the handle
Once the water supply is turned off, you will need to remove the handle from the tap. This can usually be done by unscrewing a small screw located in the handle or by lifting off a decorative cap to access the screw. Use a screwdriver or an Allen wrench to remove the screw.
Step 3: Unscrew the cartridge
After removing the handle, you will see the cartridge, which is responsible for controlling the flow and temperature of the water. Unscrew the cartridge using an adjustable wrench or a cartridge removal tool. Rotate it counterclockwise until it is loose enough to be pulled out.
Step 4: Access the ceramic washer
Once the cartridge is removed, you will be able to access the ceramic washer. It is typically located at the bottom of the cartridge and can be easily removed by pulling it out. Inspect the washer for any damages or signs of wear and tear.
By following these steps, you can easily disassemble the kitchen mixer tap and access the ceramic washer. Once the tap is disassembled, you can proceed with replacing the ceramic washer and reassemble the tap to restore its functionality.
Remove the old ceramic washer
Before you can replace the ceramic washer on your kitchen mixer tap, you will first need to remove the old one. Follow these steps to safely remove the old ceramic washer:
- Turn off the water supply: Locate the shut-off valves under the sink and turn them clockwise to shut off the water supply to the tap. This will prevent any water from flowing while you work.
- Remove the tap handle: Use a screwdriver to remove any screws holding the tap handle in place. Once the screws are removed, carefully lift off the handle to expose the cartridge.
- Unscrew the cartridge: Use an adjustable wrench to loosen the cartridge nut. Turn it counterclockwise until it can be easily removed by hand.
- Remove the cartridge: Gently pull the cartridge out of the tap body. This may require some wiggling or twisting to loosen it from any remaining seals or gaskets.
- Locate the ceramic washer: Once the cartridge is removed, locate the ceramic washer at the bottom. It may be secured with a screw or held in place by pressure. Take note of how it is attached before proceeding.
- Remove the ceramic washer: Depending on the attachment method, use a screwdriver or your hands to remove the old ceramic washer from the cartridge. Be careful not to damage the cartridge or any surrounding components.
Once the old ceramic washer is removed, you can proceed to install the new one following the manufacturer’s instructions.
Install the new ceramic washer
Step 1: Take the new ceramic washer out of its packaging and inspect it for any defects or damages. Make sure it is the correct size and shape for your kitchen mixer tap.
Step 2: Apply a small amount of plumber’s grease or silicone lubricant to the surface of the new ceramic washer. This will help create a smooth seal and prevent any leaks.
Step 3: Carefully place the new ceramic washer onto the spindle of the kitchen mixer tap. Ensure that it sits flush and securely in place.
Step 4: Use a wrench or a spanner to tighten the nut or screw that holds the ceramic washer in place. Be careful not to overtighten, as this can damage the washer or the tap.
Step 5: Turn on the water supply to test the new ceramic washer. Check for any leaks or drips. If everything looks good, you have successfully installed the new ceramic washer on your kitchen mixer tap.
Note: It is important to follow the manufacturer’s instructions and guidelines when installing a new ceramic washer on your kitchen mixer tap.
FAQ
What is a ceramic washer?
A ceramic washer is a small round piece made from ceramic material that is used inside a kitchen mixer tap to control the flow of water.
Why would I need to change the ceramic washer on my kitchen mixer tap?
You would need to change the ceramic washer on your kitchen mixer tap if you are experiencing a leak or if the tap is not turning on or off properly. The ceramic washer can wear out over time and may need to be replaced.
How can I change the ceramic washer on my kitchen mixer tap?
To change the ceramic washer on your kitchen mixer tap, you will need to turn off the water supply to the tap, remove the handle and the cartridge, locate the ceramic washer, remove it using pliers or a wrench, and then replace it with a new ceramic washer. Make sure to tighten the washer securely and reassemble the tap before turning the water supply back on.


