Boiling rice in a microwave oven is a quick and convenient way to cook this staple food. Whether you want to make a simple side dish or a base for a delicious meal, the microwave is a great tool to have in your kitchen. With just a few simple steps, you can have perfectly cooked rice in no time.
To start, you will need a microwave-safe bowl and the desired amount of rice and water. It is important to use the right ratio of rice to water to ensure that the rice cooks evenly and is not too dry or too soggy. A general rule of thumb is to use one part rice to two parts water. For example, if you are cooking 1 cup of rice, you will need 2 cups of water.
Next, rinse the rice thoroughly under cold water until the water runs clear. This is an important step to remove any excess starch from the rice, which can make it sticky. Once the rice is rinsed, add it to the microwave-safe bowl along with the water. Stir the rice and water together to distribute the grains evenly.

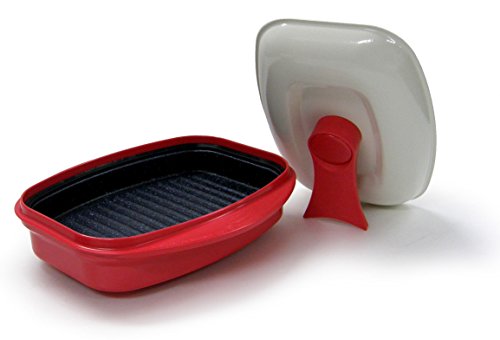
Cover the bowl with a microwave-safe lid or microwave-safe plastic wrap. This will help to trap steam inside the bowl, allowing the rice to cook more efficiently. If you are using plastic wrap, make sure to leave a small vent to allow steam to escape. Microwave the rice on high for about 10 minutes. After 10 minutes, check the rice to see if it is cooked to your desired level of tenderness. If it is not fully cooked, continue microwaving in 1-minute increments until it is done.
Once the rice is cooked, let it stand for a few minutes before fluffing it with a fork. This will allow any excess moisture to evaporate and the rice to firm up slightly. Fluffing the rice will also help to separate the grains and prevent clumping. Serve the rice immediately as a side dish or use it as a base for stir-fries, curries, or other delicious recipes.
In conclusion, boiling rice in a microwave oven is a simple and efficient way to cook this versatile grain. With just a few steps and a microwave-safe bowl, you can have perfectly cooked rice in no time. So, next time you need to make rice, consider using your microwave oven for a quick and convenient cooking method. Happy cooking!
Step 1: Measure the Rice
Before you begin cooking rice in a microwave oven, it’s important to measure the rice accurately. Use a measuring cup to measure the desired amount of rice. The standard ratio for cooking rice is 1 cup of rice to 2 cups of water, but you can adjust the ratio based on your personal preference.
Pro Tip: If you want to make a larger quantity of rice, you can double or triple the measurements accordingly.
Example: If you want to cook 2 cups of rice, you will need 4 cups of water.
This step is crucial as it ensures that you have the right amount of rice and water, resulting in perfectly cooked rice in the microwave oven.
Step 2: Rinse the Rice
Before cooking the rice, it is important to rinse it in order to remove any excess starch. Rinsing the rice will also help prevent it from becoming sticky when cooked.
To rinse the rice, follow these steps:
| Step | Instructions |
| 1 | Place the desired amount of rice in a fine mesh strainer or colander. |
| 2 | Rinse the rice under cold running water, making sure to agitate it with your fingers. |
| 3 | Continue rinsing the rice until the water runs clear. This may take a few minutes. |
| 4 | Once the rice is rinsed, drain any excess water from the strainer or colander. |
By rinsing the rice, you are removing any impurities and improving the texture of the cooked rice. This step is crucial for achieving fluffy and separate rice grains.
Step 3: Add Water
1. Measure the amount of water: For each cup of rice, you will need to add 1.5 cups of water. Use a measuring cup to accurately measure the amount of water needed.
2. Rinse the rice: Before adding water, rinse the rice thoroughly. Place the rice in a fine-mesh strainer and rinse it under cold running water until the water runs clear. This step helps remove any excess starch on the rice grains and prevents the rice from becoming sticky.
3. Add the water: After rinsing the rice, transfer it to a microwave-safe container with a tight-fitting lid. Pour the measured amount of water into the container, making sure that the water covers the rice by about 1 inch.
4. Stir: Gently stir the rice and water together using a fork or spoon. This will help distribute the water evenly and ensure that all the rice grains are submerged.
5. Close and seal the container: Place the lid on the container and make sure it is tightly sealed. This will trap the steam inside the container and help cook the rice evenly.
Step 4: Cover and Microwave
After rinsing the rice thoroughly, place it in a microwave-safe bowl. Add the desired amount of water, depending on the type of rice and your preferred texture. As a general rule, use a ratio of 1 cup of rice to 1.5-2 cups of water.
Cover the bowl with a microwave-safe lid or a microwave-safe plate. This will help to keep the steam trapped inside and ensure even cooking.
Place the bowl in the microwave and set the cooking time. Follow the instructions on your microwave or use the following guidelines for white rice:
– For 1 cup of rice, microwave on high for 5 minutes, then reduce the power to 50% and microwave for an additional 10-15 minutes.
– For 2 cups of rice, microwave on high for 5 minutes, then reduce the power to 50% and microwave for an additional 15-20 minutes.
During cooking, the water will start to boil and create steam, which is essential for cooking the rice. The cooking time can vary depending on the power of your microwave, so keep an eye on the rice to avoid overcooking.
When the timer goes off, use oven mitts or a towel to carefully remove the bowl from the microwave. Let the rice stand, covered, for 5 minutes to allow for any remaining steam to finish cooking the rice.
After the 5-minute resting period, remove the lid or plate and fluff the rice with a fork. Your perfectly cooked rice is now ready to be served!
Step 5: Fluff and Serve
Once the rice is cooked, carefully remove the lid or cover and use a fork to fluff the rice. Gently rake the fork through the rice, separating any clumps and evenly distributing the moisture. This will help to create light and fluffy rice.
Next, it’s time to serve the rice. Use a spoon or a rice paddle to scoop the rice into individual bowls or onto plates. Try to distribute the rice evenly among the servings.

If desired, you can garnish the rice with fresh herbs, such as cilantro or parsley, for some added flavor and visual appeal.
Rice can be served as a side dish, or it can be used as a base for other dishes, such as stir-fries or curries. Enjoy your perfectly cooked rice!
| Serving Size | 1 cup cooked rice |
| Calories | 205 |
| Carbohydrates | 45g |
| Fat | 0.4g |
| Protein | 4.3g |
| Fiber | 0.6g |
| Sodium | 1mg |
FAQ
Can I cook rice in a microwave oven?
Yes, you can cook rice in a microwave oven. It is a quick and convenient method for cooking rice.
What is the process of boiling rice in a microwave oven?
The process of boiling rice in a microwave oven involves rinsing the rice, adding it to a microwave-safe bowl with water, covering the bowl with a microwave-safe lid or wrap, and microwaving it on high power for a certain amount of time.