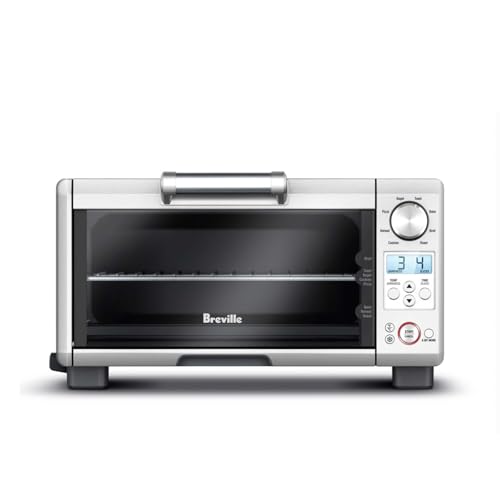


Keeping your Ninja Mini Oven clean is essential for maintaining its performance and ensuring that your meals are cooked to perfection. Regular cleaning not only helps to remove any leftover food or grease but also prevents the build-up of residue that can affect the taste and quality of your dishes. In this article, we will guide you through the steps to effectively clean your Ninja Mini Oven, ensuring that it stays in optimum condition.
Step 1: Unplug and Cool Down
Before you begin cleaning your Ninja Mini Oven, make sure to unplug it from the power source and allow it to cool down completely. This is important to avoid any risk of electrical shock and burns. Once the oven is cool to touch, you can proceed with the cleaning process.
Step 2: Remove and Wash Accessories

Start by removing any removable accessories, such as the crumb tray, baking rack, and baking pan. These accessories are usually dishwasher safe, so you can simply place them in your dishwasher for a thorough cleaning. If you prefer to hand wash them, use warm soapy water and a non-abrasive sponge to remove any residual food or grease.
Note: Make sure to refer to your Ninja Mini Oven’s user manual for specific instructions on cleaning and care.
Preparing for Cleaning
Before you start cleaning your Ninja Mini Oven, there are a few steps you need to take to ensure the process goes smoothly:
| Step | Description |
|---|---|
| 1 | Unplug the oven from the power source and ensure it is completely cool. This will prevent any accidents or injuries while cleaning. |
| 2 | Remove any racks or trays from the oven and set them aside. These can be cleaned separately later on. |
| 3 | Take a look inside the oven and remove any loose crumbs or food particles. You can use a damp cloth or a soft brush to gently wipe away any debris. |
| 4 | Refer to the user manual for any specific cleaning instructions or warnings from the manufacturer. It’s important to follow these guidelines to avoid damaging the oven. |
| 5 | Gather the necessary cleaning supplies, such as mild dish soap, water, and a sponge or cloth. Avoid using harsh chemicals or abrasive cleaners, as they can cause damage. |
By following these steps and preparing for cleaning, you’ll be ready to tackle the task of keeping your Ninja Mini Oven sparkling clean.
Gather Cleaning Supplies
Before you begin cleaning your Ninja Mini Oven, it is important to gather all the necessary cleaning supplies. Having everything on hand will make the cleaning process much more efficient. Here are the supplies you will need:
- All-purpose cleaner or mild dish soap
- Soft microfiber cloth
- Sponge or scrub brush
- Baking soda
- Warm water
- Vinegar
- Cotton swabs
Make sure you have these supplies readily available before you start cleaning your Ninja Mini Oven. Having the right tools at your disposal will ensure that you can effectively remove any built-up grime and keep your mini oven looking and performing its best.
Unplug the Oven
Before beginning the cleaning process, make sure to unplug your Ninja Mini Oven from the power source. This is crucial for your safety and to avoid any electrical hazards.
Unplugging the oven will ensure that there is no risk of electric shock while cleaning the appliance. It is always better to be safe than sorry, and taking this simple step can prevent any accidents from occurring.
Once the oven is unplugged, you can proceed with the cleaning process knowing that you have eliminated any electrical risks.
Remove Removable Parts
Before cleaning your Ninja Mini Oven, it is important to remove any removable parts. This will allow you to thoroughly clean each component and ensure that no food particles or residue are left behind.
Start by unplugging the oven and allowing it to cool down completely. This will prevent any accidents or injuries. Once the oven is cool, remove the wire rack and crumb tray.
Wire Rack
To remove the wire rack, simply pull it out from the oven. Be careful as the rack may still be hot. Place the wire rack in a sink filled with warm soapy water. Let it soak for a few minutes to loosen any baked-on food.
After soaking, use a sponge or dishcloth to scrub the wire rack. Pay special attention to the areas with stubborn stains. Rinse the rack thoroughly under running water to remove any soap residue. Allow it to air dry completely before placing it back in the oven.
Crumb Tray
The crumb tray is located at the bottom of the oven. To remove it, slide it out from the front or back of the oven. Empty any crumbs or debris into the trash. Rinse the crumb tray with warm soapy water to remove any greasy residue.
Use a brush or sponge to scrub the crumb tray, making sure to reach all corners and crevices. Rinse it thoroughly under running water to remove any soap residue. Allow the crumb tray to air dry before inserting it back into the oven.
Once the wire rack and crumb tray are dry, you can reassemble your Ninja Mini Oven and continue with the cleaning process.
Wipe Down the Interior
1. Before cleaning the interior of your Ninja Mini Oven, make sure that it has cooled down and is unplugged.
2. Take a clean, damp cloth or sponge and wipe down the interior surfaces of the oven. This will remove any food debris or residue that may have accumulated.
3. For stubborn stains or dried-on food, you can use a mild dish soap mixed with water. Apply the soapy solution to a cloth and gently scrub the affected areas.
4. Rinse the cloth or sponge and wipe away any soap residue.
5. If there are any lingering odors, you can place a small bowl of baking soda in the oven to absorb them. Leave it overnight, then remove and discard the baking soda.
6. Once you have finished cleaning the interior, wipe it dry with a clean cloth or allow it to air dry thoroughly before using the oven again.
Remember to regularly clean your Ninja Mini Oven to maintain its performance and extend its lifespan.
Clean the Exterior
Keeping the exterior of your Ninja Mini Oven clean is essential for maintaining its appearance and functionality. Here are some steps to help you clean the exterior of your oven:
- Dampen a soft cloth with warm soapy water.
- Gently wipe down the exterior surfaces of the oven, including the handles and control panel.
- For tougher stains or grease buildup, use a mild kitchen cleaner or a mixture of baking soda and water.
- Apply the cleaner to a cloth and gently scrub the stained area.
- Rinse the cloth with clean water and wipe away any remaining cleaner.
- Dry the exterior of the oven with a clean towel or let it air dry.
Remember to always unplug the oven before cleaning and avoid using abrasive materials or harsh chemicals that may damage the surfaces.
By regularly cleaning the exterior of your Ninja Mini Oven, you can keep it looking great and ensure that it performs at its best for years to come.
Reassemble and Test
Once all the parts of your Ninja mini oven are clean and dry, it’s time to reassemble them. Follow these steps to ensure proper reassembly:
Step 1: Replace the Removable Parts
Begin by placing the crumb tray back into the oven. Make sure it snaps securely into place. Next, reattach the baking pan and the wire rack. Ensure that they are properly aligned and fit snugly in the oven.
Step 2: Reattach the Door
Carefully align the oven door with the hinges on the oven body. Hold the door at an angle and slide it onto the hinge pins. Once in place, push the door down until it clicks into position.
Step 3: Test the Oven
Before using the oven again, it’s important to test that all the components are properly reassembled. Plug the oven back into the power outlet and set the temperature to a low setting. Allow the oven to preheat for a few minutes, and then check if the heating elements are functioning. If everything is working as expected, you can proceed to use the oven for your cooking needs.
If you encounter any issues during the reassembly process or notice any malfunctioning parts, refer to the user manual provided with your Ninja mini oven or contact customer support for assistance.
| Step | Instruction |
|---|---|
| 1 | Replace the removable parts (crumb tray, baking pan, wire rack). |
| 2 | Reattach the oven door onto the hinge pins. |
| 3 | Test the oven by preheating it and checking the heating elements. |
FAQ
What is a Ninja Mini Oven? How does it work?
A Ninja Mini Oven is a compact countertop appliance that allows you to bake, roast, and toast your favorite foods. It works by using a combination of heating elements and convection technology to evenly cook your food.
Can I clean the Ninja Mini Oven with water and soap?
Yes, you can clean the Ninja Mini Oven with water and mild dish soap. Be sure to unplug the oven and allow it to cool before cleaning. Use a damp cloth or sponge to wipe down the interior and exterior of the oven. Rinse with clean water and dry thoroughly.
What should I do if there are stubborn stains or food residue in the Ninja Mini Oven?
If there are stubborn stains or food residue in the Ninja Mini Oven, you can use a non-abrasive cleaner or a paste made of baking soda and water. Apply the cleaner or paste to the stain, scrub gently with a soft cloth or sponge, and rinse thoroughly.
Can I use oven cleaner to clean the Ninja Mini Oven?
No, you should not use oven cleaner to clean the Ninja Mini Oven. Oven cleaners can be too harsh and may damage the oven’s interior or exterior. Stick to using mild dish soap, water, and non-abrasive cleaners for best results.
How often should I clean the Ninja Mini Oven?
It is recommended to clean the Ninja Mini Oven after each use to prevent the buildup of grease and food residue. Regular cleaning will help maintain the oven’s performance and extend its lifespan.