If you love making homemade pasta, then having a pasta machine is a must. But what do you do when your pasta machine is not working properly? Well, you might need to disassemble it to fix the issue. Disassembling a pasta machine may seem like a daunting task, but with some guidance, you can do it yourself.
Before you begin:
Firstly, it’s important to remember that all pasta machines are different, so the process of disassembling might vary. It’s recommended to consult your machine’s manual if available. Additionally, make sure that the machine is unplugged and turned off before you start the disassembly process. Safety should always be your top priority.

Here are some general steps to disassemble a pasta machine:
What is a Pasta Machine?
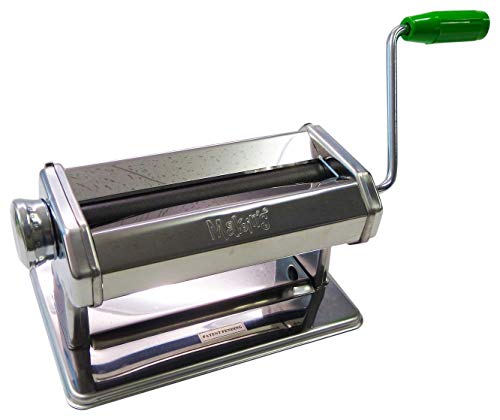
A pasta machine is a kitchen tool used to roll and cut pasta dough, allowing you to create fresh homemade pasta in different shapes and sizes. It typically consists of a hand-cranked roller and a set of adjustable cutting blades.
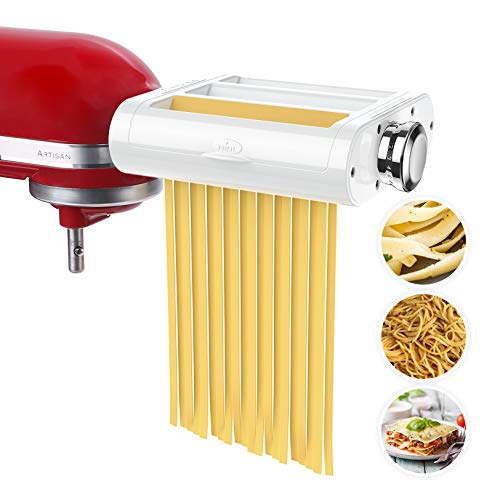
With a pasta machine, you can easily make pasta sheets of uniform thickness for dishes like lasagna, or cut the dough into thin or wide strips for spaghetti or fettuccine. Some pasta machines also come with attachments that let you make other types of pasta shapes, such as ravioli or tortellini.
Using a pasta machine is a great way to experiment with different pasta recipes and personalize your pasta dishes. It gives you control over the thickness and width of the pasta, allowing you to create the perfect texture and shape for your desired dish.
Whether you are a seasoned cook or just starting out in the kitchen, a pasta machine is a versatile and essential tool that can elevate your pasta-making skills and help you create delicious homemade pasta with ease.
Why would you want to disassemble a Pasta Machine?
There might be several reasons why you would want to disassemble a pasta machine. Here are a few common ones:
| 1. Cleaning: | If your pasta machine has been used extensively, it could be time to give it a thorough cleaning. Disassembling the machine will allow you to access all the parts and remove any built-up dough or residue. |
| 2. Repairing: | If your pasta machine is not working properly, disassembling it can help you identify the issue. It will allow you to inspect each component and repair or replace any damaged parts. |
| 3. Upgrading: | Sometimes, you may want to upgrade certain parts of your pasta machine to improve its performance or functionality. Disassembling the machine will allow you to replace specific components with better ones. |
Remember, before disassembling your pasta machine, it is essential to consult the manufacturer’s instructions or a professional guide to ensure you do it correctly and avoid any damage.
Preparation
Before beginning the disassembly process, it’s important to gather all the necessary tools and materials. Here’s what you’ll need:
- A flat surface to work on, such as a table or countertop
- A clean cloth or towel to protect the surface from scratches
- A screwdriver set with various sizes and types of screwdrivers
- A small container or bowl to hold the screws and other small parts
- A soft-bristle brush or toothbrush for cleaning hard-to-reach areas
- A lubricant, such as WD-40 or a similar product, for loosening stuck parts
Once you have all the necessary tools and materials, make sure to clear a space on the flat surface for the disassembled parts. This will help you keep track of all the pieces and prevent them from rolling or falling off the surface.
Gather the necessary tools
Before disassembling your pasta machine, make sure you have all the necessary tools on hand. This will help make the process easier and more efficient. Here are some tools you may need:
- Flathead screwdriver
- Phillips head screwdriver
- Adjustable wrench
- Needle-nose pliers
- Allen wrench set
Having these tools ready will allow you to tackle any screws, bolts, or small components that need to be removed in order to disassemble your pasta machine. Make sure the tools are in good condition and suitable for the job at hand.
Clear a workspace
Before you begin disassembling your pasta machine, it’s important to clear a workspace that is clean and organized. This will make the disassembly process much easier and help prevent any small parts from getting lost. Here are some steps to clear your workspace:
- Remove any clutter or unnecessary items from your work area.
- Wipe down your work surface with a damp cloth to ensure it’s clean.
- Gather all the necessary tools you’ll need for disassembling the pasta machine, such as screwdrivers or wrenches.
- Prepare a small container or tray to hold any screws or small parts that you remove during the disassembly process. This will help keep everything organized and prevent any pieces from rolling away or getting lost.
- Place the pasta machine on your cleared workspace, making sure it’s secure and won’t tip over.
- Ensure there is enough light in your workspace to see what you’re doing.
By clearing your workspace and following these steps, you’ll create an ideal environment for safely and efficiently disassembling your pasta machine. It’s always better to be prepared and organized before starting any DIY project.
Disassembling the Pasta Machine
Disassembling a pasta machine may be necessary for cleaning, maintenance, or repair purposes. Here is a step-by-step guide on how to disassemble your pasta machine:
Gather the necessary tools
- Phillips screwdriver
- Flathead screwdriver
- Small pliers
Step 1: Unplug the pasta machine
The first step is to unplug the pasta machine from the power source to ensure your safety during the disassembly process.
Step 2: Remove the pasta attachments
Start by removing any pasta attachments or accessories that may be connected to the machine. This could include cutters, rollers, or extruders. Refer to the manufacturer’s instructions if needed.
Step 3: Remove the screws
Using a Phillips screwdriver, locate and remove the screws that hold the outer casing of the pasta machine together. These screws are typically found on the sides and back of the machine.
Step 4: Separate the outer casing
Once the screws are removed, carefully separate the outer casing of the pasta machine by gently pulling it apart. Be cautious not to force it as this can damage the machine.
Step 5: Disassemble the internal components
With the outer casing removed, you will have access to the internal components of the pasta machine. Use a flathead screwdriver or small pliers to disconnect any wires, belts, or gears that are holding the machine together. Take note of the arrangement and orientation of these components to aid in reassembly later.
Step 6: Clean or repair as needed
Once all the components are disassembled, you can clean or repair them as needed. Use a soft cloth or brush to remove any debris or pasta residue. Replace any damaged parts if necessary.
Step 7: Reassemble the pasta machine
After cleaning or repairing the components, start reassembling the pasta machine in the reverse order of disassembly. Follow the manufacturer’s instructions for properly reconnecting the wires, belts, and gears.
Step 8: Test the machine
Once reassembled, plug the pasta machine back into the power source and test its functionality. Make sure all the parts are working correctly before using the machine to make fresh pasta.
Remember, if you are not comfortable with disassembling the pasta machine yourself, it is best to seek professional assistance to avoid any potential damage or injury.
Step 1: Remove the pasta attachments
The first step in disassembling your pasta machine is to remove any pasta attachments that may be attached to the machine. These attachments can include cutters and rollers that are used to shape and cut the pasta. To remove the attachments, you will need to locate the attachment release mechanism, which is usually a lever or button. Press or pull the release mechanism to detach the attachments from the machine.
Step 2: Unscrew the main body
After removing the handle, the next step is to unscrew the main body of the pasta machine. Look for the screws holding the body together and use a screwdriver to loosen and remove them. Make sure to keep the screws in a safe place, as you will need them when reassembling the machine later.

Once the screws are removed, gently separate the two halves of the main body. You may need to use a bit of force, but be careful not to damage any of the internal components. Take your time and work slowly to avoid any mishaps.
With the main body disassembled, you will have better access to the inner workings of the pasta machine. This will allow you to clean and inspect the parts more thoroughly, as well as make any necessary repairs or adjustments.
FAQ
Why would I need to disassemble a pasta machine?
There can be several reasons why you might need to disassemble a pasta machine. One common reason is if your pasta machine is not functioning properly and you need to inspect and fix any internal parts that may be causing the issue. Disassembling the machine also allows for a thorough cleaning, which is important for maintaining hygiene and preventing any build-up of pasta dough or debris.
What tools will I need to disassemble a pasta machine?
Disassembling a pasta machine typically requires a few basic tools. You will usually need a Phillips screwdriver or a small Allen key to remove any screws or bolts holding the machine together. Additionally, having a small pair of pliers or tweezers can be helpful for manipulating small parts or removing any obstruction. It’s always a good idea to have a soft cloth or towel handy to place the disassembled parts on, to prevent any damage or scratching.