If you’re a fan of homemade pasta, then a pasta rolling machine is a must-have kitchen tool. This versatile device allows you to effortlessly create thin, evenly rolled sheets of pasta with ease. Whether you’re a seasoned pasta maker or a beginner, using a pasta rolling machine can help elevate your homemade pasta to a whole new level.
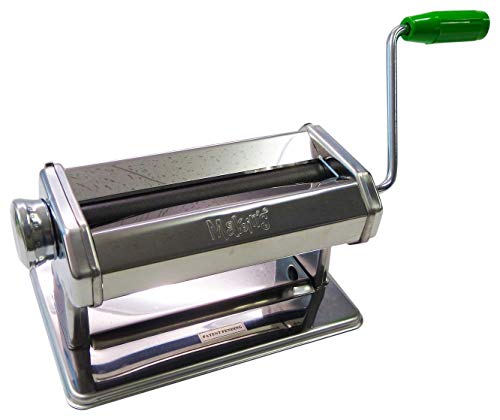
Before you start using your pasta rolling machine, it’s important to familiarize yourself with its various components. The machine typically consists of a crank handle, a notch for adjusting the thickness of the pasta, and a set of rollers. It’s crucial to ensure that the machine is securely attached to your countertop or table to prevent any mishaps during the pasta rolling process.

Once you have your machine set up and ready to go, it’s time to begin the pasta rolling process. Start by kneading your pasta dough until it’s smooth and elastic, then divide it into smaller portions. Flatten each portion with your hands and dust it with flour to prevent sticking. Feed one portion of the dough into the machine, turning the crank handle to guide the dough through the rollers.
Step-by-Step Guide on Using a Pasta Rolling Machine
Using a pasta rolling machine may seem intimidating at first, but with a little practice, you’ll be rolling out perfect pasta dough in no time. Follow these simple steps to get started:
Step 1: Set up the machine
Place the pasta rolling machine on a sturdy surface and secure it with the clamp provided. Ensure that the machine is clean and free from any debris.
Step 2: Prepare the dough
Prepare your pasta dough according to your preferred recipe. It’s important to have a well-kneaded dough that is smooth and elastic for optimal results.
Step 3: Divide the dough
Divide the dough into smaller portions. This will make it easier to work with and prevent it from drying out. Cover the unused portions with a damp cloth to keep them moist.
Step 4: Flatten the dough
Take one portion of the dough and flatten it with your hands. Dust it with flour to prevent sticking. Make sure the dough is not too thick, as it will need to pass through the machine.
Step 5: Adjust the thickness setting
Set the machine to the desired thickness. Start with the thickest setting and gradually decrease it for thinner pasta. This will depend on the type of pasta you want to make.
Step 6: Roll the dough
Pass the flattened dough through the machine’s rollers, starting at the thickest setting. Crank the handle and guide the dough through with your other hand. Repeat this process several times, gradually decreasing the thickness setting each time.
Step 7: Shape the pasta
Once you reach the desired thickness, you can use the machine’s attachments to shape the pasta. Attach the desired pasta shape cutter and pass the rolled dough through to cut it into your preferred shape.
Step 8: Dry the pasta
Allow the freshly cut pasta to dry for a few minutes before cooking or storing it. You can hang it on a pasta drying rack or lay it flat on a clean surface.
Step 9: Cook and enjoy
Cook the pasta in a large pot of salted boiling water for the recommended time. Serve it with your favorite sauce, and enjoy your homemade pasta!
Remember, practice makes perfect when using a pasta rolling machine. Don’t be discouraged if your first attempts are not perfect – with time, you’ll become more proficient and produce amazing homemade pasta.
Preparing the Machine
Before using a pasta rolling machine, it is important to properly prepare the machine for use. Follow these steps to ensure a smooth and effective pasta making process:
- Place the pasta rolling machine on a clean, sturdy surface, such as a countertop or table.
- Ensure that the machine is securely attached to the surface for stability.
- Adjust the settings on the machine according to the desired thickness of the pasta dough. Most machines have a numbered dial or knob for easy adjustment.
- Attach the desired pasta roller attachment to the machine. This can typically be done by sliding the attachment into the designated slot and locking it into place.
- Choose a clean and spacious area for dough preparation. Dust the area with flour to prevent sticking.
- Prepare the pasta dough according to your recipe. Ensure that the dough is well-kneaded and smooth in texture.
- Divide the dough into smaller portions for easier handling. Dust each portion with flour to prevent sticking.
- Feed one portion of the dough through the machine at a time. Start with the largest setting to flatten the dough, gradually decreasing the thickness as desired.
- Continue rolling the dough through the machine, adjusting the settings as necessary, until the desired thickness is achieved.
By properly preparing the pasta rolling machine, you can ensure a successful pasta making experience and achieve the desired thickness of your pasta dough.
Making the Dough
Before you can start using your pasta rolling machine, you need to make the dough. Here’s how:
- Measure out the desired amount of flour for your pasta recipe. It’s a good idea to have extra flour on hand for dusting.
- Make a well in the center of the flour mound.
- Break the eggs into the well.
- Using a fork, gradually whisk the eggs, incorporating flour from the sides of the well as you go.
- Continue mixing until the dough starts to come together and becomes too difficult to mix with a fork.
- Use your hands to knead the dough, incorporating any remaining flour from the sides of the well.
- Knead the dough for about 5-10 minutes, until it becomes smooth and elastic. Add more flour if the dough is too sticky, or a few drops of water if it’s too dry.
- Shape the dough into a ball and cover it with plastic wrap.
- Allow the dough to rest for at least 30 minutes before using it in the pasta rolling machine. This resting period allows the gluten to relax and makes the dough easier to work with.
Once you have made the dough, you can move on to using the pasta rolling machine to roll it out and cut it into your desired pasta shapes.
Kneading the Dough
Before using the pasta rolling machine, it’s important to knead the dough properly. Kneading helps to develop the gluten in the dough, resulting in a smooth and elastic texture.
To knead the dough, start by dusting a clean surface with some flour. Place the dough on the surface and use the heel of your hand to press it down and away from you. Fold the dough in half and then rotate it a quarter turn. Repeat this process, pushing, folding, and rotating the dough for about 10 minutes.
Tips for Kneading:
1. If the dough is too sticky, add a little flour as you knead. Be careful not to add too much flour, as it can make the pasta dry and tough.
2. If the dough is too dry, you can add a few drops of water to moisten it. Be cautious and add a little water at a time, as too much water can make the dough sticky.
3. Use the heel of your hand to push the dough away from you, using your body weight to apply pressure. This will help to stretch and develop the gluten in the dough.
Once the dough is properly kneaded, it should be smooth and elastic. It’s now ready to be rolled through the pasta rolling machine to create delicious homemade pasta!
Setting the Thickness
Setting the thickness on a pasta rolling machine is an important step in achieving the desired consistency for your pasta dough. The thickness settings on the machine allow you to control how thin or thick your pasta sheets will be. Here are the steps to set the thickness on a pasta rolling machine:
1. Preparing the Machine
Before setting the thickness, make sure your pasta rolling machine is properly set up and secured to a stable surface. Ensure that the rollers are clean and free of any debris.
2. Adjusting the Rollers
Most pasta rolling machines have a dial or knob that allows you to adjust the distance between the rollers. This controls the thickness of the pasta sheet. Start by turning the dial to the widest setting, usually marked as “1”.
Note: Different machines may have different numbering systems for their thickness settings. Consult the manual or instructions provided with your specific machine if you are unsure.
3. Initial Pass
Once you have set the machine to the widest thickness, take a small ball of pasta dough and flatten it slightly with your hands. Feed the dough through the rollers of the machine, turning the crank slowly. This initial pass helps to prepare the dough and ensures that it is evenly rolled.
4. Gradually Thinning the Dough
After the initial pass, fold the dough in half and feed it through the machine again. Repeat this process several times, gradually decreasing the thickness setting on the machine with each pass. This allows the dough to become thinner and more pliable.
Tip: If the dough becomes too long to handle comfortably, cut it in half and work with one piece at a time.
5. Final Thickness
Continue passing the dough through the machine, gradually reducing the thickness setting, until you achieve the desired thickness for your pasta sheets. Thicker settings are ideal for doughs that require more structure, such as lasagne, while thinner settings are suitable for delicate pastas like tagliatelle or ravioli.

Note: It may take a few tries to find the perfect thickness for your liking. Experiment with different settings until you achieve the desired result.
Once you have set the thickness, you can proceed to roll out the remaining pasta dough and cut it into your desired shape using the appropriate attachments on your machine or by hand.
With these steps in mind, you can confidently set the thickness on your pasta rolling machine and create homemade pasta sheets with the perfect texture for your favorite dishes. Enjoy!
Rolling the Dough
Once you have prepared your pasta dough, it is time to start rolling it out. Follow these steps to properly use your pasta rolling machine:

1. Divide the dough into smaller, manageable portions. This will make it easier to work with and prevent it from drying out. Wrap the unused dough in plastic wrap to keep it moist.
2. Set your pasta rolling machine to the thickest setting. You can usually adjust the thickness using a dial or knob on the side of the machine.
3. Take one portion of dough and flatten it into a rectangular shape using a rolling pin. Make sure it is thin enough to fit through the opening of the machine.
4. Dust the dough lightly with flour to prevent sticking. You can use either all-purpose flour or semolina flour for dusting.
5. Feed the dough through the machine, starting with the widest setting. Crank the handle or turn on the electric motor to roll the dough through. Be sure to hold the dough gently as it goes through the machine.
6. Fold the dough into thirds and pass it through the machine again. This step helps to create an even texture and distributes the moisture evenly.
7. Gradually decrease the setting on the machine with each pass. Repeat the folding and rolling process several times until you reach your desired thickness.
8. If the dough becomes too long to handle, you can cut it into smaller pieces. Just make sure each piece is dusted with flour to prevent sticking.
9. Once you have rolled out all the dough, let it dry for a few minutes before cutting into your desired shape.
By following these steps, you’ll be able to use your pasta rolling machine effectively and create delicious homemade pasta.
Cutting the Pasta
Once you have rolled out your pasta dough to the desired thickness, it’s time to cut it into your desired shape. Most pasta rolling machines come with a straight cutter attachment, which will cut your pasta into long, thin strips of the same width.

To start cutting the pasta, make sure that your pasta sheets are well-floured. This will prevent the pasta from sticking to itself and help you achieve clean-cut shapes. Next, feed one end of the pasta sheet into the cutter attachment, making sure it is centered. Gently turn the handle of the pasta rolling machine, and the cutter will slice through the dough, creating even-sized noodles.
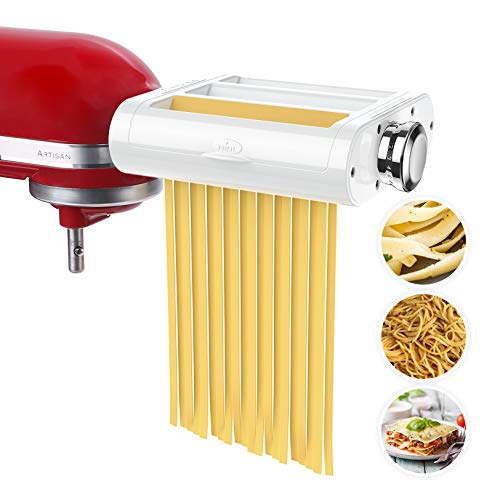
If you prefer a different shape of pasta, you can use different cutter attachments or manually cut the dough. Some machines come with attachments for making fettuccine, linguine, or even ravioli. Simply attach the desired cutter and follow the same process as above.
| Tips for cutting pasta: |
|---|
| 1. Always use well-floured pasta sheets to prevent sticking. |
| 2. Work in small batches, cutting a manageable amount of pasta at a time. |
| 3. Adjust the thickness settings on your pasta rolling machine according to the type of pasta you want to make. |
| 4. Be patient and take your time, ensuring clean and precise cuts. |
Once you have cut your pasta, you can cook it immediately or dry it for later use. Remember to cook fresh pasta for a shorter time compared to dried pasta, as it cooks much faster.
Now that you know how to cut pasta using a pasta rolling machine, you can enjoy homemade pasta in various shapes and sizes. Experiment with different recipes and sauces to create delicious and authentic Italian dishes.
Drying and Storing the Pasta
Once you have rolled out your pasta using the pasta rolling machine, it is important to dry and store it properly to ensure that it maintains its shape and texture. Here are some tips for effectively drying and storing your pasta:
Drying the Pasta
1. Before you begin drying your pasta, ensure that you have enough space available. You can use a clean, dry surface or a pasta drying rack to hang the pasta strands.
2. Gently place the rolled-out pasta onto the drying surface. Make sure that the strands are not touching each other to prevent sticking.
3. Allow the pasta to dry for at least 30 minutes to 1 hour, or until it is no longer sticky to the touch. This drying time may vary depending on the humidity in your environment.
4. If you are using a pasta drying rack, carefully hang the strands of pasta on the rack’s arms, ensuring that they are evenly spaced apart.
5. Turn the pasta strands occasionally during the drying process to ensure even drying.
Storing the Pasta
1. Once the pasta is dry, you can store it for later use. There are a few options for storing pasta:

| Storage Option | Description |
|---|---|
| Airtight Containers | Place the dried pasta in an airtight container and store it in a cool, dry place. This will help to preserve the pasta’s freshness and prevent it from absorbing any moisture. |
| Freezer Bags | If you plan on storing the pasta in the freezer, place it in a freezer bag and remove as much air as possible before sealing. This will help to prevent freezer burn. |
| Pasta Jars | You can also store your dried pasta in airtight pasta jars, which can be a decorative way to store and display your homemade pasta. |
2. Regardless of the storage method you choose, make sure to label the container or bag with the date the pasta was made to keep track of its freshness.
3. Stored properly, homemade dried pasta can last for up to 2 weeks in a cool, dry place, or for up to 3 months in the freezer.
By following these tips for drying and storing your pasta, you can enjoy delicious homemade pasta anytime you desire!
FAQ
What is a pasta rolling machine?
A pasta rolling machine is a kitchen appliance used to roll out pasta dough into thin and even sheets.
Why should I use a pasta rolling machine?
Using a pasta rolling machine helps to achieve consistent thickness and texture in your pasta dough, which can be difficult to achieve by hand. It also saves time and effort compared to rolling out the dough manually with a rolling pin.
How do I use a pasta rolling machine?
To use a pasta rolling machine, start by dividing your dough into smaller portions and feeding it through the widest setting on the machine. Gradually decrease the thickness setting and pass the dough through multiple times, folding and re-rolling if necessary, until you reach the desired thickness.
What types of pasta can I make with a pasta rolling machine?
A pasta rolling machine can be used to make a variety of pasta shapes, including lasagna sheets, fettuccine, tagliatelle, and even stuffed pastas like ravioli. The machine usually comes with different attachments or settings to accommodate different pasta shapes.