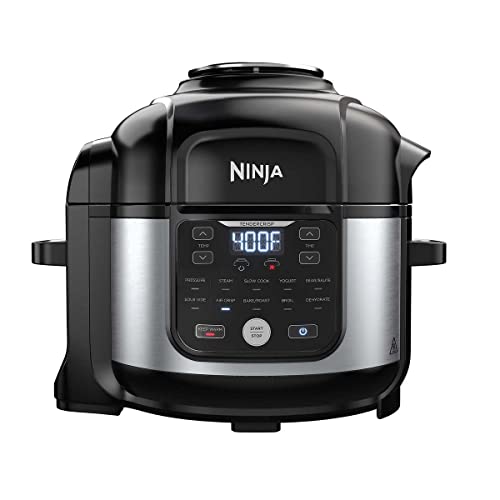


Are you craving tender and juicy ribs but don’t want to spend hours cooking them? Look no further! With the Ninja Foodi Pressure Cooker, you can have delicious ribs in no time. This powerful kitchen appliance not only pressure cooks your food quickly, but it also grills and air crisps, giving you the perfect combination of flavors and textures.
Using the Ninja Foodi Pressure Cooker to cook ribs is a game-changer. The pressure cooking function helps to tenderize the meat, making it fall-off-the-bone tender. Imagine sinking your teeth into succulent ribs that have been infused with flavor. Whether you prefer baby back ribs, spare ribs, or St. Louis-style ribs, the Ninja Foodi Pressure Cooker can handle it all.
But wait, there’s more! Once your ribs are perfectly cooked and tender, you can take them to the next level by using the grilling function of the Ninja Foodi Pressure Cooker. This allows you to achieve that mouthwatering char and smoky flavor that we all love in grilled ribs. And if you’re a fan of crispy ribs, you can even air crisp them to achieve that perfect crunch.

So, if you’re ready to take your rib game to the next level, it’s time to bring out your Ninja Foodi Pressure Cooker. Get ready to impress your family and friends with your amazing rib-cooking skills. Follow our easy step-by-step guide to cook the most flavorful and tender ribs you’ve ever tasted. Don’t be surprised if your friends start calling you the rib master!
Preparing Ribs for Pressure Cooking
Before you start cooking your ribs in the Ninja Foodi Pressure Cooker, it’s essential to properly prepare them to ensure tender and flavorful results.
1. Selecting the Ribs
There are various types of ribs available, such as baby back ribs, spareribs, and St. Louis-style ribs. Choose the type that suits your preference and availability. Ensure that the ribs are fresh and of high quality.
2. Removing the Membrane
The membrane, located on the underside of the ribs, is tough and can prevent the flavors from penetrating the meat. To remove it, start by loosening one corner with a butter knife or your fingers. Then, using a paper towel for better grip, gently pull the membrane away from the ribs.
3. Seasoning the Ribs
Seasoning is crucial for adding flavor to your ribs. You can use a store-bought rub or make your own by combining spices like salt, pepper, paprika, garlic powder, and brown sugar. Massage the seasoning into both sides of the ribs, ensuring an even coating.
Note: If you prefer a saucy finish, you can skip seasoning the ribs and add your favorite barbecue sauce at the end of the pressure cooking process.
4. Marinating the Ribs (Optional)
For enhanced flavor, you can marinate the ribs before pressure cooking. Place the seasoned ribs in a resealable plastic bag, pour the marinade over them, and seal the bag tightly. Leave the ribs to marinate in the refrigerator for at least an hour or overnight.
Some popular marinades for ribs include a mixture of soy sauce, Worcestershire sauce, garlic, and honey or a combination of apple juice, brown sugar, and mustard.
Note: Make sure to pat the ribs dry before pressure cooking to ensure better browning and a more flavorful exterior.
By properly preparing your ribs, you’ll set the foundation for delicious, fall-off-the-bone meat when using the Ninja Foodi Pressure Cooker. Enjoy!
Selecting the Ribs
When it comes to cooking ribs in a Ninja Foodi pressure cooker, it’s important to start with the right cut of meat. There are several types of ribs to choose from, but baby back ribs and spare ribs are the most popular options.
Baby back ribs are smaller and leaner, making them a good choice if you prefer tender and meaty ribs. They are located at the top of the rib cage, near the backbone of the pig.
Spare ribs, on the other hand, are larger and meatier with more fat. They are located beneath the baby back ribs and have a richer flavor. If you prefer a juicier and more flavorful rib, spare ribs are the way to go.
When selecting ribs, make sure they are fresh and have a good amount of meat on them. Look for ribs that are moist and not dry or discolored. The meat should be pinkish in color, indicating that it is fresh.
It’s also worth considering the thickness of the ribs. Thicker ribs will take longer to cook, while thinner ribs will cook more quickly. Choose the thickness based on your personal preference and how much time you have available to cook.
| Rib Type | Description |
|---|---|
| Baby Back Ribs | Smaller and leaner ribs located at the top of the rib cage. They are tender and meaty. |
| Spare Ribs | Larger and meatier ribs located beneath the baby back ribs. They have more fat and a richer flavor. |
Take the time to select the right ribs for your taste preferences and make sure they are fresh and of good quality. This will ensure that your ribs turn out delicious and tender when cooked in the Ninja Foodi pressure cooker.
Removing the Membrane
Before you begin cooking your ribs in the Ninja Foodi pressure cooker, it’s important to remove the membrane. The membrane is a tough layer on the back of the ribs that can prevent flavors from penetrating the meat and result in less tender ribs. Removing the membrane will allow the marinade and seasonings to fully seep into the meat, resulting in more flavorful and tender ribs.
To remove the membrane, start by loosening it with a butter knife at one end of the rack. Once you have a good grip on the membrane, use a paper towel to firmly pull it off the ribs. The membrane may be slippery, so using a paper towel will provide a better grip and make the removal process easier.
Removing the membrane takes a bit of time and effort, but it is an essential step for achieving delicious ribs in your Ninja Foodi pressure cooker. Don’t skip this step if you want the best results!
Seasoning the Ribs
Preparing the perfect seasoning for your ribs is an essential step to achieve deliciously flavored meat. Here are some simple steps to follow:
- Start by patting the ribs dry with paper towels. This will help the seasoning adhere better to the meat.
- In a small bowl, combine your favorite dry rub seasonings. You can use a pre-made blend or create your own by combining spices like paprika, brown sugar, salt, pepper, garlic powder, onion powder, and chili powder.
- Generously coat both sides of the ribs with the dry rub. Massage it into the meat to ensure even distribution and maximum flavor.
- Let the seasoned ribs sit at room temperature for about 20-30 minutes to allow the flavors to penetrate the meat.
Remember, the seasoning is your opportunity to add your personal touch, so feel free to experiment with different spice combinations to create a flavor profile that suits your taste preferences.
Cooking Ribs in Ninja Foodi Pressure Cooker
Preparing tender and flavorful ribs is made easy with the Ninja Foodi pressure cooker. Whether you are a seasoned chef or a beginner cook, this kitchen appliance will help you achieve mouthwatering results every time.
Here is a simple step-by-step guide to cooking ribs in your Ninja Foodi pressure cooker:
- Start by selecting a rack of ribs that will fit comfortably in your pressure cooker. Baby back ribs or spare ribs are both great options.
- Remove the membrane from the back of the ribs, as this can prevent them from becoming tender.
- Season the ribs generously with your favorite dry rub or marinade. This will add flavor to the meat and help tenderize it.
- Preheat your Ninja Foodi pressure cooker on the “SAUTE” function. Add a small amount of oil and sear the ribs on both sides until they are browned. This will help lock in the juices and enhance the taste.
- Remove the ribs from the pressure cooker and set them aside.
- Add a cup of liquid to the pressure cooker, such as beef broth or apple juice. This will create steam and help cook the ribs.
- Place a trivet or metal rack in the pressure cooker, then arrange the ribs on top of it. This will keep the ribs elevated from the liquid and prevent them from getting soggy.
- Close the lid of the pressure cooker and set it to cook on high pressure for around 25-30 minutes. The exact cooking time may vary depending on the thickness of the ribs and personal preference for tenderness.
- Once the cooking time is complete, allow the pressure to naturally release for about 10 minutes, then carefully release the remaining pressure.
- Remove the ribs from the pressure cooker and brush them with your favorite barbecue sauce.
- For an extra charred and caramelized finish, you can place the ribs under a broiler for a few minutes.
- Serve the deliciously cooked ribs with your favorite sides and enjoy!
Using the Ninja Foodi pressure cooker to cook ribs offers convenience and incredible flavor. Give this recipe a try and impress your family and friends with perfectly cooked ribs every time!
FAQ
What is a Ninja Foodi pressure cooker?
A Ninja Foodi pressure cooker is a multi-functional kitchen appliance that combines the functions of a pressure cooker and an air fryer. It allows you to cook food quickly under pressure and then crisp it up using the air fryer function.
Can I cook ribs in a Ninja Foodi pressure cooker?
Yes, you can cook ribs in a Ninja Foodi pressure cooker. The pressure cooking function helps to tenderize the ribs quickly, while the air fryer function can be used to give them a crispy finish.
What is the cooking time for ribs in a Ninja Foodi pressure cooker?
The cooking time for ribs in a Ninja Foodi pressure cooker can vary depending on the size and thickness of the ribs. Generally, it takes about 25-30 minutes to cook ribs under pressure. However, it’s always best to consult the recipe or cooking guide that comes with your Ninja Foodi for specific cooking times.
Do I need to marinate the ribs before cooking them in a Ninja Foodi pressure cooker?
Marinating the ribs before cooking them in a Ninja Foodi pressure cooker is optional. Marinating can help to infuse the ribs with flavor, but it’s not necessary for tenderizing them. If you choose to marinate the ribs, it’s recommended to do so for at least a few hours or overnight to allow the flavors to penetrate the meat.
Can I use the Ninja Foodi pressure cooker to cook other types of meat?
Yes, you can use the Ninja Foodi pressure cooker to cook a variety of meats, including chicken, beef, pork, and more. The pressure cooking function is especially useful for cuts of meat that require longer cooking times to become tender. The air fryer function can also be used to crisp up the meat after pressure cooking.