If you love yogurt and have an electric pressure cooker, then you’re in luck! Making homemade yogurt in an electric pressure cooker is easier than you think. It allows you to control the ingredients, flavors, and sweetness to suit your taste.
Why make yogurt in an electric pressure cooker? Well, electric pressure cookers provide a controlled and consistent environment for the yogurt to ferment, ensuring consistent results every time. Plus, it’s a quick and convenient method that saves you time and effort.
So, how do you make yogurt in an electric pressure cooker? First, you’ll need to gather your ingredients: milk (any type – whole, skim, or non-dairy), a starter culture or plain yogurt with live active cultures, and any flavorings or sweeteners you desire.
Next, heat the milk: Pour the milk into the inner pot of your electric pressure cooker and heat it on the “Sauté” mode until it reaches 180°F (82°C). This step helps to kill any unwanted bacteria and proteins that could interfere with the fermentation process. Stir the milk occasionally to prevent scorching.
Once the milk reaches the desired temperature, cool it: Remove the inner pot from the electric pressure cooker and let the milk cool down to 110°F (43°C). You can speed up this process by placing the inner pot in a cold water bath.

Add the starter culture or plain yogurt: Once the milk has cooled, stir in your starter culture or a few tablespoons of plain yogurt with live active cultures. The live cultures will act as the fermentation agents that transform the milk into yogurt. Mix well to ensure the starter culture is evenly distributed.
Ferment the yogurt: Place the inner pot back into the electric pressure cooker and close the lid. Set the pressure cooker to the “Yogurt” or “Custom” function, and adjust the time to 6-12 hours, depending on the desired tartness and thickness of your yogurt. The longer you ferment, the tangier the yogurt will become.
Chill and enjoy: Once the fermentation is complete, remove the inner pot from the electric pressure cooker and refrigerate the yogurt for at least 4 hours or overnight to allow it to set and thicken further. Now your homemade yogurt is ready to enjoy!
Remember to save a small portion of your homemade yogurt as a starter culture for your next batch. This way, you can continue making delicious yogurt in your electric pressure cooker with ease.
So, why buy yogurt from the store when you can make your own at home using an electric pressure cooker? Give it a try and discover the joy of homemade yogurt – it’s creamy, delicious, and customizable to suit your preferences!
What is an Electric Pressure Cooker?
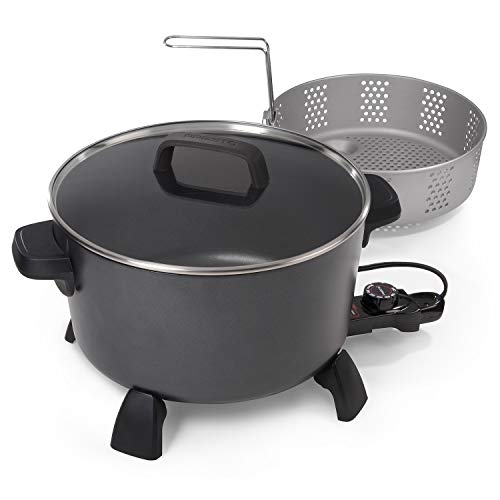
An electric pressure cooker is a versatile kitchen appliance that combines the benefits of a traditional pressure cooker, slow cooker, rice cooker, and more into one convenient device. It uses pressure and steam to cook food quickly and efficiently, helping to save time and energy in the kitchen.
The electric pressure cooker consists of a sturdy outer pot, a removable inner pot, a locking lid that seals in steam and pressure, and a control panel with various cooking settings. It is designed to provide a safe and convenient cooking experience, allowing users to prepare a wide variety of dishes with ease.
Benefits of Using an Electric Pressure Cooker
There are several benefits to using an electric pressure cooker:
- Time-saving: The high pressure inside the cooker allows food to cook faster than traditional methods, reducing cooking time by up to 70%. This is great for busy individuals or families looking to prepare meals quickly.
- Energy-efficient: The sealed cooking environment traps heat and steam inside, resulting in less energy required to cook food compared to stovetop methods.
- Convenience: Electric pressure cookers often come with pre-set cooking programs for a variety of dishes, making it easy to cook different recipes without the need for constant monitoring.
- Versatility: In addition to pressure cooking, electric pressure cookers can also be used for slow cooking, steaming, sautéing, and even making yogurt and homemade desserts.
How Does an Electric Pressure Cooker Work?
An electric pressure cooker works by trapping steam inside the sealed pot, which raises the pressure and temperature. This increased pressure raises the boiling point of water, allowing food to cook at higher temperatures. The higher heat and pressure help to tenderize tough cuts of meat, cook grains and legumes faster, and infuse flavors into the food.
The control panel on the electric pressure cooker allows users to select different cooking modes and adjust cooking time and pressure levels. Once the desired settings are selected, the cooker will heat up, build up pressure, and begin the cooking process. It will automatically regulate the pressure and temperature to ensure safe and consistent cooking.
Once the cooking time is complete, the pressure needs to be released before opening the cooker. This can be done through a natural release, where the pressure gradually decreases on its own, or a quick release, where the pressure is released manually using a valve.
Overall, an electric pressure cooker is a versatile and time-saving kitchen appliance that can help simplify the cooking process while allowing for a variety of culinary creations.
Why Make Yogurt in an Electric Pressure Cooker?
Making yogurt in an electric pressure cooker has several benefits and advantages. Here are a few reasons why you should consider making yogurt in your pressure cooker:
- Time-saving: Making yogurt in an electric pressure cooker is a quick and efficient process. It can be done in just a few hours, compared to traditional methods that can take up to 10-12 hours.
- Consistent results: The controlled temperature and even heat distribution in an electric pressure cooker ensure consistent and perfect yogurt every time. You don’t have to worry about the temperature being too low or too high.
- Economical: Making yogurt at home in an electric pressure cooker is much more cost-effective compared to buying it from the store. You only need milk and a small amount of yogurt as a starter, which saves money in the long run.
- Customization: Making yogurt in your pressure cooker allows you to customize the flavor and consistency according to your preference. You can add fruits, honey, or other flavorings to create your own unique varieties.
- Health benefits: Homemade yogurt from an electric pressure cooker contains live and active cultures that are beneficial for your gut health. It is a great source of probiotics and can help improve digestion and strengthen the immune system.
In conclusion, making yogurt in an electric pressure cooker is a convenient, cost-effective, and customizable way to enjoy homemade yogurt with all its health benefits. Plus, it saves you time and ensures consistent results every time you make it.
Step-by-Step Guide to Making Yogurt in an Electric Pressure Cooker
Making yogurt at home might sound intimidating, but with an electric pressure cooker, it’s actually quite simple. Here’s a step-by-step guide to help you make creamy and delicious homemade yogurt.
Step 1: Gather Your Ingredients
Before you begin, gather all the ingredients you’ll need. This includes milk, yogurt starter, and any flavorings or sweeteners you want to add.
Step 2: Prep Your Electric Pressure Cooker
Make sure your electric pressure cooker is clean and ready to use. If it has a yogurt function, select that setting. If not, choose the “keep warm” or “low” setting.
Step 3: Heat the Milk
Pour the desired amount of milk into the inner pot of your electric pressure cooker. Close the lid and set the pressure release valve to the “sealing” position. Press the “yogurt” or “manual” button, and adjust the cooking time to boil the milk. The ideal temperature to heat the milk to is around 180°F (82°C).
Step 4: Cool the Milk
Once the milk has reached the desired temperature, carefully remove the inner pot from the pressure cooker and let it cool. You can place it in a sink of cold water or let it cool naturally at room temperature.
Step 5: Add the Yogurt Starter
Once the milk has cooled to around 110°F (43°C), it’s time to add the yogurt starter. This can be store-bought yogurt or a previous batch of homemade yogurt. Stir the starter into the cooled milk until well combined.
Step 6: Incubate the Yogurt
Transfer the inner pot back into the electric pressure cooker. Close the lid and set the pressure release valve to “venting” or “sealing,” depending on your cooker. If using the “keep warm” or “low” setting, wrap the pot in a towel or blanket to maintain a warm environment. Let the yogurt incubate for 6 to 8 hours or overnight, depending on how tangy you like your yogurt.
Step 7: Chill and Enjoy
Once the incubation time is complete, remove the inner pot from the pressure cooker and refrigerate the yogurt for at least 4 hours to allow it to set. Once chilled, your homemade yogurt is ready to be enjoyed plain, or you can add your favorite toppings or mix-ins.
With an electric pressure cooker, making yogurt at home is a breeze. Follow this step-by-step guide, and soon you’ll be savoring the tangy and creamy delights of homemade yogurt.
Tips and Tricks for Perfect Yogurt in an Electric Pressure Cooker
Yogurt is a versatile and nutritious food that can be enjoyed at any time of the day. Making yogurt in an electric pressure cooker is a convenient and efficient way to achieve that creamy and delicious consistency. Here are some tips and tricks to help you make the perfect yogurt in your electric pressure cooker.
1. Use the Right Milk
The key ingredient for making yogurt is fresh milk. It is important to use whole milk for the best results, as it provides the right amount of fat content for a creamy and thick texture. Avoid using skim or low-fat milk, as they may result in a thinner consistency.
2. Choose the Right Starter Culture
The starter culture is what inoculates the milk and turns it into yogurt. You can use a store-bought yogurt with active cultures as a starter, or you can use a yogurt starter culture specifically designed for making yogurt. Using a starter culture will help ensure a consistent and delicious flavor.
3. Heat the Milk to the Right Temperature
In order for the yogurt to properly set, it is crucial to heat the milk to the right temperature. The ideal temperature is around 180°F (82°C). You can use the “saute” function on your pressure cooker to heat the milk gradually and prevent it from scorching. Using a food thermometer can help you monitor the temperature accurately.
4. Incubate at the Right Temperature
After heating the milk, it needs to be incubated to allow the yogurt cultures to multiply and ferment. The ideal temperature for incubation is between 110°F (43°C) and 115°F (46°C). Most electric pressure cookers have a “yogurt” function that can maintain this temperature for the required incubation time. If your pressure cooker does not have this function, you can use a separate yogurt maker or a warm environment like an oven with the light on.
5. Strain for a Thicker Texture
If you prefer a thicker yogurt, you can strain it after the incubation process. Line a fine-mesh sieve or a cheesecloth with a clean cloth and place it over a bowl. Pour the yogurt into the sieve and let it strain in the refrigerator for a few hours or overnight. This will remove excess whey and give you a creamy and thick yogurt.
With these tips and tricks, you can easily make perfect yogurt in your electric pressure cooker. Experiment with different flavors and toppings to create a yogurt that suits your taste preferences. Enjoy your homemade yogurt as a healthy breakfast, snack, or ingredient in various recipes!
FAQ
What is an electric pressure cooker?
An electric pressure cooker is a kitchen appliance that uses steam pressure to cook food quickly. It is a convenient and efficient way to prepare meals in a short amount of time.
Why would I want to make yogurt in an electric pressure cooker?
Making yogurt in an electric pressure cooker allows you to have full control over the ingredients and process. It also saves time and ensures a consistent and creamy texture.
What are the ingredients needed to make yogurt in an electric pressure cooker?
The ingredients needed to make yogurt in an electric pressure cooker are milk and a yogurt starter culture. You can also add sweeteners or flavorings if desired.
Can I use non-dairy milk to make yogurt in an electric pressure cooker?
Yes, you can use non-dairy milk such as almond milk or soy milk to make yogurt in an electric pressure cooker. However, the process and outcome may be slightly different compared to using dairy milk.