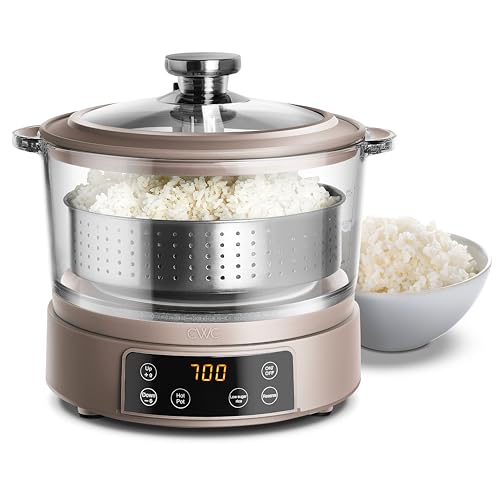


If you own an electric rice cooker, you may be surprised to learn that it can do more than just cook rice. One of the unexpected uses for this versatile kitchen appliance is boiling milk. Boiling milk on the stovetop can be a tricky task, as it requires constant attention to prevent it from scorching or overflowing. However, with an electric rice cooker, you can easily boil milk without the hassle.
The first thing you need to do is make sure your rice cooker is clean and in good working condition. Fill the inner pot of the rice cooker with the desired amount of milk. It’s important not to fill it too full, as the milk will expand as it heats up. Next, place the inner pot back into the rice cooker and close the lid.
Before you start the cooking process, it’s crucial to set the cooking mode to “boil” or “milk” if your rice cooker has specific settings for boiling milk. This will ensure that the milk heats up properly without burning. Once you’ve set the cooking mode, turn on the rice cooker and let it do its magic.
While the milk is heating up, it’s essential to keep an eye on it to avoid any spills or overflows. The rice cooker will automatically turn off once the milk has reached the boiling point. However, it’s always a good idea to be present in the kitchen to prevent any accidents.
Once the milk has boiled, you can turn off the rice cooker and carefully remove the inner pot. Be cautious as the pot and milk will be hot. Give the milk a gentle stir to ensure it is evenly heated and free of any clumps. You can then pour the boiled milk into a heatproof container or use it immediately for your recipes.
In conclusion, using an electric rice cooker to boil milk is a convenient and safe method. It eliminates the risk of scorching or overflowing that can occur when boiling milk on the stovetop. With a few simple steps, you can have perfectly boiled milk ready for your recipes or a comforting cup of hot chocolate.
How to Use an Electric Rice Cooker to Boil Milk
Boiling milk in an electric rice cooker is a convenient and safe way to heat your milk without the risk of it burning or sticking to the bottom of the pot. Here is a step-by-step guide on how to use an electric rice cooker to boil milk.
Step 1: Prepare the Rice Cooker
Before you start boiling the milk, make sure your rice cooker is clean and in good working condition. Check the instruction manual to see if there are any specific settings or precautions for boiling milk. If not, the regular cooking setting should be sufficient.
Step 2: Add Milk to the Rice Cooker
Pour the desired amount of milk into the inner pot of the rice cooker. Make sure not to exceed the maximum fill level indicated on the pot to avoid any spillage during boiling.
Step 3: Set the Temperature and Time
Depending on your rice cooker model, you may have different temperature and time settings. For boiling milk, you can start with the highest temperature setting and set the timer for 10-15 minutes. This should be enough to bring the milk to a boil without scorching it.
Step 4: Monitor the Milk
While the milk is boiling, keep an eye on it to ensure it doesn’t overflow. If you notice the milk rising too close to the lid, quickly switch off the rice cooker and let it cool down before continuing. Stir the milk occasionally to prevent a skin from forming on the surface.
Step 5: Turn Off the Rice Cooker
Once the milk has come to a boil, switch off the rice cooker and unplug it from the power source. Let the milk cool down in the rice cooker for a few minutes before transferring it to a different container or using it for other purposes.
Remember to clean the rice cooker thoroughly after boiling milk to prevent any leftover residue from sticking to the pot.
Using an electric rice cooker to boil milk is a simple and hassle-free method that eliminates the need for constant stirring and risk of burning. It allows you to have perfectly boiled milk every time with minimal effort. Give it a try and enjoy a cup of warm milk whenever you want!
Step-by-Step Guide
Boiling milk in an electric rice cooker is a convenient and easy way to do so. Follow these simple steps to boil milk in your electric rice cooker:
Step 1: Start by cleaning your electric rice cooker thoroughly. Make sure it is free from any residues or dirt.
Step 2: Pour the desired amount of milk into the inner pot of the rice cooker. Ensure that you do not exceed the maximum fill line.
Step 3: Close the lid of the rice cooker securely.
Step 4: Plug in the rice cooker and turn it on. Select the “Boil” or “Milk” setting if your rice cooker has one. Otherwise, use the regular cooking mode.
Step 5: Allow the milk to boil. It may take some time for the milk to reach the boiling point, but be patient and do not leave it unattended.
Step 6: Once the milk starts boiling, reduce the heat to a simmer or the lowest setting. This will prevent the milk from overflowing.
Step 7: Stir the milk occasionally to prevent it from scorching or forming a skin on the surface.
Step 8: Continue simmering the milk for a few minutes, or until it reaches your desired consistency.
Step 9: Once the milk is boiled to your liking, turn off the rice cooker and unplug it from the power source.
Step 10: Carefully remove the inner pot from the rice cooker. Be cautious as the pot may be hot.
Step 11: Pour the boiled milk into a separate container or use it directly as desired.
Step 12: Clean the inner pot of the rice cooker thoroughly to remove any residue or milk stains.
Follow these steps, and you’ll have perfectly boiled milk using your electric rice cooker!
Tips for Boiling Milk in an Electric Rice Cooker
Boiling milk in an electric rice cooker can be a convenient and time-saving method. However, it’s important to follow certain tips to ensure that the process goes smoothly and you get the desired results. Here are some tips to help you boil milk in an electric rice cooker:
1. Use a rice cooker with a temperature control feature
Not all rice cookers are suitable for boiling milk. Look for a rice cooker that has a temperature control feature, as this will allow you to set the heat to a lower setting, preventing the milk from boiling over or scorching.
2. Choose the right size cooker
If you’re boiling a small amount of milk, choose a smaller rice cooker. Using a larger cooker might result in uneven heating and can cause the milk to burn.
3. Use a glass or heat-resistant container
It’s recommended to use a glass or heat-resistant container to boil milk in the rice cooker. This will ensure that the container can withstand the heat and prevent any potential accidents or damage.
4. Stir the milk occasionally
While the milk is boiling, stir it occasionally to prevent it from sticking to the bottom of the container or forming a skin on top. This will ensure that the milk heats evenly and doesn’t scorch.
5. Monitor the milk closely
Keep a close eye on the milk as it boils in the rice cooker. It can heat up quickly, so it’s important to monitor it continuously to prevent it from boiling over or overflowing.
| Summary |
|---|
|
Boiling milk in an electric rice cooker can be a convenient and time-saving method. Use a rice cooker with a temperature control feature to prevent boiling over or scorching. Choose the right size cooker and use a glass or heat-resistant container. Stir the milk occasionally to ensure even heating. Monitor the milk closely to prevent boiling over or overflowing. |
FAQ
Can I boil milk in an electric rice cooker?
Yes, you can boil milk in an electric rice cooker. It is a convenient and easy way to heat up milk without the risk of it boiling over. Just make sure to keep an eye on it to prevent any spills.
How long does it take to boil milk in an electric rice cooker?
The time it takes to boil milk in an electric rice cooker can vary depending on the specific model and the quantity of milk being heated. On average, it usually takes around 10-15 minutes for the milk to reach a boiling point. However, it is important to keep an eye on it and stir occasionally to prevent it from scorching or boiling over.


