


If you’re a fan of succulent, flavorful meat, then rotisserie cooking is definitely for you. And when it comes to poultry, there’s nothing quite like a perfectly cooked rotisserie duck. But how long should you cook it for?
When it comes to rotisserie cooking, time is key. The cooking time for a duck on a rotisserie can vary depending on various factors such as the size of the duck and the temperature of your grill. However, as a general rule of thumb, you should aim to cook a duck on a rotisserie for around 2 to 2.5 hours.
It’s important to note that cooking times can vary, so it’s always best to use an instant-read thermometer to check the internal temperature of the duck. The duck should reach an internal temperature of 165°F (74°C) in the thickest part of the thigh. This will ensure that the duck is cooked through and juicy.
Remember, a perfectly cooked rotisserie duck should have crispy skin and tender, moist meat. So, take the time to cook it just right and enjoy a delicious meal that will impress your family and friends.
Preparation for Rotisserie Duck
Before you start rotisserie cooking a duck, it’s important to properly prepare the bird to ensure delicious and tender results. Here are the steps you should follow:
1. Thaw the Duck
If your duck is frozen, make sure to thaw it completely in the refrigerator. Allow the duck to defrost slowly for about 24 hours per 2.5 kilograms (5 pounds) of weight. This will help the meat cook evenly.

2. Remove the Giblets
Take out the giblets from the duck’s cavity, including the liver, heart, and gizzard. Set them aside if you want to use them later for making stock or gravy.
3. Rinse and Pat Dry
Rinse the duck inside and out with cold water, then pat it completely dry with paper towels. Removing excess moisture will help the skin crisp up during cooking.
4. Season the Duck
Generously season the duck with kosher salt and freshly ground black pepper. You can also add other herbs and spices to enhance the flavor, such as thyme, rosemary, or garlic powder.
5. Let the Seasonings Infuse
Place the seasoned duck on a plate or tray and let it sit in the refrigerator for at least 1 hour or overnight. This will allow the flavors to penetrate the meat and result in a more flavorful dish.
6. Truss the Duck
Trussing involves tying the legs and wings of the duck close to its body. This will help the bird cook evenly and maintain its shape during rotisserie cooking. You can use kitchen twine or metal skewers to secure the duck.
7. Preheat the Grill
If you’re using a grill for rotisserie cooking, preheat it to medium-high heat. Make sure the grill is clean and well-oiled to prevent sticking.
Following these preparation steps will ensure that your rotisserie duck turns out juicy, flavorful, and perfectly cooked.
Seasoning the Duck
Properly seasoning the duck is crucial to enhancing its flavor and creating a delicious rotisserie dish. Here are the steps to season the duck:
Step 1: Rinse the Duck
Start by rinsing the duck under cold water to remove any debris. Pat it dry with paper towels.
Step 2: Salt the Duck
Generously sprinkle salt on both the exterior and interior of the duck. Rub the salt into the skin and cavity to ensure even seasoning.
Step 3: Add Herbs and Spices
Next, add your preferred herbs and spices to enhance the flavor of the duck. Popular options include rosemary, thyme, garlic powder, onion powder, and black pepper.
You can create a simple herb blend by combining equal parts of the herbs and spices. Alternatively, you can experiment with your own unique blend to suit your taste preferences.
Step 4: Marinate the Duck
Once seasoned, you have the option to marinate the duck for a few hours or overnight. This step allows the flavors to penetrate the meat, resulting in a more flavorful and tender final product.
Place the seasoned duck in a sealed container or a resealable bag and refrigerate. Make sure to turn the duck occasionally to ensure even marination.
Step 5: Bring the Duck to Room Temperature
Before cooking the duck, remove it from the refrigerator and let it come to room temperature. This helps ensure even cooking throughout the bird and prevents the skin from becoming too crispy or dry.
Now that your duck is properly seasoned, it’s ready to be placed on the rotisserie and cooked to perfection.
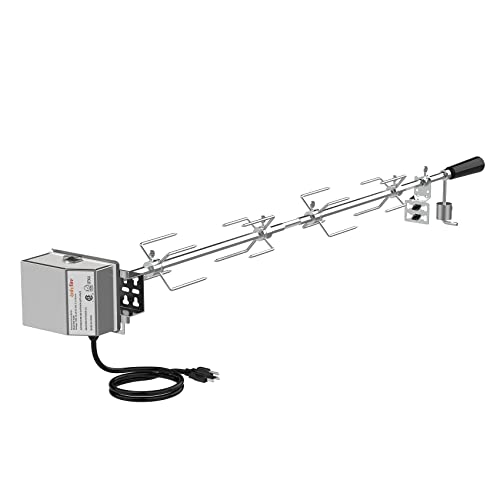
Setting up the Rotisserie Grill
Before you start rotisserie grilling your duck, it’s important to properly set up the rotisserie grill to ensure even cooking and delicious results. Here are the steps you need to follow:
1. Safety First
Make sure you place the rotisserie grill in a safe and stable location. It should be on a level surface away from any flammable materials, such as overhanging branches or wood decks. Keep children and pets away from the grill while it’s in use.
2. Assemble the Rotisserie Kit
If your rotisserie grill comes with a kit, carefully read the instructions and assemble it according to the manufacturer’s guidelines. This usually involves attaching the rotisserie spit, forks, and motor to the grill.
3. Preheat the Grill
Before placing the duck on the rotisserie, preheat the grill to a medium-high heat. This will ensure that the duck cooks evenly and reduces the risk of undercooking.
4. Position the Duck
Remove any giblets or excess fat from the duck and truss it if desired. Insert the rotisserie spit through the cavity of the duck, making sure it is centered. Secure the duck with the forks, making sure it is tightly held in place.
5. Adjust the Heat and Rotisserie Settings
Once the duck is properly positioned, adjust the heat to a medium-low setting. This will allow the bird to cook slowly and evenly. Turn on the rotisserie motor and make sure it is properly rotating the duck. Adjust as needed to ensure even cooking.
6. Monitor the Cooking Process
Keep an eye on the duck as it cooks to ensure it doesn’t burn or become overcooked. Use a meat thermometer to check the internal temperature of the duck, which should reach at least 165°F (74°C) for safe consumption.
7. Let it Rest
After the duck reaches the desired temperature, turn off the grill and carefully remove the rotisserie spit. Let the duck rest for a few minutes before carving and serving. This allows the juices to redistribute, resulting in a juicier and more flavorful meat.
Following these steps will help you set up your rotisserie grill properly and achieve a perfectly cooked and delicious rotisserie duck.
| Step | Description |
|---|---|
| 1 | Safety First |
| 2 | Assemble the Rotisserie Kit |
| 3 | Preheat the Grill |
| 4 | Position the Duck |
| 5 | Adjust the Heat and Rotisserie Settings |
| 6 | Monitor the Cooking Process |
| 7 | Let it Rest |
Rotisserie Cooking Time for Duck
Rotisserie cooking is a popular method for preparing duck that results in a flavorful and crispy skin. The cooking time for a rotisserie duck will depend on the weight of the bird and the desired level of doneness. Below are some guidelines to help you determine how long to rotisserie a duck:
1. Preparing the Duck
Before cooking, make sure to remove any giblets from the cavity of the duck and pat the bird dry with paper towels. This will help to remove excess moisture and promote a crispy skin. You can also season the duck with your choice of spices or herbs for added flavor.
2. Cooking Time
A general rule of thumb for cooking a rotisserie duck is to allow around 20 minutes of cooking time per pound (450 grams) of meat. However, it’s important to note that this is just a guideline and the actual cooking time may vary depending on a few factors.
If you prefer your duck to be cooked to a medium-rare level, aim for an internal temperature of around 135°F (57°C) and cook the duck for approximately 15 minutes per pound (450 grams). For a medium level of doneness, target an internal temperature of around 145°F (63°C) and increase the cooking time to about 18 minutes per pound (450 grams).
Remember to use a meat thermometer to ensure the duck reaches the desired internal temperature. Insert the thermometer into the thickest part of the thigh, making sure not to touch the bone.
3. Resting Time
Once the duck has reached the desired internal temperature, remove it from the rotisserie and allow it to rest for about 10-15 minutes. This resting period is essential as it allows the juices to redistribute within the meat, resulting in a more tender and flavorful duck.
After the resting time, you can carve the duck and serve it with your favorite side dishes. Enjoy!
Note: It’s important to follow proper food safety guidelines when cooking duck. Make sure to handle and store raw duck properly to prevent any potential foodborne illnesses.
Checking for Doneness
Rotisserie cooking a duck can take anywhere from 2 to 3 hours, depending on the size of the duck and the temperature of the fire. However, the best way to ensure the duck is cooked to perfection is by checking for doneness.
One way to check if the duck is done is by using a meat thermometer. Insert the thermometer into the thickest part of the duck, making sure not to touch the bone. The duck is considered cooked when the internal temperature reaches 165°F (74°C).
Another way to test for doneness is by piercing the duck with a skewer or fork. If the juices run clear and the meat is tender, the duck is cooked through.
It’s important to note that the skin should be golden brown and crisp, and the meat should be pink and juicy. If the duck is undercooked, return it to the rotisserie and continue cooking. If it’s overcooked, the meat may become dry.
Once the duck is done, remove it from the rotisserie and let it rest for about 15 minutes before carving. This will allow the juices to redistribute, ensuring a moist and flavorful result.
Now that you know how to check for doneness, you can confidently roast a delicious rotisserie duck every time!
Resting and Carving the Rotisserie Duck
After the rotisserie duck has finished cooking, it is important to let it rest before carving. This resting period allows the juices to redistribute throughout the meat, resulting in a juicier and more flavorful final product.

Resting the Duck
Once the rotisserie duck is done cooking, carefully remove it from the rotisserie spit and transfer it to a cutting board. Allow the duck to rest for at least 15 minutes before carving.
While the duck is resting, cover it loosely with aluminum foil to keep it warm and prevent it from drying out. This will also help the juices to remain in the meat, instead of spilling out onto the cutting board.
Carving the Duck
When the duck has finished resting, it is time to carve it. Start by removing the legs and wings. Use a sharp carving knife to make clean, precise cuts, following the natural joints of the bird.
Next, separate the breast meat from the bone by cutting along the breastbone. Slice the breast meat against the grain into thin, even slices.
Arrange the carved duck meat on a serving platter and garnish with fresh herbs or citrus slices, if desired. Serve immediately and enjoy!
Tips and Variations for Rotisserie Duck
Rotisserie duck is a delicious and flavorful dish that can be enjoyed in many different ways. Here are some tips and variations to enhance your rotisserie duck experience:
1. Marinades
A good marinade can really elevate the flavor of your rotisserie duck. Try marinating the duck in a mixture of soy sauce, honey, garlic, and ginger for a delicious Asian twist. Alternatively, you can use a blend of herbs like thyme, rosemary, and sage with olive oil for a more traditional flavor.

2. Stuffing
Consider stuffing the cavity of the duck with flavorful ingredients before rotisserie cooking. Some popular stuffing options include apples, oranges, onions, or even a mixture of wild rice and dried cherries. The stuffing will infuse the duck with additional flavor while it cooks.
3. Basting
To keep the duck moist and succulent, basting it with its own juices or a flavorful liquid throughout the cooking process is key. This will ensure that the meat stays tender and the skin gets beautifully crispy. Baste the duck every 20-30 minutes for best results.
4. Cooking Time and Temperature
The cooking time and temperature for rotisserie duck may vary depending on the size of the bird and your preference for doneness. As a general guideline, cook a 4-5 pound duck on a rotisserie grill at around 350°F (175°C) for about 2 to 2.5 hours, or until the internal temperature reaches 165°F (74°C).
5. Serve with Sauces
Once the duck is cooked and rested, carve it into serving portions and serve with delicious dipping sauces. Some popular options include plum sauce, hoisin sauce, or a tangy orange glaze. These sauces complement the rich flavor of the duck and add an extra layer of taste.
6. Pair with Side Dishes
Complete your rotisserie duck meal by serving it with flavorful side dishes. Classic accompaniments like roasted potatoes, glazed carrots, or a fresh green salad make for a well-rounded and satisfying meal.
Experiment with these tips and variations to create a rotisserie duck dish that suits your taste and preferences. Whether you try a new marinade or stuff the duck with different ingredients, the result is sure to be a flavorful and mouthwatering experience.
FAQ
How long should I rotisserie a duck?
The cooking time for rotisserie duck can vary depending on the size of the duck and the heat of your grill. As a general guideline, a 4-5 pound duck will take about 1.5 to 2 hours to cook on a medium-high heat grill. It’s important to use a meat thermometer to ensure the duck is cooked to an internal temperature of 165°F.

What temperature should I cook the duck at?
For rotisserie duck, it’s best to cook it at a medium-high heat of around 375°F (190°C). This temperature allows the duck to cook evenly and also helps to render out the fat, giving the duck a crispy and golden skin.
Can I marinate the duck before rotisserie cooking?
Absolutely! Marinating the duck before cooking can add flavor and help to tenderize the meat. You can use a variety of marinades such as citrus-based marinades, Asian-inspired marinades, or even simple herb and garlic marinades. Just be sure to pat the duck dry before placing it on the rotisserie to ensure a crispy skin.
Can I stuff the duck before rotisserie cooking?
While it is possible to stuff a duck before rotisserie cooking, it is generally not recommended. Stuffing can impede the airflow inside the duck and result in uneven cooking. It’s best to cook the stuffing separately or use aromatics such as citrus fruits, herbs, and garlic inside the cavity of the duck to add flavor.