


Using a rotisserie skewer to cook chicken is a fantastic way to infuse it with flavor and achieve a crispy, golden-brown skin. However, putting a chicken on a rotisserie skewer can be a bit tricky if you’ve never done it before. In this guide, we’ll walk you through the process step by step, so you can enjoy delicious rotisserie chicken in the comfort of your own home.
Step 1: Prepare Your Chicken
The first step in putting a chicken on a rotisserie skewer is to prepare the chicken. Start by removing any giblets and excess fat from the cavity. Rinse the chicken under cold water and pat it dry with paper towels. Next, season the chicken with your favorite rub or marinade. Be sure to get the seasoning both inside and outside the chicken for maximum flavor.
Step 2: Truss the Chicken
Trussing the chicken is an important step to ensure that it cooks evenly on the rotisserie. To truss the chicken, tuck the wings behind the back and tie the legs together with kitchen twine. This will help the chicken maintain its shape while it rotates on the skewer.
Pro tip: If you’re using a rotisserie with prongs, you can secure the chicken by inserting the prongs through the legs and the breast. This will prevent the chicken from spinning on the skewer.
Step 3: Thread the Chicken onto the Skewer
Now it’s time to place the chicken on the rotisserie skewer. Insert the skewer through the cavity of the chicken, making sure it goes through both the leg and breast. Push the chicken tightly against the prongs or forks of the rotisserie to hold it securely in place.
Step 4: Cook the Chicken
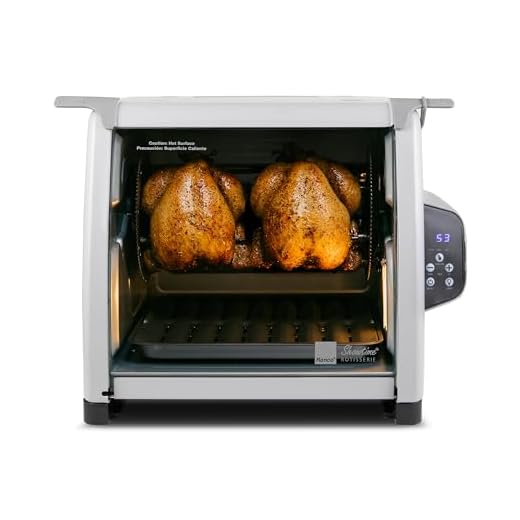
Once your chicken is securely threaded onto the rotisserie skewer, you’re ready to start cooking. Preheat your grill to medium-high heat and place the skewer on the rotisserie attachment. Close the hood of the grill and let the chicken cook for about 1 to 1 1/2 hours, or until the internal temperature reaches 165°F (74°C).
Pro tip: Baste the chicken with your favorite sauce or marinade every 20 minutes for a flavorful and juicy result.
Step 5: Rest and Serve
After the chicken reaches the desired temperature, carefully remove it from the rotisserie skewer and let it rest for 10 minutes on a cutting board. This will allow the juices to redistribute, resulting in a moist and delicious chicken. Once the chicken has rested, carve it into pieces and serve it hot with your favorite sides.
With these step-by-step instructions, putting a chicken on a rotisserie skewer is easier than ever. Enjoy the mouthwatering flavors and crispy skin that this cooking method provides. Your family and friends will be impressed with your culinary skills!
Preparing the Chicken
Before putting the chicken on a rotisserie skewer, there are a few steps you should take to prepare it. These steps ensure that the chicken is flavorful, tender, and cooks evenly on the rotisserie.
1. Clean the Chicken
Start by washing the chicken thoroughly under cold water. Remove any giblets or organs that may be inside the cavity. Pat the chicken dry with paper towels to remove excess moisture.
2. Season the Chicken
Next, generously season the chicken with your preferred combination of spices. This can include salt, pepper, garlic powder, paprika, or any other dry herbs and seasonings you enjoy. Rub the spices all over the chicken, ensuring that it is evenly coated.
| Tip: | You can also marinate the chicken overnight in a mixture of your choice of marinade ingredients. This can add extra flavor and tenderize the meat. |
|---|
Allow the chicken to sit for at least 30 minutes to allow the flavors to penetrate the meat.
Once the chicken is cleaned and seasoned, it is ready to be skewered and placed on the rotisserie for cooking. Taking the time to properly prepare the chicken will result in a delicious and succulent rotisserie chicken.
Taking Out the Giblets
Before placing your chicken on the rotisserie skewer, it is important to remove the giblets. The giblets are the organs found inside the chicken, usually wrapped in a small bag. They include the liver, gizzard, heart, and neck.
To remove the giblets, carefully open the cavity of the chicken. This can be done by locating the neck or tail end and using your hands to gently pull the skin away from the body. Once the cavity is exposed, you should see the bag of giblets.
Use your hands or a pair of tongs to carefully remove the giblets from the cavity. Be cautious not to tear the bag or spill any juices. Some chickens may also have a neck attached to the cavity, which can be removed along with the giblets if desired.
Once the giblets and neck have been removed, you can discard them or use them for other recipes, such as making stock or gravy. Make sure to thoroughly wash your hands and any utensils used in the process to avoid cross-contamination.
With the giblets taken out, your chicken is now ready to be placed on the rotisserie skewer and cooked to perfection.
Seasoning the Chicken
One of the most important steps in preparing a chicken for the rotisserie is seasoning it properly. This step will ensure that your chicken is flavorful and delicious when it comes off the spit.
There are many different seasoning options available, but a classic and simple combination is salt, pepper, and garlic powder. This trio of seasonings adds a great base flavor to the chicken.
To season the chicken, start by patting it dry with paper towels. This will help the seasoning adhere to the skin better. Then, generously sprinkle the chicken with salt, pepper, and garlic powder on all sides. Be sure to season both the inside and outside of the chicken.
If you want to add some extra flavor, you can also include herbs and spices such as rosemary, thyme, paprika, or cayenne pepper. These additional seasonings can add depth and complexity to the chicken’s flavor profile.
After seasoning the chicken, let it sit in the refrigerator for at least 1 hour to allow the flavors to meld together. This step is crucial for the seasonings to penetrate the meat and enhance the taste.
Remember, don’t be afraid to experiment with different seasonings and spices to find the flavor combination that suits your preferences. The key is to use enough seasoning to enhance the flavor but not overpower it.
Securing the Chicken on the Skewer
Securing the chicken on the rotisserie skewer is an important step to ensure even cooking and prevent the chicken from falling off during the cooking process. Follow these steps to properly secure the chicken on the skewer:
- Prepare the chicken by removing any giblets or excess fat from the cavity.
- Pat the chicken dry using paper towels to remove any moisture.
- Hold the chicken upright with the neck cavity facing down.
- Insert the rotisserie skewer into the tail end of the chicken, making sure it goes through the cavity and comes out through the neck area.
- Push the chicken tightly against the skewer, ensuring it is centered.
- Using butcher’s twine or kitchen string, tie the chicken securely to the skewer at regular intervals. Start from the tail end and work your way up to the neck area.
- Be sure to tie the legs and wings tightly to the skewer to prevent them from flopping around during cooking.
- After securing the chicken, make any necessary adjustments to ensure it is balanced on the skewer.
Once the chicken is securely fastened to the rotisserie skewer, it is ready to be placed on the rotisserie grill for cooking. Ensure that the skewer is properly inserted into the rotisserie motor and that the chicken is balanced to prevent any wobbling or uneven cooking.

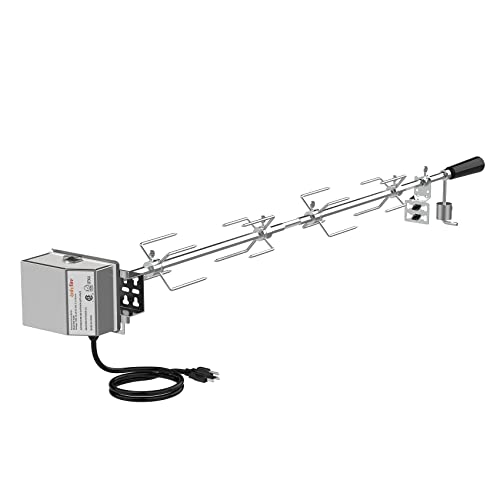
Assembling the Rotisserie Skewer
Before you can start cooking your chicken on a rotisserie, you will need to assemble the rotisserie skewer. Follow these steps to ensure a secure and well-balanced setup:

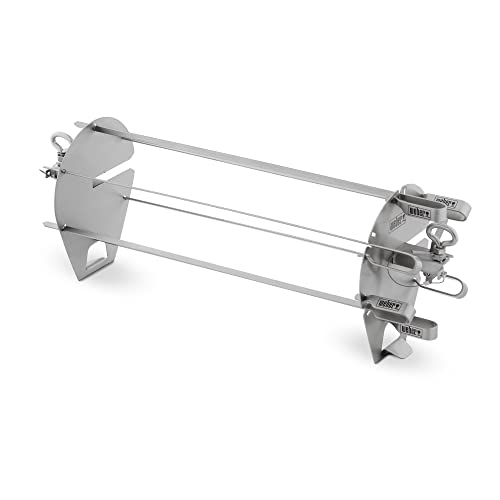
- Attach the prongs: Begin by securing the prongs onto the rotisserie skewer. The prongs should be spaced evenly apart and facing upwards to hold the chicken in place.
- Thread the chicken: Carefully slide the chicken onto the skewer, ensuring that it is centered and balanced. Adjust the prongs as needed to secure the chicken and prevent it from sliding during rotation.
- Secure the chicken: Once the chicken is threaded onto the skewer, use the provided brackets or forks to secure the chicken in place. These brackets or forks will hold the chicken securely during rotation.
- Tighten the screws: Double-check that all screws and fasteners on the rotisserie skewer are tight and secure. This will prevent any unnecessary movement or wobbling during the cooking process.
- Test the balance: Before starting the rotisserie, test the balance of the skewer by gently rotating it with your hands. The chicken should rotate smoothly without any excessive wobbling or tilting. Adjust the positioning of the chicken, prongs, and brackets if needed to achieve a balanced setup.
Note: It is important to ensure that the rotisserie skewer is securely assembled before cooking. A properly assembled skewer will ensure even cooking and prevent any accidents or mishaps during the cooking process.
FAQ
What is a rotisserie skewer?
A rotisserie skewer is a long metal rod or stick used for cooking meat, especially chicken, on a rotisserie. It is inserted through the chicken to hold it securely in place while it rotates and cooks evenly.
How do I secure a chicken on the rotisserie skewer?
To secure a chicken on the rotisserie skewer, start by trussing the chicken with kitchen twine to keep its shape. Next, slide the skewer through the cavity of the chicken, making sure it goes through both the breast and the legs. Use the provided prongs to secure the chicken tightly on the skewer, ensuring it rotates without wobbling or falling off during cooking.