Nothing beats the succulent, juicy flavor of a perfectly cooked rotisserie chicken. Whether you’re planning a family dinner or hosting a backyard barbecue, learning how to set up a rotisserie chicken is a skill worth mastering. With a few simple steps, you can create a mouthwatering meal that will impress your guests and leave them begging for seconds.
First, start by selecting a high-quality chicken. Look for a bird that is fresh and plump, with firm, pink flesh. For the best flavor, choose an organic or free-range chicken. These birds have a richer taste and are often more tender.
Next, prepare your rotisserie by cleaning it thoroughly and oiling the spit rod. This will prevent the chicken from sticking and ensure even cooking. Season the chicken to your liking, using a combination of herbs and spices. Popular choices include garlic, rosemary, thyme, and paprika.
Once the chicken is seasoned, place it onto the rotisserie rod, securing it tightly. Make sure the chicken is centered on the rod to ensure even cooking. If necessary, use butcher’s twine to truss the bird and keep it in place.

Now it’s time to fire up the rotisserie and let it do its magic. Set the grill to medium-high heat, around 350 degrees Fahrenheit (175 degrees Celsius). Close the lid and let the chicken cook for approximately 1-1.5 hours, or until the internal temperature reaches 165 degrees Fahrenheit (75 degrees Celsius).
Once cooked, remove the chicken from the rotisserie and let it rest for a few minutes before carving. This allows the juices to redistribute, resulting in a more succulent and flavorful bird. Serve with your favorite side dishes, such as roasted potatoes and grilled vegetables, and enjoy!
Learning how to set up a rotisserie chicken is a game-changer in the kitchen. With minimal effort, you can create a show-stopping centerpiece that will have your guests coming back for more. So, give it a try and elevate your chicken-cooking skills to new heights!
Preparing the Chicken
1. Start by cleaning the chicken thoroughly. Remove any giblets or innards from the body cavity. Rinse the chicken under cold water to remove any excess blood or debris.
2. Pat the chicken dry with paper towels. This will help the seasoning stick to the chicken and ensure a crispy skin.
3. Season the chicken generously with salt, pepper, and any other desired spices. You can also use a marinade or rub for added flavor. Rub the seasoning all over the chicken, including under the skin and inside the body cavity.
4. Let the chicken marinate in the refrigerator for at least 1 hour, or overnight for maximum flavor.
5. Preheat your rotisserie grill according to the manufacturer’s instructions.
6. Truss the chicken by tying the legs together with kitchen twine. This will help the chicken cook evenly and maintain its shape on the rotisserie.
7. Place the chicken on the rotisserie spit, making sure it is secured tightly. Balance the chicken as evenly as possible to prevent it from spinning unevenly on the grill.
8. Once the grill is preheated, turn on the rotisserie motor and let the chicken cook for the recommended cooking time. This is usually around 15 minutes per pound, but refer to your specific grill’s instructions for accurate cooking times.
9. Use a meat thermometer to check the internal temperature of the chicken. It should reach 165°F (75°C) in the thickest part of the thigh or breast.
10. Once the chicken is cooked, carefully remove it from the rotisserie and let it rest for a few minutes before carving. This will allow the juices to redistribute and result in a juicier chicken.
Cleaning the Chicken
Before setting up the rotisserie chicken, it is important to properly clean the chicken to ensure food safety. Follow these steps to clean the chicken:
- Remove the chicken from its packaging and place it on a clean cutting board.
- Wash your hands thoroughly with soap and water before handling the chicken.
- Rinse the chicken under cold running water to remove any excess blood or debris.
- Pat the chicken dry using paper towels.
- Inspect the chicken for any remaining feathers or quills and use a pair of kitchen tweezers to remove them.
- Trim any excess fat or skin from the chicken.
- Once the chicken is cleaned, discard any paper towels used and wash your hands again.
By properly cleaning the chicken, you are ensuring that it is safe to consume and reducing the risk of foodborne illnesses.
Seasoning the Chicken
Before setting up the rotisserie, it’s essential to season the chicken properly. This step can make a significant difference in the final flavor of the dish. Here are some tips for seasoning your chicken:
1. Rinse the Chicken
Start by rinsing the chicken under cold water. This helps to remove any excess blood or impurities. Pat the chicken dry with paper towels afterward.
2. Apply a Dry Rub
A dry rub is an excellent way to enhance the flavor of the chicken. You can create your own blend of herbs and spices or use a pre-made rub from the store. Apply the rub generously to all parts of the chicken, including the cavity.
Some popular herbs and spices for a rotisserie chicken rub include:
- Paprika
- Garlic powder
- Onion powder
- Thyme
- Rosemary
- Salt
- Black pepper
Make sure to rub the seasoning mixture into the chicken’s skin to ensure it adheres well.
3. Let it Rest
After seasoning the chicken, let it rest for at least 30 minutes or up to overnight in the refrigerator. This allows the flavors to penetrate the meat and results in a more flavorful final product.
Remember to bring the chicken to room temperature before placing it on the rotisserie for cooking.
Trussing the Chicken
Trussing the chicken is an essential step in preparing a rotisserie chicken. Trussing helps the chicken cook evenly and retain its shape during the cooking process. Follow these simple steps to truss your chicken:
- Begin by placing the chicken breast-side up on a clean cutting board.
- Take a long piece of butcher’s twine and slide it under the chicken, positioning it where the wings meet the body.
- Cross the twine over the chicken’s breast, making an “X” shape.
- Bring the ends of the twine to the back of the chicken and tie them tightly together, securing the wings against the body.
- Next, wrap the twine around the legs of the chicken, pulling them together towards the tail.
- Tie a knot to secure the legs in place.
- Trim any excess twine.
Trussing the chicken not only helps with even cooking, but it also creates a professional presentation when serving. It’s a simple technique that can make a big difference in the quality of your rotisserie chicken.
Setting Up the Rotisserie
Setting up the rotisserie for cooking a delicious chicken is an important step in the process. Follow these steps to ensure your rotisserie is set up correctly:

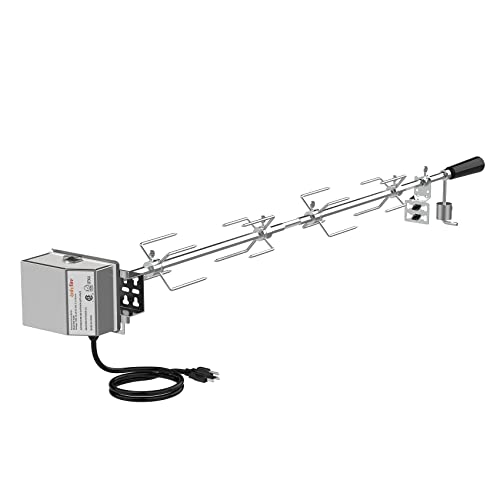
- Start by assembling the rotisserie kit according to the manufacturer’s instructions. This usually involves attaching the spit rod, forks, and other necessary components.
- Next, preheat your grill or oven to the appropriate temperature for rotisserie cooking. This is typically around 350-400 degrees Fahrenheit (175-200 degrees Celsius).
- If using a grill, make sure the rotisserie attachment is properly installed and secured. For ovens, check that the rotisserie function is enabled and functioning correctly.
- Prepare your chicken by seasoning it with your desired herbs, spices, and marinades. Make sure to truss the chicken using kitchen twine to secure its shape and prevent it from spinning too much on the rotisserie.
- Slide the chicken onto the spit rod, ensuring it is centered and balanced. Secure the chicken in place with the forks provided.
- If necessary, adjust the counterbalance on the rotisserie so that the chicken rotates evenly during cooking.
- Place a drip pan underneath the chicken to catch any drippings and prevent flare-ups.
- Carefully place the spit rod onto the rotisserie attachment or into the oven, ensuring it is properly aligned.
- Start the rotisserie motor, making sure it rotates smoothly and evenly.
- Cook the chicken for the recommended amount of time, usually 1-2 hours, or until the internal temperature reaches 165 degrees Fahrenheit (74 degrees Celsius).
- Monitor the cooking process, rotating the chicken occasionally to ensure even browning and to prevent any hot spots.
- Once cooked, carefully remove the chicken from the rotisserie and let it rest for a few minutes before carving and serving.
By following these steps, you’ll be able to set up your rotisserie and cook a perfectly delicious chicken every time. Enjoy!
FAQ
What is a rotisserie chicken?
A rotisserie chicken is a whole chicken that is cooked on a rotating spit, allowing the chicken to cook evenly and develop a crispy skin.
How do I set up a rotisserie chicken?
To set up a rotisserie chicken, you will need a rotisserie attachment for your grill or oven. Follow the instructions provided with your rotisserie attachment to properly install it. Once the attachment is set up, place the whole chicken onto the spit and secure it with the proper forks or clamps. Make sure the chicken is centered and balanced on the spit to ensure even cooking. Finally, turn on the rotisserie and let it cook for the recommended amount of time.