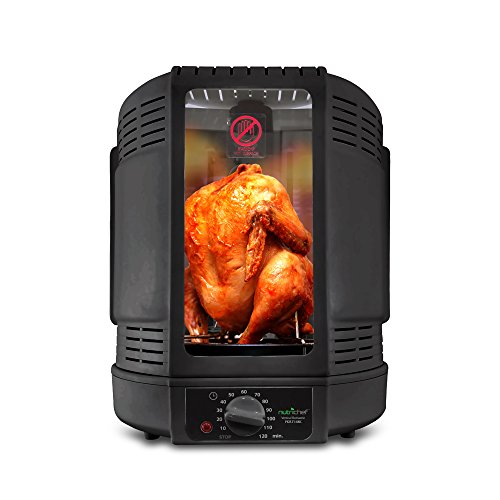
Shredded chicken is not only delicious and versatile, but it can also be a time-saver when it comes to meal preparation. One of the easiest ways to get perfectly shredded chicken is by using a rotisserie chicken. Rotisserie chickens are already cooked to perfection and have a rich and flavorful taste, making them a great option for shredding.
So, how do you shred chicken from a rotisserie? It’s simple and only requires a few steps. First, remove the chicken from the packaging and separate the meat from the bones. You can use your hands or a pair of forks to do this. It’s important to remove any skin or excess fat from the chicken at this stage.
Next, take the chicken breast and place it on a cutting board. Use two forks to firmly hold the chicken breast in place. Then, using a third fork, start pulling the chicken apart. Use a back and forth motion to shred the chicken into smaller pieces. Repeat this process with the remaining chicken meat.

Once you have shredded all the chicken, you can use it in a variety of dishes. Shredded rotisserie chicken is perfect for sandwiches, salads, tacos, and even soups. Its flavorful taste adds an extra dimension to any meal. Plus, it’s a great protein-packed option for those looking to add more nutrients to their diet.
Preparing the Chicken
Before you begin shredding the chicken, it’s important to properly prepare it. Follow these steps to ensure the chicken is ready for shredding:
1. Remove the Skin
Start by removing the skin from the rotisserie chicken. The skin can add unwanted fat and change the texture of the shredded chicken. Simply use your hands or a sharp knife to peel off the skin.
2. Separate the Meat
Next, separate the meat from the bones. Gently pull apart the chicken using your fingers or a fork. If the meat is still hot, consider using oven mitts or letting it cool down for a few minutes to avoid burning yourself.
3. Discard Bones and Cartilage
Remove any bones, cartilage, or large pieces of fat that you come across. These unwanted parts can affect the taste and texture of the shredded chicken.
Once you have completed these preparation steps, you are ready to move on to shredding the chicken. This is an essential step in many recipes that call for shredded chicken, as it helps to distribute the flavor and allows for easier incorporation into a dish.
Removing the Skin
One of the first steps in shredding a rotisserie chicken is to remove the skin. The skin of the chicken can be quite fatty and may not be desired in the shredded chicken. Here’s how you can remove the skin:
- Start by peeling back a corner of the skin near the breast area.
- Slowly and gently pull the skin back, using your fingers or a knife if necessary, until it is completely detached from the meat.
- Repeat this process for the entire chicken, peeling off the skin from all areas including the legs and wings.
- Once the skin is removed, discard it or save it for another use.
By removing the skin, you can reduce the amount of fat in the shredded chicken. It also allows the flavors from any seasoning or marinade to better penetrate the meat, resulting in a more flavorful dish.
Separating the Meat
Once the rotisserie chicken has cooled down slightly, it’s time to start separating the meat from the bones.
1. Start by removing the skin from the chicken. Use your hands to gently peel the skin away from the meat and discard it.
2. Using a pair of kitchen tongs or forks, hold the chicken at the joints and pull the leg and thigh away from the body. Repeat this process on the other side of the chicken.
3. Next, separate the wings from the body of the chicken. Hold the chicken at the joint and use your other hand to pull the wing away from the body. Repeat on the other side.
4. Now it’s time to remove the breast meat. Hold the chicken with one hand and use a sharp knife to slice along the breastbone. Carefully cut the meat away from the bone, working your way down the breast. Repeat on the other side.
5. Once all the meat has been separated from the bones, inspect it for any remaining bones or cartilage. Use your fingers or a pair of kitchen tongs to remove any unwanted pieces.
6. Finally, shred the chicken into small, bite-sized pieces using your hands or two forks. Pull the meat apart along the natural grain of the meat to achieve a shredded texture.
Now that the chicken has been shredded, it’s ready to be used in your favorite recipes. Enjoy!
Tools and Techniques
To efficiently shred chicken from a rotisserie, you will need a few essential tools and employ specific techniques. Here are the key items you will need:
| Tool | Description |
|---|---|
| Two Forks | Use two forks to pull apart the meat as it provides better control and allows you to shred the chicken into smaller pieces. |
| Cutting Board | Place the chicken on a clean cutting board to ensure a stable surface for shredding. |
| Bowl | Have a bowl ready to collect the shredded chicken. |
When it comes to techniques, follow these steps for efficient shredding:
- Begin by removing the chicken from the rotisserie, and let it rest for a few minutes to cool slightly.
- Place the chicken on the cutting board and use the two forks to hold it securely.
- Start pulling the forks in opposite directions, separating the meat along the grain.
- Continue pulling and tearing until all the chicken is shredded to your desired consistency.
- Transfer the shredded chicken to the bowl, discarding any bones or cartilage.
By using the right tools and techniques, you can easily shred chicken from a rotisserie and incorporate it into various delicious recipes.
Using a Fork
To shred chicken using a fork, follow these simple steps:
- Place the rotisserie chicken on a clean cutting board or plate.
- Use a fork to hold the chicken firmly in place.
- With a second fork, start pulling the chicken meat apart, moving the forks in opposite directions.
- Continue shredding the chicken until all the meat is separated into small, thin pieces.
Make sure to remove any bones or cartilage as you shred the chicken.
Using a fork to shred rotisserie chicken is a convenient way to achieve the desired texture for various recipes such as sandwiches, salads, or tacos.
Tips:
- If the chicken is too hot to handle, let it cool down slightly before shredding.
- To make the shredding process easier, you can also use two forks in both hands and pull the meat apart.
Shredding chicken with a fork is a quick and efficient method that doesn’t require any special tools. It allows you to control the size and texture of the shredded meat, making it a versatile option for many dishes.
Using Your Hands
To shred the chicken using your hands, follow these steps:
- Allow the rotisserie chicken to cool slightly before handling.
- Remove any skin from the chicken and discard.
- Using your hands, tear the chicken flesh away from the bones.
- Continue to tear the chicken into small, bite-sized pieces.
- As you tear the meat, feel free to remove any excess fat or gristle.
- Place the shredded chicken pieces into a bowl or container of your choice.
Using your hands allows you to have better control over the size and texture of the shredded chicken. It also allows you to feel for any remaining bones or undesirable parts that may have been missed during the initial carving process.

Pro tip: If you prefer a finer shred, you can use your fingers to further break down the chicken into even smaller pieces.
Using your hands to shred the chicken from a rotisserie is a quick and easy method that doesn’t require any special tools. It’s a great technique to use for dishes like salads, sandwiches, tacos, or any recipe that calls for shredded chicken.
Remember to wash your hands thoroughly before and after handling the chicken to ensure food safety.
Shredding the Chicken
Once you have securely held the rotisserie chicken, you can start shredding the meat. There are a few different methods you can use to shred the chicken, depending on your preference and the tools you have available.
One popular method is to use two forks. Simply hold one fork in each hand and start pulling the meat apart. Use the forks to gently tear the chicken into small, bite-sized pieces. This method is convenient and easy to do, but it may take a little bit of time to shred all of the chicken.
Another option is to use your hands. Make sure the chicken has cooled down enough to handle, and then simply start pulling the meat apart with your fingers. This method can be a little bit messier, but it allows you to shred the chicken quickly and efficiently.
If you prefer a more precise shredding method, you can use a pair of kitchen shears or scissors. Hold the chicken with one hand and use the shears to snip the meat into small shreds. This method may require a bit more dexterity and coordination, but it can produce nicely shredded chicken.
Regardless of the method you choose, make sure to remove any bones and pieces of skin as you go. These can be discarded or saved for other purposes, such as making stock.
Once you have finished shredding the chicken, it is ready to be used in your favorite recipes. Whether you are making chicken salad, tacos, or soup, shredded rotisserie chicken adds a flavorful and tender touch to any dish.
| Tip: | If you have leftover shredded rotisserie chicken, you can store it in an airtight container in the refrigerator for up to three days. It can also be frozen for later use. |
Pulling the Meat Apart
Once the rotisserie chicken has cooled slightly, it’s time to start pulling the meat apart. Begin by removing the skin from the chicken. Using your hands or a fork, gently peel off the crispy skin and set it aside if desired.
Next, locate the joint where the leg and thigh meet the body of the chicken. Hold the leg firmly and use your other hand to pull the leg away from the body until it separates. Repeat this process with the other leg.
Now, focus on the wings. Grab one wing at a time and fold it away from the body, using your hands to separate it from the breast. Repeat this step with the remaining wing.
The bulk of the meat is found in the breast and back of the chicken. Begin by holding the chicken breast with one hand and using your other hand to pull the meat away in small, bite-sized pieces. Continue doing this until all of the breast meat is removed.
The back of the chicken also contains a significant amount of meat. Using your hands or a fork, scrape along the bone to remove the remaining meat. Be sure to check for any small bones or cartilage as you go.
Once all of the meat has been pulled apart, it’s ready to be used in your favorite recipes. Enjoy!
FAQ
What is a rotisserie chicken?
A rotisserie chicken is a whole chicken that has been slow cooked on a rotisserie spit. It is typically seasoned with spices and herbs, resulting in a flavorful and tender meat.
How do I shred chicken from a rotisserie?
To shred chicken from a rotisserie, start by removing the chicken from the bones and discarding any skin. Then, use two forks to pull the meat apart into small shreds. You can also use your hands to shred the chicken if it’s cool enough to handle.
What can I do with shredded rotisserie chicken?
Shredded rotisserie chicken is incredibly versatile and can be used in a variety of dishes. You can use it to make chicken salad, sandwiches, wraps, tacos, or even add it to soups and casseroles for added protein.
Can I freeze shredded rotisserie chicken?
Yes, you can freeze shredded rotisserie chicken. Allow it to cool completely, then transfer it to an airtight container or freezer bag. Label it with the date and freeze for up to 3 months. Thaw the chicken in the refrigerator before using.
How long does shredded rotisserie chicken last in the fridge?
Shredded rotisserie chicken can last in the fridge for 3-4 days when stored properly in an airtight container. Make sure to refrigerate it promptly after shredding and keep it at a temperature below 40°F to ensure food safety.