Are you tired of making pancakes that turn out flat and rubbery? Do you want to achieve that perfect golden-brown crust with a fluffy interior? Look no further than cooking your pancakes in a cast iron skillet. This traditional cooking method has been used for generations, and for good reason – it produces pancakes that are crispy on the outside, tender on the inside, and absolutely delicious.
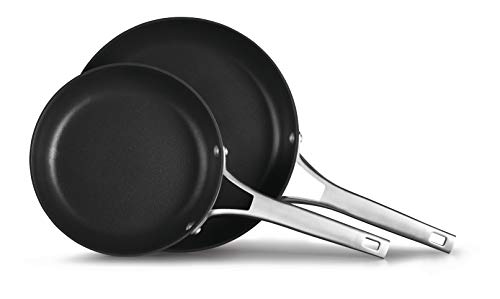
Why choose a cast iron skillet?
One of the main benefits of using a cast iron skillet for pancake cooking is its ability to distribute heat evenly. This ensures that your pancakes cook evenly and prevents the dreaded hot spots that can ruin your breakfast. Additionally, the cast iron skillet retains heat well, so your pancakes will stay warm even after you’ve finished cooking the entire batch.

Seasoning the skillet
Before you start cooking your pancakes, it’s important to season your cast iron skillet. This process involves coating the skillet with a thin layer of oil and heating it in the oven. Seasoning creates a non-stick surface and helps prevent rust. To season your skillet, preheat your oven to 350°F (175°C). Spread a small amount of vegetable oil on a paper towel and rub it into the skillet, making sure to cover the entire surface, including the sides and handle. Place the skillet upside down on the oven rack and bake it for about an hour. Let it cool completely before using it for cooking.
Choosing the Right Ingredients
When it comes to cooking pancakes in a cast iron skillet, selecting the right ingredients is crucial. These simple yet delicious breakfast treats require a few key components.
Flour: Start with all-purpose flour for a classic pancake texture. You can also experiment with other types of flour, such as whole wheat or buckwheat, for a healthier twist.
Leavening Agent: Baking powder is an essential ingredient as it helps the pancakes rise and become fluffy. Make sure to check the expiration date of the baking powder to ensure optimal results.
Sugar: A small amount of sugar will add a touch of sweetness to the pancakes. Adjust the amount to your taste preference or try using alternatives like honey or maple syrup.
Salt: Salt is vital for balancing the flavors in the pancake batter. Just a pinch will enhance the overall taste and make the pancakes more savory.
Eggs and Milk: Eggs provide structure to the pancakes and help bind all the ingredients together. Milk adds moisture and richness to the batter. You can use regular cow’s milk or substitute with alternatives like almond milk or soy milk.
Butter or Oil: Using a small amount of butter or oil in the skillet will prevent the pancake batter from sticking and add a subtle flavor. Choose a neutral oil with a high smoke point, such as canola or vegetable oil.
Additional Flavors: Feel free to get creative and add extra flavors to your pancakes. Vanilla extract, cinnamon, or grated lemon zest can enhance the taste and make your pancakes more exciting.
Remember, the quality of your ingredients will greatly impact the final outcome of your pancakes. Fresh and high-quality ingredients will result in more flavorful and delicious pancakes.
Preparing the Pancake Batter
Before you can begin cooking pancakes in a cast iron skillet, you need to prepare the pancake batter. Follow these steps to create a delicious and fluffy pancake batter:
Gather Your Ingredients
Start by gathering all the ingredients you will need for your pancake batter. This typically includes:
- 2 cups of all-purpose flour
- 2 tablespoons of granulated sugar
- 1 tablespoon of baking powder
- 1/2 teaspoon of salt
- 2 cups of milk
- 2 large eggs
- 4 tablespoons of melted butter
- 1 teaspoon of vanilla extract (optional)
Combine Dry Ingredients
In a large mixing bowl, whisk together the all-purpose flour, granulated sugar, baking powder, and salt. Make sure all the dry ingredients are evenly combined.
Add Wet Ingredients
In a separate bowl, whisk together the milk, eggs, melted butter, and vanilla extract (if desired). Gradually pour the wet ingredients into the bowl with the dry ingredients, stirring until just combined. Be careful not to overmix, as this can result in dense pancakes.
If you prefer thinner pancakes, you can add a little more milk to the batter. For thicker pancakes, reduce the amount of milk slightly.
At this point, you can also add any additional mix-ins, such as chocolate chips or blueberries, to the batter.
Once your pancake batter is ready, you can move on to the next steps of cooking the pancakes in a cast iron skillet.
Seasoning and Preheating the Cast Iron Skillet
Seasoning your cast iron skillet is an important step before cooking pancakes. It helps to create a non-stick surface and enhances the flavor of your pancakes.
To season your skillet, start by preheating your oven to 350°F (175°C). Wash the skillet with warm water and mild dish soap, then thoroughly dry it with a towel. Apply a thin layer of cooking oil or melted shortening to the entire surface of the skillet, inside and out.
Place the skillet upside down on the middle rack of the oven, with a sheet of aluminum foil or a baking sheet on the lower rack to catch any drips. Leave it in the oven for about one hour.
After an hour, turn off the oven and let the skillet cool completely inside the oven. This helps to ensure a strong seasoning bond between the oil and the cast iron.
Once your skillet is cool, you can remove it from the oven and wipe off any excess oil with a paper towel. Your cast iron skillet is now seasoned and ready for pancake-making!
Cooking the Pancakes
Once the batter is ready, it’s time to cook the pancakes! Follow these simple steps to achieve perfectly cooked pancakes in a cast iron skillet.
Step 1: Preheat the Skillet
Place the cast iron skillet on the stovetop and turn the heat to medium-low. Allow the skillet to heat for a few minutes until it reaches the desired temperature. This ensures that the pancakes cook evenly and have a golden brown crust.
Step 2: Grease the Skillet
To prevent the pancakes from sticking to the skillet, grease it lightly with butter or oil. Use a paper towel to spread the grease evenly across the surface of the skillet.
Step 3: Pour the Batter
Using a ladle or a measuring cup, pour the pancake batter onto the skillet. Start with a small amount of batter and gradually increase the amount as you become more comfortable with the cooking process. Space out the pancakes to allow room for flipping.
Step 4: Cook the Pancakes
Cook the pancakes on medium-low heat until small bubbles begin to form on the surface. This usually takes around 2-3 minutes. Once you see the bubbles, it’s time to flip the pancakes.
Use a spatula to carefully flip the pancakes over. Cook for an additional 1-2 minutes on the other side, or until the pancakes are golden brown and cooked through.

Step 5: Serve and Enjoy!
Transfer the cooked pancakes to a plate and repeat the process with the remaining batter. Serve the pancakes warm with your favorite toppings, such as maple syrup, fresh fruits, or whipped cream. Enjoy!
| Issue | Solution |
|---|---|
| Pancakes stick to the skillet | Ensure the skillet is properly greased. Adjust the heat if necessary. |
| Pancakes are undercooked in the middle | Lower the heat and cook the pancakes for a longer time. |
| Pancakes are too thin or flat | Add more flour to the batter to thicken it up. Let the batter rest for a few minutes before cooking. |
| Pancakes are burned on the outside | Reduce the heat and cook the pancakes for a shorter time. |
Tips for Flipping Pancakes
Flipping pancakes can be a bit tricky, especially if you’re using a cast iron skillet. However, with a few simple tips, you can master the art of flipping pancakes like a pro.
1. Use a Proper Spatula
Invest in a good quality spatula that is thin and flexible. A spatula with a thin edge will easily slide under the pancake, making it easier to flip without breaking.
2. Wait for Bubbles
Before attempting to flip the pancake, make sure you wait for bubbles to form on the surface. These bubbles are an indication that the pancake is ready to be flipped. If you try to flip it too early, the pancake will not hold its shape and may break apart.
3. Loosen the Edges
Using the thin edge of the spatula, gently loosen the edges of the pancake from the skillet. This will help prevent the pancake from sticking to the skillet and make it easier to flip.
4. Use a Quick, Confident Motion
When flipping the pancake, use a quick and confident motion. Place the spatula under the pancake, then swiftly and smoothly lift and flip it over. Avoid hesitating or flipping the pancake too slowly, as this may cause it to break.
5. Practice Makes Perfect
Flipping pancakes takes practice, so don’t be discouraged if your first few attempts aren’t perfect. With time and experience, you’ll become more skilled at flipping pancakes without any issues.
By following these tips, you’ll be able to flip pancakes with ease and achieve that perfect golden brown color on both sides. Happy cooking!
Serving and Enjoying Pancakes
Once your pancakes are cooked to perfection in your cast iron skillet, it’s time to serve and enjoy them. Here are a few tips to elevate your pancake experience:
1. Toppings and Syrups
Get creative with your pancake toppings. Classic options include butter, syrup, and powdered sugar. For a fruity twist, add fresh berries or sliced bananas. If you’re feeling indulgent, top your pancakes with whipped cream or Nutella. The possibilities are endless, so feel free to experiment and find your favorite combination.

2. Pairing with a Beverage
A delicious cup of coffee or a glass of freshly squeezed orange juice can perfectly complement your pancakes. The contrast between the rich flavors of the pancakes and the refreshing taste of your chosen beverage can enhance the overall enjoyment of the meal. Experiment with different beverages to find your preferred pairing.
Remember, serving and enjoying pancakes is a personal preference. Whether you prefer simple classics or elaborate creations, the key is to savor every bite and relish the experience. Bon appétit!
FAQ
Are cast iron skillets good for making pancakes?
Yes, cast iron skillets are excellent for making pancakes. They distribute heat evenly and retain heat well, resulting in perfectly cooked pancakes with a golden crust.